If an iSIC datalogger needs servicing, it is best to detach it from the mounting apparatus and ship the datalogger by itself. The mounting plate is designed to simplify data logger installation and removal.
1. Gather the following tools:
- #3 Phillips head screwdriver
- 5/32″ allen wrench
- large adjustable wrench
- 3 mm tip slotted screwdriver
2. Open the data logger enclosure and disconnect the battery.
3. Remove the two screws holding the battery plate using the #3 Phillips head screwdriver. Set aside the battery, retaining plate, and screws.

Figure 1: Removing the battery
4. Unplug all cables from the datalogger. This includes the MS2 connector from the solar panel, the RF connector from the antenna, the grounding wire from the bronze lug and any sensor cable connected through the ports.
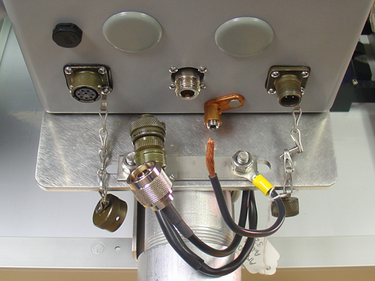
Figure 2: Disconnecting all cables
5. To remove the grounding wire use the 5/32″ allen wrench on the grounding lug screw.
6. To remove any connections to the internal terminal strips, use the slotted screwdriver to loosen the pins.
Note: loosen the sealcon openings before sliding cable out of the enclosure.
7. Detach the data logger from mounting plate by removing the four screws on the back using the #3 Phillips head screwdriver.
Note: If the system uses an antenna, be sure to not let it fall since it typically mounted between the data logger and mounting plate.
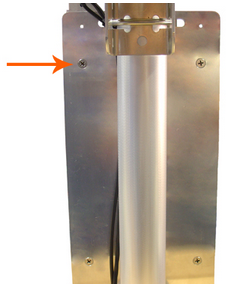
Figure 3: Removing the iSIC from the mounting plate
8. Be sure to send the data logger with any other requested items with plenty of packing material (original packing material if possible) to prevent damage during shipping.
REV: 13G29