
Replace Solar (Charge) Regulator
The 6A solar regulator (NexSens P/N N10108) inside the UW6-BB does not require regular maintenance. Regulator failure, generally indicated by a flashing or solid red LED, is rare but can occur.
- Open the battery backup enclosure lid using a Flathead screwdriver.
Remove UW6-BB enclosure lid.

Enclosure lid removed.
- Remove the foam spacer pieces positioned between the lid, batteries, and solar regulator.
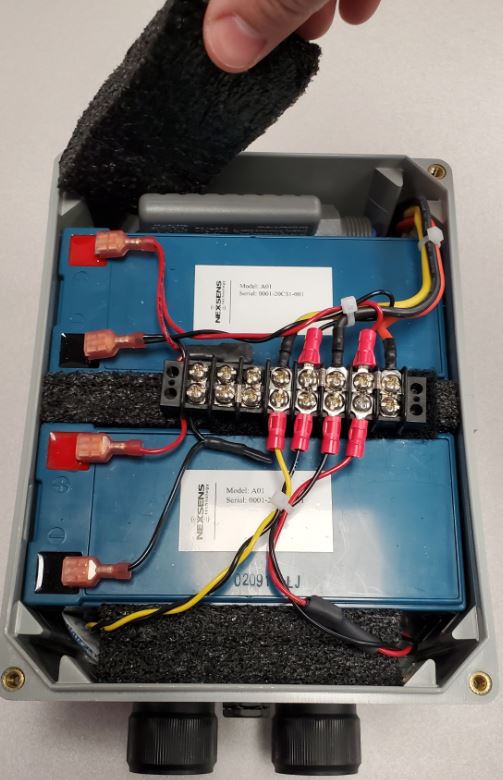
Remove the two foam spacers on top of the batteries and the piece behind the charge regulator.
- Unplug the AC adapter cable from the ‘AC IN’ port on the enclosure and disconnect the positive leads from both batteries to remove power.

Disconnect the AC adapter from the enclosure and unplug the positive cable leads from both batteries to remove power.
- Loosen the terminal screws associated with the red, yellow, and black leads from the regulator using a Phillips screwdriver.
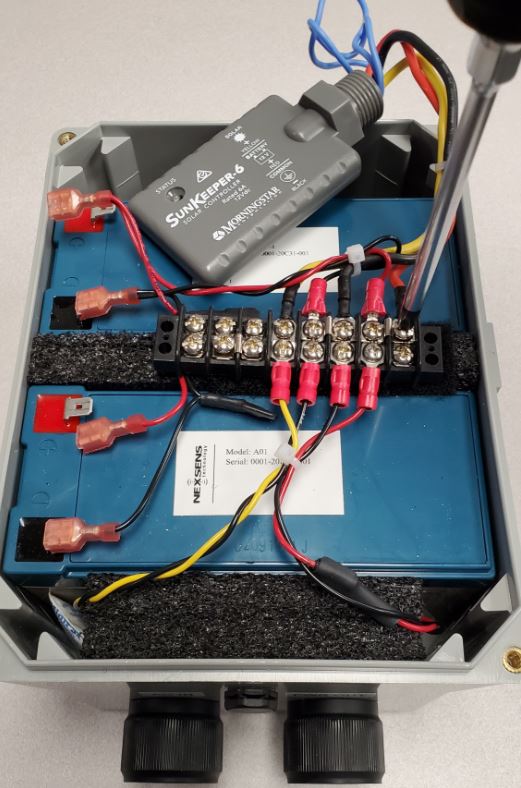
Loosen the regulator terminal screw connections using a Phillips screwdriver.
- Disconnect the regulator leads from the terminal strip.

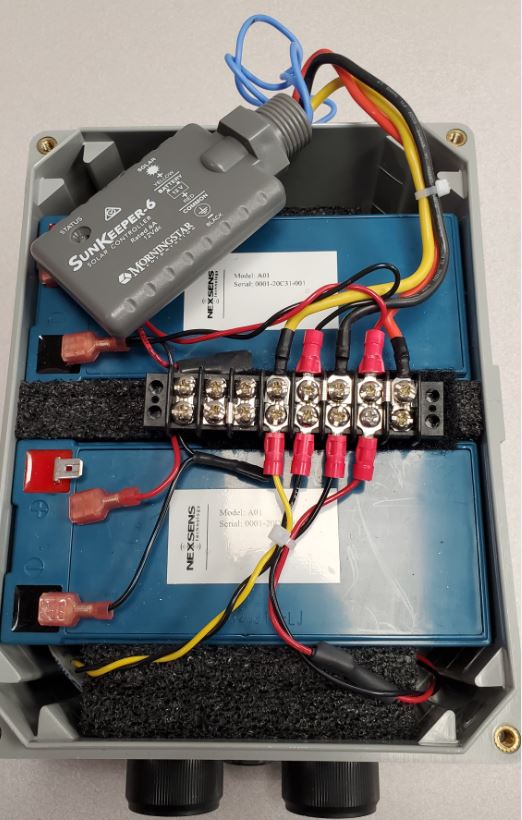
Regulator leads disconnected from the terminal strip.
- Carefully cut the white zip tie bundling the regulator to the battery wires to free up the regulator and remove it from the enclosure.
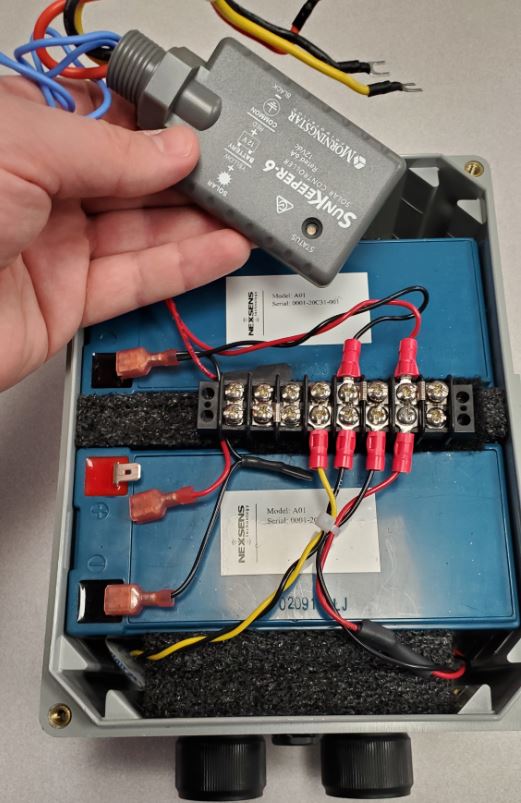
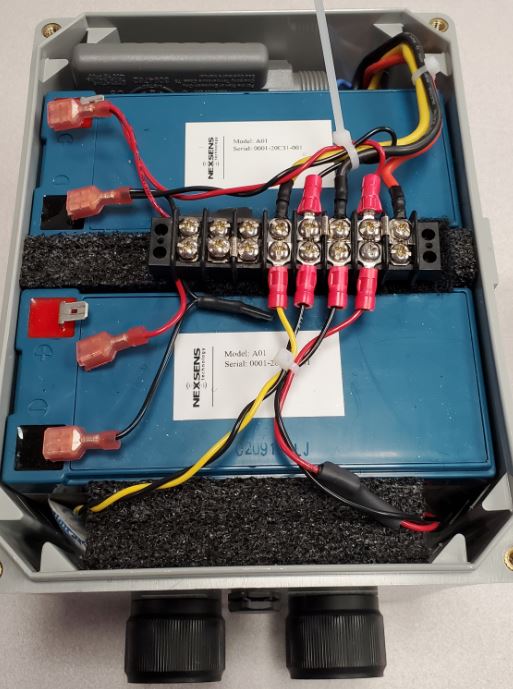
Old regulator removed.
- Connect the new solar regulator to the terminal strip, maintaining the same wiring positions and tighten the connections securely.
Connect the new regulator.

Close-up view of the terminal strip wiring.
- [Optional] Bundle the regulator cables to the battery lead wires using a new zip tie.
Optionally, replace the zip tie cut earlier to bundle the regulator wires to the battery cable leads.
- Replace the piece of foam holding the regulator in place.

Replace regulator foam piece.
- Set the remaining pieces of spacing foam on top of the batteries in the same positions as before.
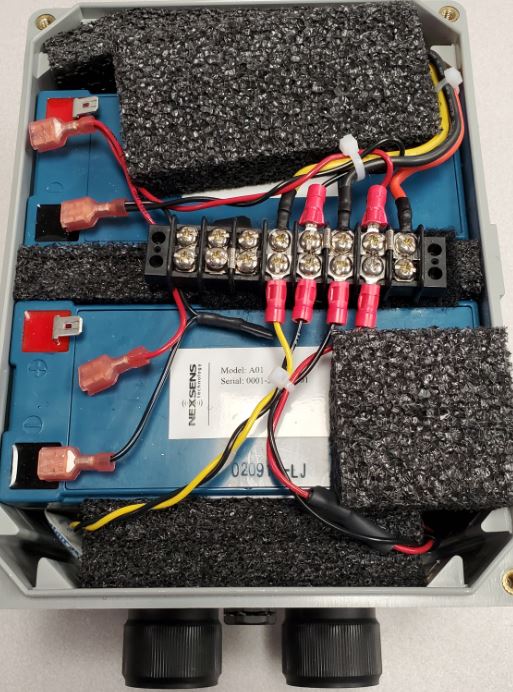
Return the remaining pieces of spacer foam to their positions on top of the battery.
- Reconnect the leads to both batteries.

Re-connect the battery leads.
- Place the lid back on the enclosure, making sure no wires will be pinched in the process, and tighten the four Flathead screws evenly in a cross pattern.
- Re-connect the AC Adapter cable to the ‘AC IN’ port on the enclosure.