
Connect to an X2 via Wi-Fi Direct
Most X2-series data loggers are equipped with on-board Wi-Fi Direct communications which can be used for logger configuration and/or transmission of data to the WQData LIVE web datacenter.
Turn On Wi-Fi
Outside of a scheduled transmission period, the Wi-Fi is powered off and must be activated to establish a connection. The primary method used to enable the Wi-Fi module of an X2 is to cycle power by removing all sources of power, waiting approximately 30 seconds for all latent power to dissipate, and then reapplying power.
The methods for cycling power differ depending on the model of X2 logger:
X2
To cycle power on a standard X2, disconnect the 6-pin cable from the central port on the bottom of the logger. This will then remove the external power source supplied by an SP-Series solar power pack, AC power adapter, or user-wired UW6 flying lead cable. Wait 30 seconds, then reconnect this cable and verify that the LEDs visible through the top of the logger begin to blink.
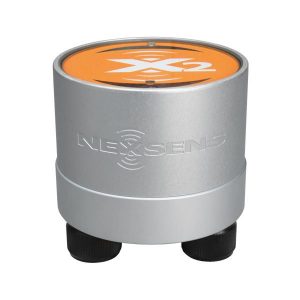
Figure 1: X2 Environmental Data Logger.
In addition to a power cycle, the Wi-Fi module of a standard X2 turns on by inserting a magnet into either of the two recesses in the logger lid. Each X2 system includes a small flathead screwdriver with a magnetic base for this purpose. Note that a green LED beneath the recess will illuminate when the magnet has activated the switch.
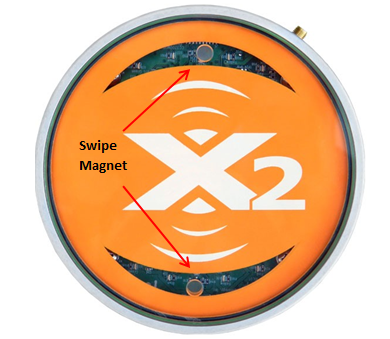
Figure 2: Insert magnet into either lid recess to activate the X2 Wi-Fi module.
Wi-Fi for X2-Iridium satellite systems is disabled on power-up, so a magnet swipe is required to enable it.
X2-CB & X2-SDLMC
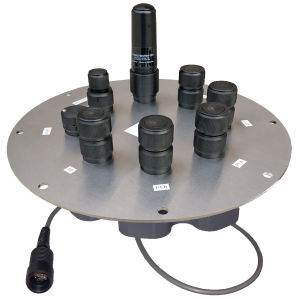
Figure 3: X2-CB Buoy-Mounted Data Logger. |
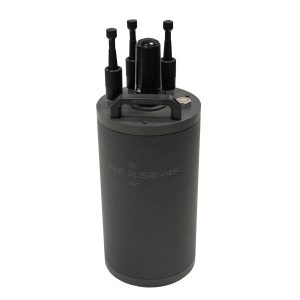
Figure 4: X2-SDLMC Submersible Data Logger. |
Buoy-mounted (X2-CB/CBMC) and X2-SDLMC data loggers receive power from internal batteries. The buoy solar panel cable acts as a switch which connects the battery circuit when plugged in. Disconnect the 6-pin solar panel cable from the SOLAR/COM port on the X2-CB or X2-SDLMC, wait approximately 30 seconds, and then reconnect it to apply power. A buzzer will sound when power is applied.
Note that Wi-Fi of X2-CB and X2-SDLMC systems with Iridium satellite telemetry is permanently disabled for communication timing reasons and cannot be enabled with a power cycle.
X2-SDL
If the system is an X2-SDL, first unscrew and then remove the white battery lid at the top of the unit. Wait 60 seconds before rethreading the battery lid onto the top bulkhead of the SDL. A buzzer will sound when power is applied.
- Before securing the lid, confirm proper installation of 16 Duracell D-Cell batteries (4 in each tube) in accordance with the positive (+) and negative (-) orientation labels adhered to the inside top of the battery tubes.

Figure 5: Remove the white battery lid by rotating it counterclockwise. Insert the included hex tool into one of the two holes on the lid to provide extra leverage.
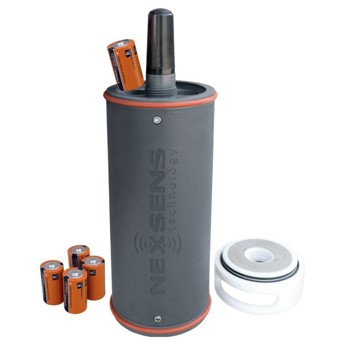
Figure 6: Install D-Cell batteries into the battery compartment.
Connect to the X2’s Local Wi-Fi Network
Following a power cycle, the X2’s local Wi-Fi network will remain active for 10 minutes thereafter. If the network is not visible or the connection expires, cycle power again to reset the Wi-Fi. Then, attempt to reconnect again.
- Using a laptop or smartphone, search for the logger SSID.
- The network name will reflect the X2’s logger Body Tag number (01136 in this example).
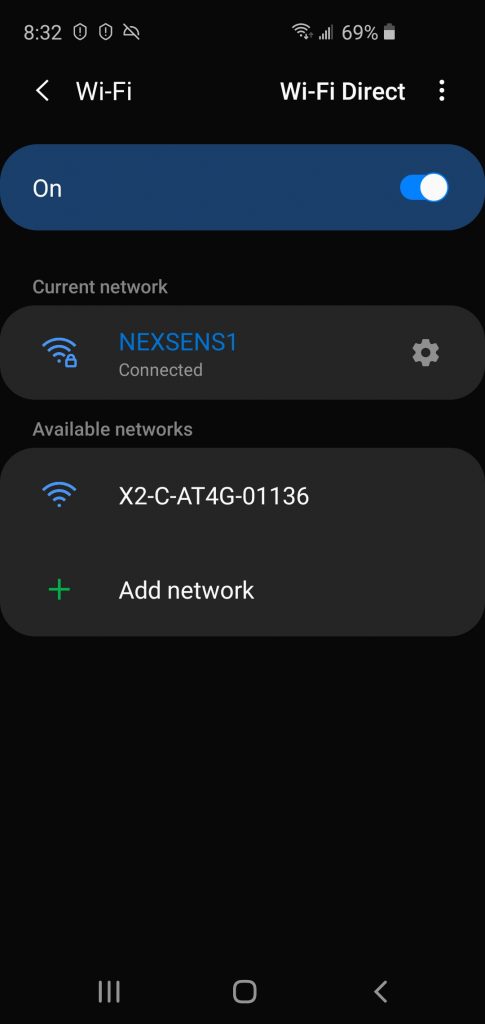
Figure 7: Locate the X2-logger network.
- Connect to the X2’s network.
- Launch a web browser and navigate to 192.168.1.1 to access the X2 Embedded Web home screen.
- Note that Chrome or Firefox are the recommended browser choices. Other browsers, Safari in particular, may have issues navigating the web utility.
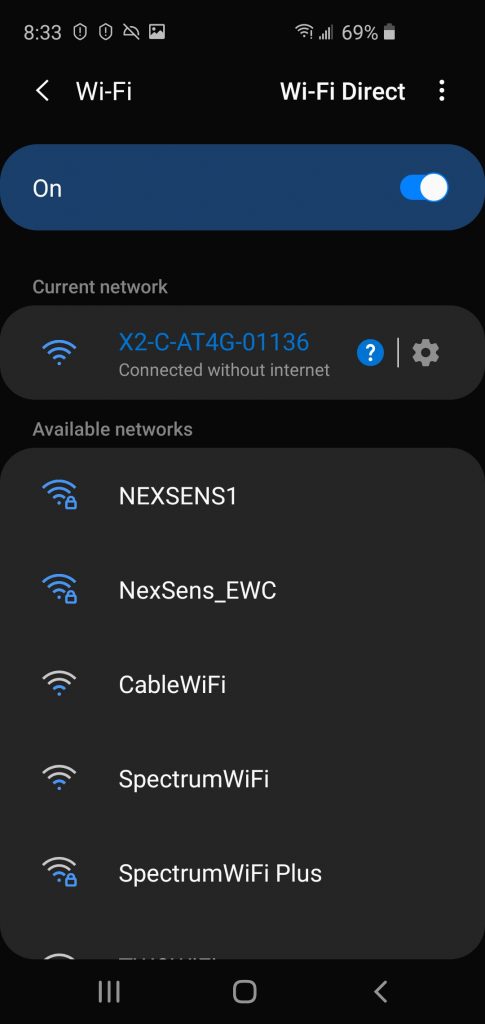
Figure 8: Connect to the X2 Wi-Fi network. |
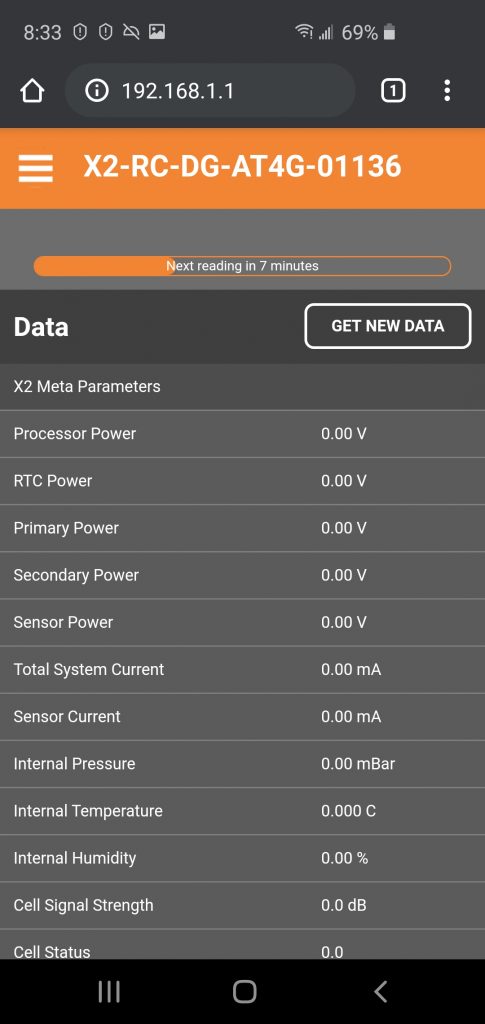
Figure 9: X2 Embedded Web home screen. |