
Set Log and Selective Upload Intervals
The X2 allows users to log data to its internal memory at a certain log interval but transmit at a different, less frequent, interval. This feature is useful, for example, to reduce system data usage and telemetry on-time. Users can then periodically access and download the data directly from the unit when on site using CONNECT.
For example, consider a sensor configured to log every 60 minutes, but the user only wants to upload the data 4 times a day. To achieve this, the selective upload interval may be set to 21,600 seconds or 6 hours (transmit 1 out of every 6 data points). This results in data logging internally every hour, but only the 12AM, 6AM, 12PM, and 6PM data points transmit to WQData LIVE (over 80% reduction in transmitted data).
This feature is particularly useful in Iridium data systems where data transmission is very expensive. In many such cases, only periodic data is necessary in real-time to ensure the system is still operational.
Set Log Intervals
- Connect the X2 logger to a PC and launch the CONNECT software. Test connection by reading the RTC clock of the logger in the CONFIG tab.
- From the CONNECT main window, select the LOG tab.
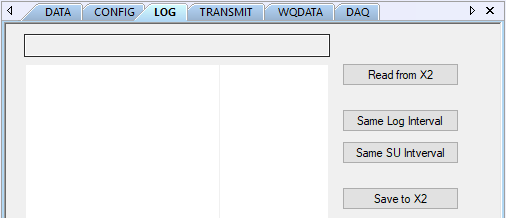
Figure 1: LOG tab in CONNECT.
- Select Read from X2 to see the current log and selective upload intervals for the diagnostic and sensor parameters.
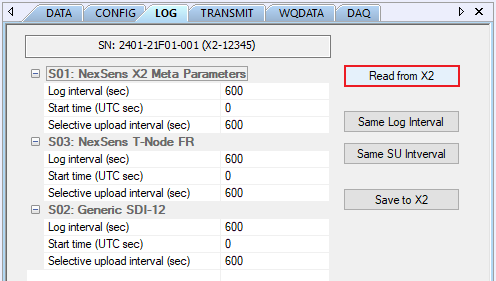
Figure 2: Read the current log and selective upload intervals.
- For each log interval change, enter the new log interval, in seconds, in the Log interval (sec) field under each parameter. Click Save to X2 when done setting all log intervals.
- In Figure 3, the log intervals for all diagnostic and sensor parameters have been changed to 300 seconds (5 minutes).
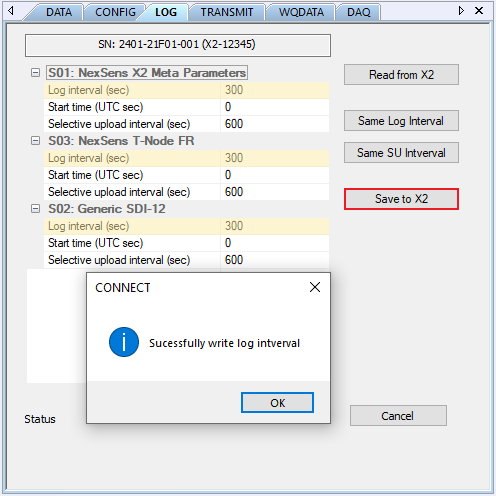
Figure 3: Log intervals changed to 300 seconds (5 minutes).
- If all log intervals should be the same, enter the log interval for the NexSens X2 Meta Parameters. Then, select Same Log Interval to change all other sensor log intervals to match the meta parameters.
- In the following example, Figure 4 displays the log interval for the meta parameters changed back to 600 seconds (10 minutes). Figure 5 shows that selecting Same Log Interval will set the log intervals of all other sensors to match that of the meta parameters.
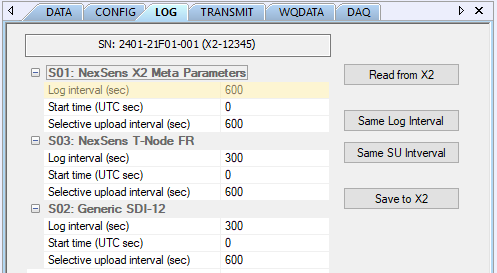
Figure 4: Changed meta parameter log interval to 600 seconds or 10 minutes. |
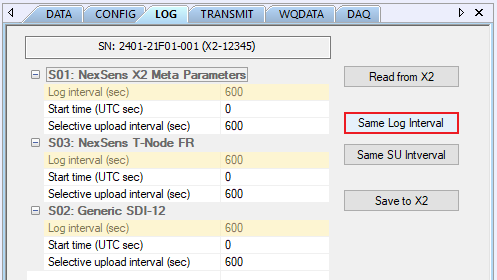
Figure 5: Selected Same Log Interval to set all other parameters to match. |
Set Selective Upload
- To change selective upload intervals, enter the new interval, in seconds, in the Selective upload interval (sec) field for each parameter. Click Save to X2 when done setting all selective upload intervals.
- In Figure 6, the selective upload interval for the diagnostic parameters has been changed to 3600 seconds (1 hour). The log interval still remains at 600 seconds (10 minutes).
- Based on this example, the X2 meta parameters will only transmit once every hour. However, the X2 will continue to log the meta parameters every 10 minutes. Thus, the user can directly upload the other 5 data points from every hour that logged internally.
- In Figure 6, the selective upload interval for the diagnostic parameters has been changed to 3600 seconds (1 hour). The log interval still remains at 600 seconds (10 minutes).
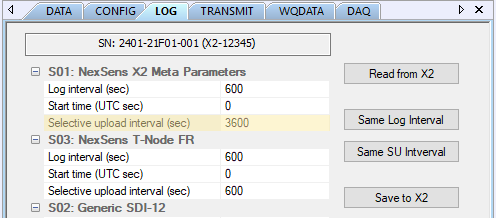
Figure 6: Changed meta parameter selective upload interval.
- To quickly match the Selective upload interval to the Log interval for each sensor, click Same SU Interval.
- By clicking Same SU Interval, the log and selective upload intervals will correspond for each diagnostic and sensor parameter. In the following example, Figure 8 shows this applied.
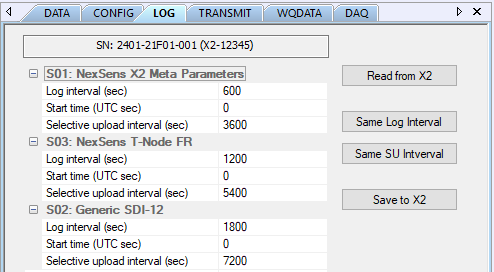
Figure 7: Different log/selective upload intervals. |
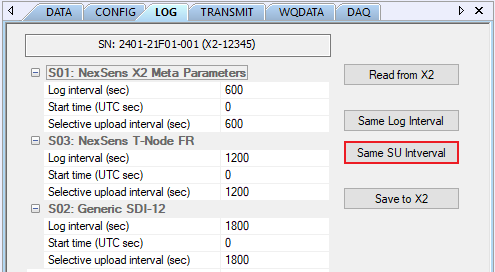
Figure 8: Intervals set by clicking Same SU Interval button. |
Log Interval Start Time
Offset
The log interval start time allows the user to begin logging data at a specific offset relative to midnight of January 1st, 1970 (Unix Epoch time or 00:00:00 UTC). If left as default, the X2 will begin logging data from this midnight reference time. Thus, if the log interval is 600 seconds or 10 minutes, the X2 will transmit at 12:10, 12:20, 12:30, etc. However, with an offset of 300 seconds configured and the same 10-minute log interval, the X2 will transmit at 12:15, 12:25, 12:35, etc.
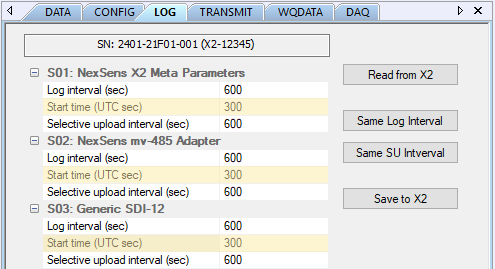
Figure 9: Log interval set with 300 second offset.
Future Logging Date
Additionally, the user can input a future logging start date by entering the UTC date and time of the desired point in the future. For example, to begin logging data on July 20th, 2021 @ 19:00:00, enter this date and time into the Epoch Converter for Unix epoch time. The example in Figure 10 shows the UTC for July 20th, 2021 @ 19:00:00, which is 1626807600.
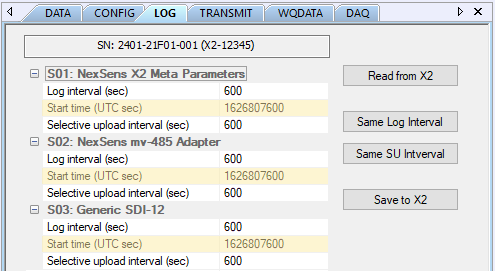
Figure 10: Begin logging on July 20th, 2021 at 19:00:00.
WQData LIVE Setup
Once adjusting the log and selective upload settings, reference the following article to push the new configuration to WQData LIVE.