
Run Sensor Detection
Once the sensor script list is configured in accordance with the sensors that will be connected to an X-Series logger, the CONNECT software can be used to run the sensor detection process. Before proceeding, reference the Sensor Detection overview and the Auto-Detection Troubleshooting guide. These provide a brief explanation of the logger’s sensor auto-detection process, some important notes on its method of operation and limitations, and troubleshooting advice if connected sensors do not detect properly.
- Connect the logger to a PC and launch the CONNECT software. Test connection by reading the RTC clock of the logger in the CONFIG tab.
- Enable and confirm the desired sensor scripts to run for the detection.
- Once detected, please note the sensor ports accordingly. For proper operation, always connect sensors into the same port used during detection.
- Confirm that 12V power is applied to the system.
- Pole-mount X2 systems or X2-SDL systems without internal D-cell batteries will draw 5V power from the USB cable. This may be insufficient for many sensors.
- X2-CB systems will draw from the larger 12V SLA batteries inside the buoy data well compartment even with the USB cable connected.
- From the CONFIG tab, select the drop down arrow next to the Read Script List button and choose the Run sensor detection option.
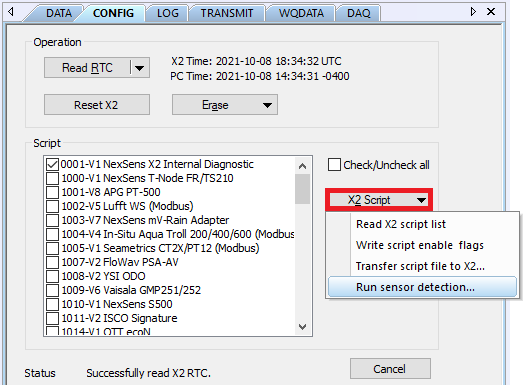
Figure 1: Initiate detection.
- Acknowledge the sensor detection warning by clicking Yes.
- The Status field at the bottom of the CONFIG tab indicates the progress of the detection process. It will normally take anywhere from 2-10 minutes to complete depending on the number of scripts enabled to run.
- After waiting for the detection process to complete, navigate to the DATA tab. Click the Read Configuration command to confirm the sensor(s) identified and programmed into the logger.

Figure 2: Sensor and parameter list.