Configure Sensor Scripts
NexSens X-Series data loggers use predefined sensor scripts to automatically detect connected sensors. By default, only a subset of the available sensor scripts are activated on a new unit. This includes logger internal diagnostic sensors and the most commonly integrated third-party sensors. Before running a sensor detection, use CONNECT software to configure the sensor script list (including any custom scripts). Activating only the scripts of the connected sensors will reduce the time it takes to complete detection.
Show Enabled Sensors
- Connect the logger to a PC and launch the CONNECT software. Test connection by reading the RTC clock of the logger in the CONFIG tab.
- On the CONFIG tab, click the Read Script List button.
- All of the sensor detection scripts loaded onto the SD card will appear.
- Scripts enabled to run by default will have a checkmark in the box.

Figure 1: Script list from the X2.
Modify Sensor Detection List
- As desired, enable or disable detection scripts using the check-boxes to the left of each listed sensor.
- Note: Always check the 0001-NexSens X2 Internal Diagnostic sensor. This supplies vital system diagnostic information.
- The more scripts that are enabled, the longer the sensor detection process will take. It is advised to select only the sensors which will be connected to the X2.

Figure 2: Configure X2 sensor scripts.
- After making any changes, click the drop-down arrow to the right of the Read Script List button and select Write script autodetect enable flags.

Figure 3: Save the enabled detection scripts to the X2.
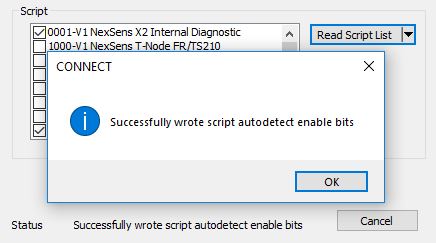
- A prompt will appear indicating that the selected sensor scripts have been enabled to run.

Figure 4: Script enable confirmation.
- Following any changes, confirm successful update of the script list by clicking the Read Script List button again.
Add/Update Sensor Scripts
Certain situations may require adding a new or updated sensor script to the X2. In such cases, NexSens will provide the script file, which is transferrable to the X2 through CONNECT.
- Copy the .lua script file provided by NexSens locally to the PC running the CONNECT software.
- Select the drop-down arrow to the right of the Read Script List button and select the Transfer script file to X2 option.

Figure 5: Select Transfer script file to X2.
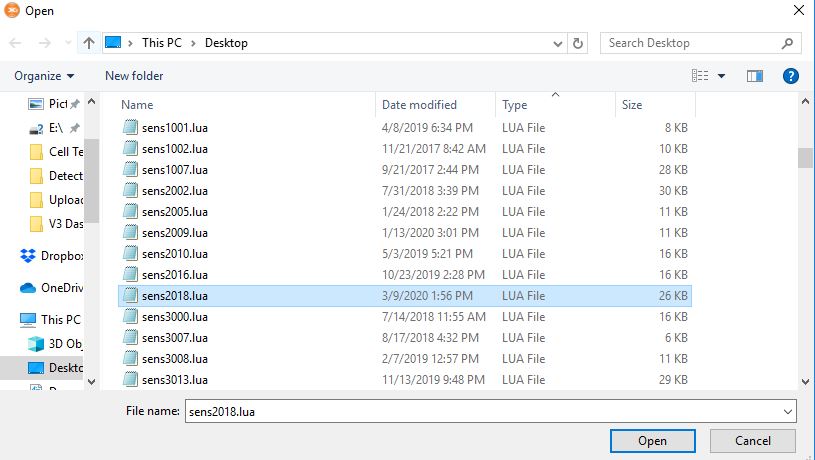
- Locate and select the script file to add using Windows explorer.

Figure 6: Select the new/updated script file to add to the X2.
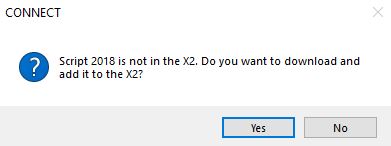
- A confirmation prompt will appear identifying whether the selected script is an updated version of an existing file or a new file altogether. Click Yes to proceed with uploading the new script.
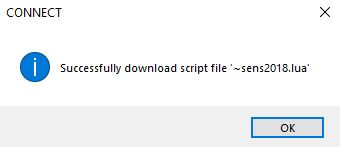
- The script upload will take approximately 10 seconds (potentially longer depending on the script size) before a prompt will appear indicating a successful transfer.
 Figure 7: Confirm the script transfer. |  Figure 8: Script transfer success. |
- Select the Read Script List option.
- Check the box next to the newly added script, then click the Write script autodetect enable flags option to enable it to run.
- Note that any 9000-series script will supersede all other standard script options and will run automatically.

Figure 9: Enable the new script to run.
- Following the next sensor detection request or logger power cycle (if no sensors have been detected yet), the new script will run.
