The Airmar WX-series Ultrasonic Weather Station measures a host of atmospheric and environmental parameters while maintaining a GPS fix. The sensors are compatible with the NexSens X-Series data logger via the NMEA0183 communication protocol and the RS-232 sensor interface.
Sensor Setup
Connect the weather station to the PC using a UW-USB-232R-DC. Follow the manufacturer’s guidelines to set up and operate the sensor. The following NMEA-0183 messages must be enabled in the Airmar WeatherCaster software:
- GGA
- VTG
- HDG
- HDT
- MDA
- XDR (A & B)
Before connecting the sensor to the X3 data logger, use a terminal emulator such as Tera Term and send it the following NMEA0183 commands.
| NMEA Command | NMEA Response | Description |
|---|---|---|
| $PAMTX,0*4C^M^J | — | Airmar weather stations output data continuously once powered. This command is sent to temporarily stop data transmission. |
| $PAMTC,WIND,FILTER,Q*22^M^J | $PAMTR,WIND,FILTER,1,10*7E | This command queries for the current IIR filter constant. The response shown should come from a new Airmar. |
| $PAMTC,WIND,FILTER,SET,1,1200*03^M^J | — | This command sets the IIR filter to 120 seconds. NexSens recommends setting this filter to 120 seconds for wind averaging. The unit is set in tenths of seconds, which is why a 1200 value corresponds to 120 seconds. |
| $PAMTC,WIND,FILTER,Q*22^M^J
(After the IIR filter constant has been changed) |
$PAMTR,WIND,FILTER,1,1200*7C | This example command and response displays the query for the adjusted IIR filter. |
| $PAMTX,1*4D^M^J | — | This command is sent to restart data transmission. This command must be sent before exiting the emulator program and powering down the weather station. |
*Calculate the checksum for the command using the NMEA Checksum Calculator.
Connecting with X-Series Loggers
Next, the Airmar Weather Station will need to be set up for the X-Series logger using CONNECT software.
- Connect the sensor using the supplied cable to one of the open sensor ports on the logger and note the port number.
- Enable the pre-loaded sensor profile.
- Configure Sensor Scripts
- Note: The Airmar Weather Station is #3000 in the list
- Complete the setup for all other sensors, and then run sensor detection in CONNECT.
- After ~5-10 minutes, read the sensor configuration to confirm detection. Let the unit gather a few readings to confirm accurate and reasonable parameter data.
- Confirm that data is being transferred to WQData LIVE.
Mounting
Deployment setups will vary based on the platform, application, and site location. For general buoy mounting instructions, see below.
Buoy-Based Deployments
First, follow the appropriate User Guide in the Knowledge Base for buoy assembly. Then, use the NexSens Airmar WX-Series Weather Sensor Buoy Mount to attach the sensor to the buoy cage by following the steps below.
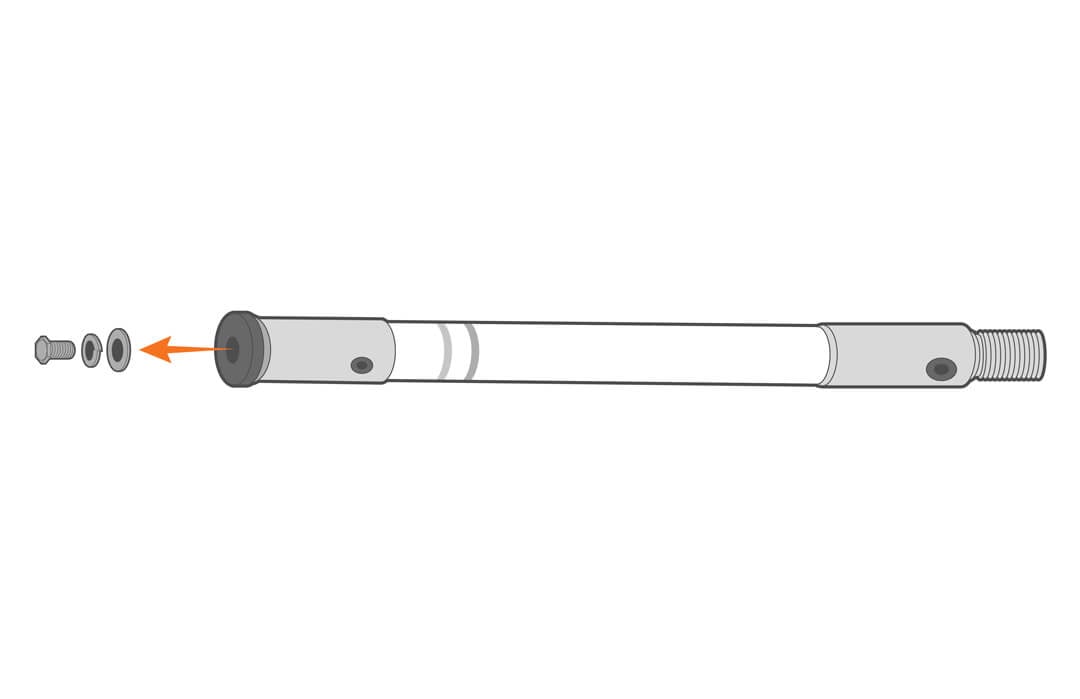
- Remove the included hardware from the threaded end of the mast.
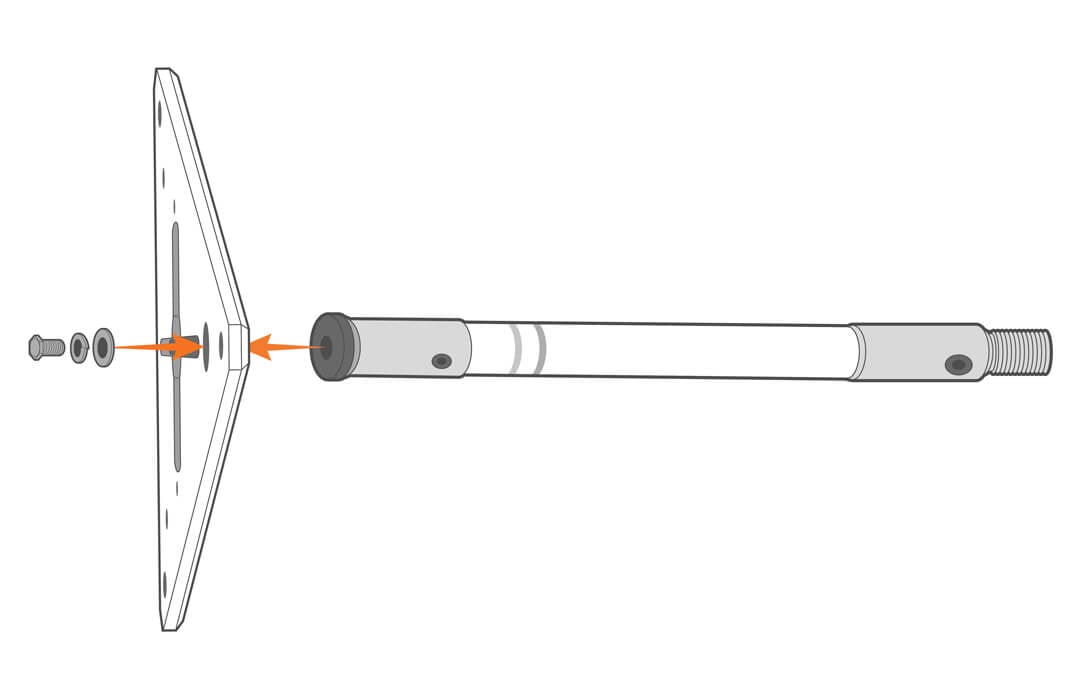
- Secure it to the solar tower top plate.
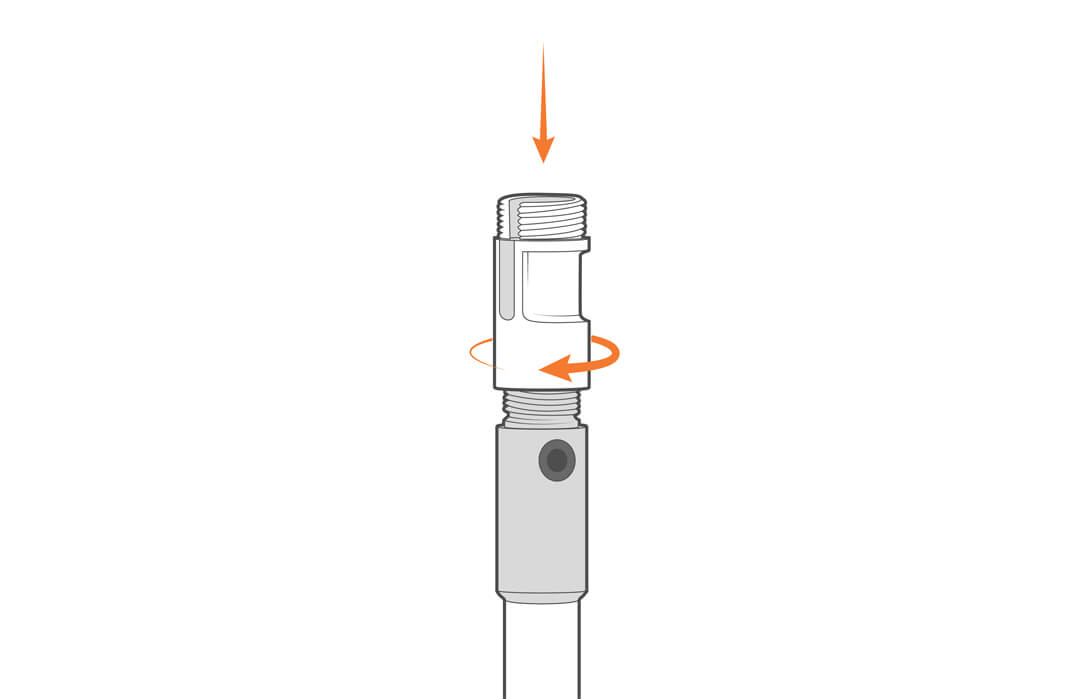
- Thread the included cable guide coupler onto the mast.
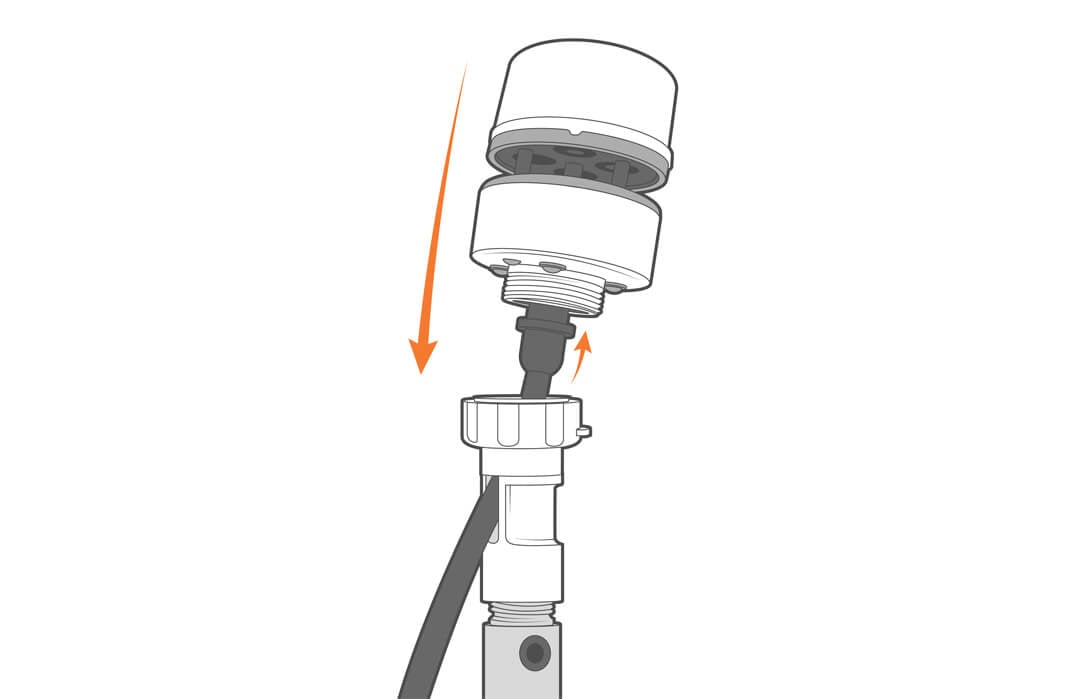
- Route the sensor cable throught the slot in the coupler and attach the adapter.

- Plug the connector into the weather station and tighten the assembly in place by turning the adaptor. Take care not to rotate the sensor.