Overview
The NexSens 4100-MAST arrives fully preconfigured with a radio data logger and 20 watt solar panel. The setup incorporates an integrated spread spectrum radio modem for license-free remote data collection from up to a five mile line of sight from the radio base station.
What’s Included
- Data logger with spread spectrum radio modem
- 20-Watt solar power kit
- Radio antenna with mounting bracket
- RF cable
- Pole mounting kit
- 2” NPT aluminum pole with PVC cap and aluminum coupling
Field Installation
1. Thread the entire system onto the end of a pre-installed 2” NPT pipe using the female coupling.
Note: To maximize performance, the solar panel should be oriented to the southern hemisphere and angle adjusted to approximately 45 degrees.
2. If the system will be set up on a pole that is pre-installed in the ground then additional grounding is not required. Otherwise, an A38 ground kit or A38-P pipe attachment ground kit should be connected from the copper lug on data logger enclosure to an appropriate earth ground.
3. Plug the MS2 connector on the end of the solar panel cable into the MS2 port on the iSIC enclosure.
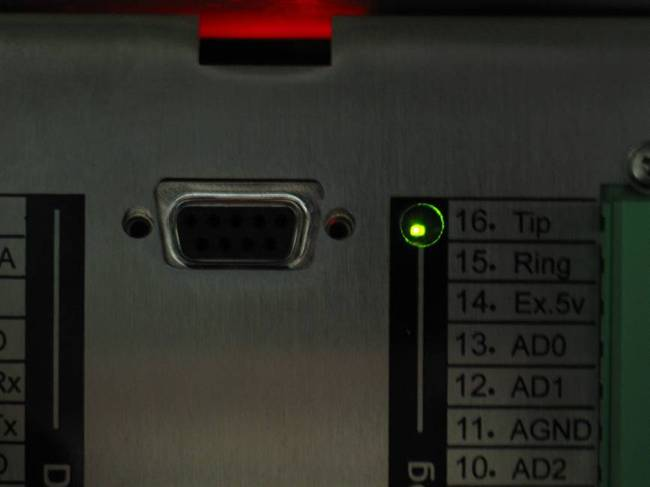
4. Power the iSIC by connecting the 12 volt battery. Observe the green blinking LED in the hole at the end of the analog terminal strip. This only blinks for 15-20 seconds during warm-up to confirm that the data logger is powered and ready.

Figure 1: Blinking Green LED Light
5. Connect sensors to the data logger. See the appropriate sensor interface manuals for wiring and other details. Bring any cables into the enclosure by removing a port plug and installing a gland fitting from the iSIC Kit.
6. Connect a 4100-Base, 3200-iSIC, 4200-iSIC, or 5200-iSIC to the monitoring PC and power the device. A base station must be used to communicate with the 4100-iSIC.
Configuring with iChart
1. Install iChart software on a Windows computer.
2. Ensure power is supplied to the data logger.
3. Add the 4100-iSIC to an iChart project file. To accomplish this: Follow the Setup Device Wizard to add a site name, and then select 4100-iSIC from the list of NexSens data loggers. Enter the correct communication information and click Test Connection to check communication.
4. Add sensors in iChart by selecting the manufacturer and model number.
5. Continue the Setup Device Wizard and click Program iSIC to conclude configuration.
REV: 13G18
