
Uploading a Project Picture
A Project Picture is displayed in the lower right corner of the default Project Dashboard as well as on the Project tile in a user’s Project selection list. It can also be added as a panel on any Custom Dashboard.

Figure 1: Project image location on default Project Dashboard.
To upload a Project Picture, navigate to the main Project Settings configuration menu.
- Click on the ADMIN | Settings tab located at the top of the Project Dashboard.

Figure 2: ADMIN | Settings menu.
- Open the Project/Site tab, then select Project to open the settings menu.
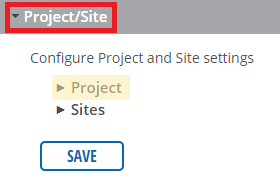
Figure 3: Project/Site settings.
- Locate the Picture field (Figure 5) and click Browse to select the desired project image from local storage.

Figure 4: Project settings menu.

Figure 5: Picture selection.
- Choose the project image file and select Open within the file explorer window.
- After selecting the photo, click SAVE at the bottom of the Project/Site display. WQData LIVE will refresh and the picture will be displayed on the Project Dashboard and Project selection list.

Figure 6: Updated Project Picture.

Figure 7: Project selection tile list.