
Logger Programming
The stored sensor configuration on an X-Series data logger can be erased if necessary. Once cleared, the logger will not read from any sensors until a new sensor auto-detection is completed.
- Connect an X-Series logger to a PC and launch the CONNECT software.
- In the CONFIG tab, test the connection by reading the RTC clock of the logger.
- To erase the logged data:
- In the CONFIG tab, click the drop-down arrow next to Erase and select Erase Log Data.
- To erase the sensor configuration (current programming):
- In the CONFIG tab, click the drop-down arrow next to Erase and select Erase Sensor Config.
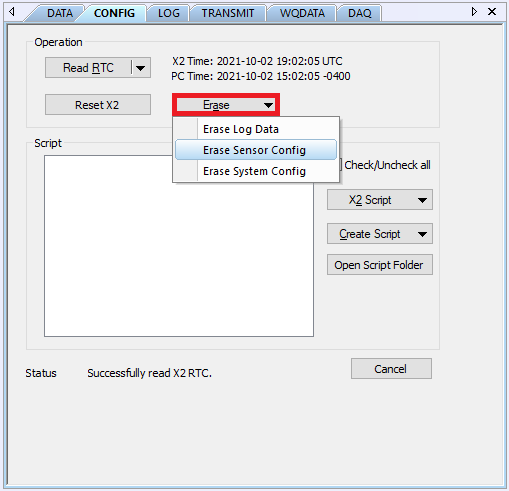
Figure 1: Erase the X2 sensor programming.
- Acknowledge the Warning Prompt
- Click Yes when prompted.
- The status line at the bottom of the CONFIG tab will confirm a successful erasure of the sensor configuration.
- Note: Multiple attempts may be required, as background processes on the logger can occasionally interrupt the command.
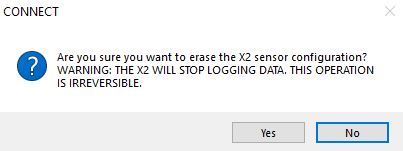
Figure 2: Accept sensor configuration wipe warning.
- Reset the Logger
- Perform a manual power cycle or click the Reset X2 button in the CONFIG tab.
- Automatic Sensor Re-Detection
- After the reset, the logger will automatically begin the sensor auto-detection process.
- Important: Some sensors may not receive enough power if the logger is running only on USB. In this case, the detection will fail. Always re-power the logger with a 12VDC power source until the re-detection completes successfully.
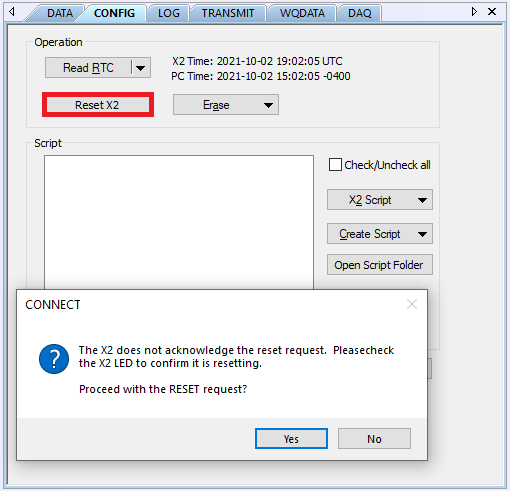
Figure 3: Queue and acknowledge the X2 reset command.
Confirming the New Sensor Configuration
Depending on the number of scripts enabled, sensor detection may take several minutes. During this time, periodically check the sensor configuration in CONNECT to verify progress. The X3 Environmental Data Logger will beep once every three seconds while detection is in progress.
When detection completes, gather a few sensor readings to confirm accuracy before continuing.
- Read Sensor Configuration.
- If the new sensor configuration is incorrect, double-check/repeat the steps above.
Updating the Sensor Configuration on WQData LIVE
After a successful re-detection, the new sensor configuration must be sent to WQData LIVE. Depending on the scope of changes, you may need to contact NexSens Technical Support to have the device re-created on the web.
- NexSens Technical Support Line: (+1) 937-426-2703
- Email: [email protected]
Re-creating the device will make the original web device obsolete, but all historical data will remain available with that entry. The new configuration and all future data will be uploaded to a separate location within your project/site. This prevents overwriting the original configuration, which could cause incorrect sensor labeling and data interpretation.
A NexSens support specialist will handle the re-creation process, rename the old device for clarity, and ensure the new device is reading and transmitting correctly.