This article demonstrates how to affix the NR Lite2 terrestrial PAR sensor to a CB-650, 950, or 1250 buoy using the manufacturer’s CMB 1 mounting bracket.
Required Tools
10mm socket
13mm wrench
13mm socket
Level
CMB1 Mount Hardware
(1) CMB 1 Mounting brace
(3) V-blocks
(4ea) M8 flat washer, lock washer, nut
(2) M8x99x71 U-bolts
(4ea) M6 flat washer, lock washer, nut
(2) M6x42x29 U-bolts
(1) M6x25 bolt
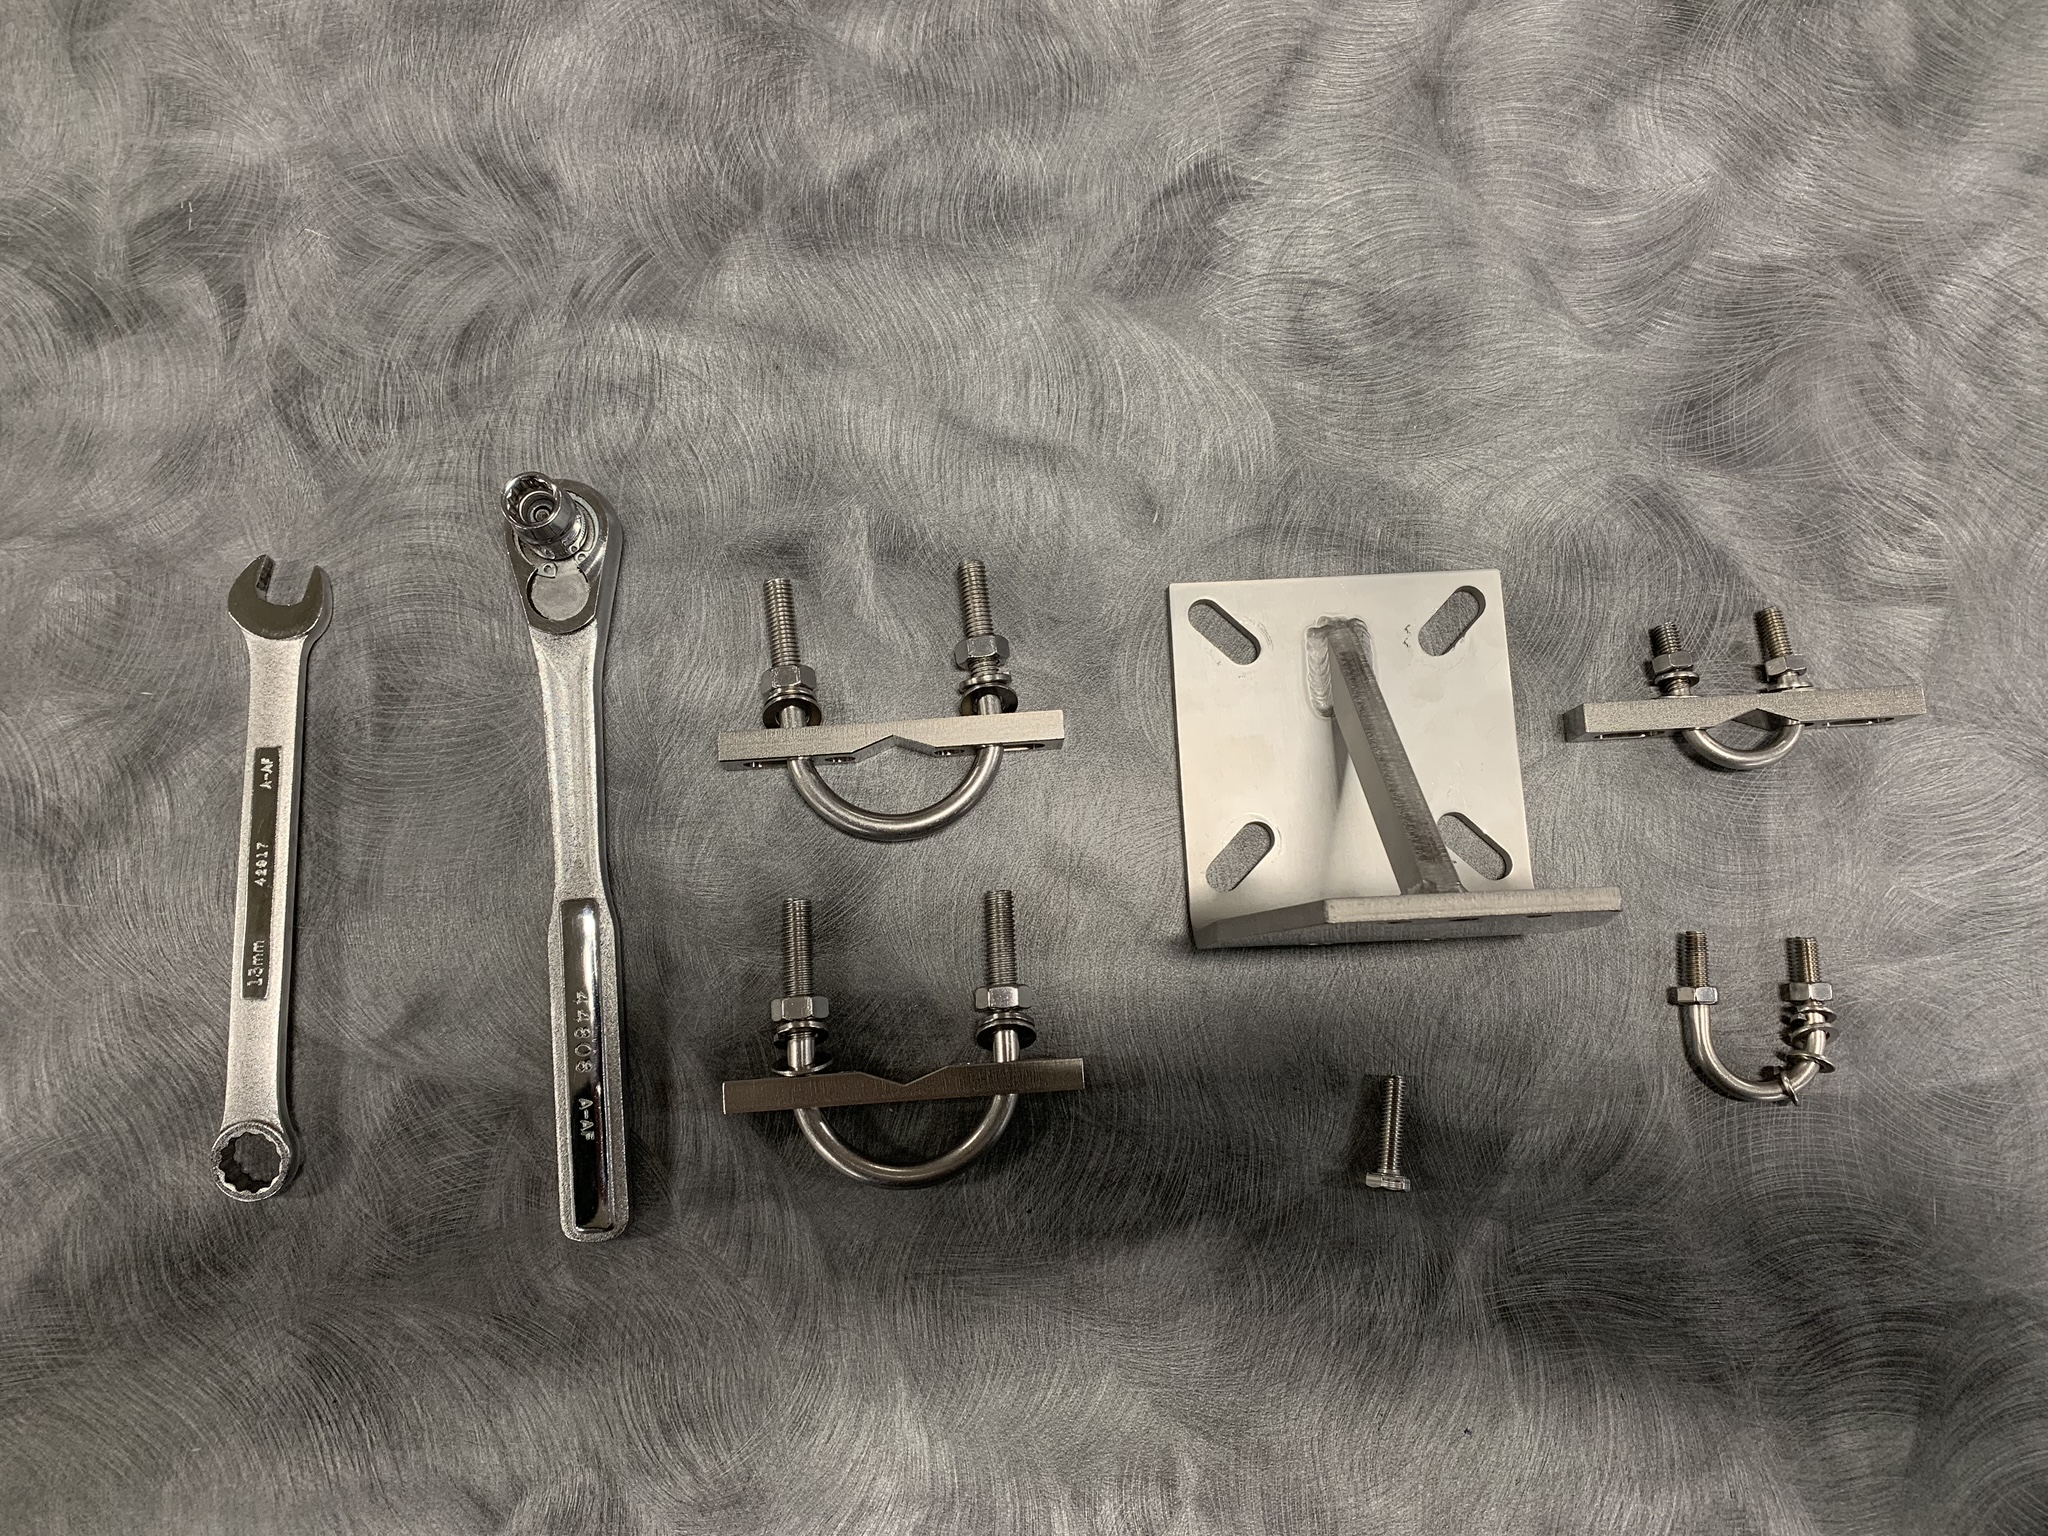
Required Hardware and Tools
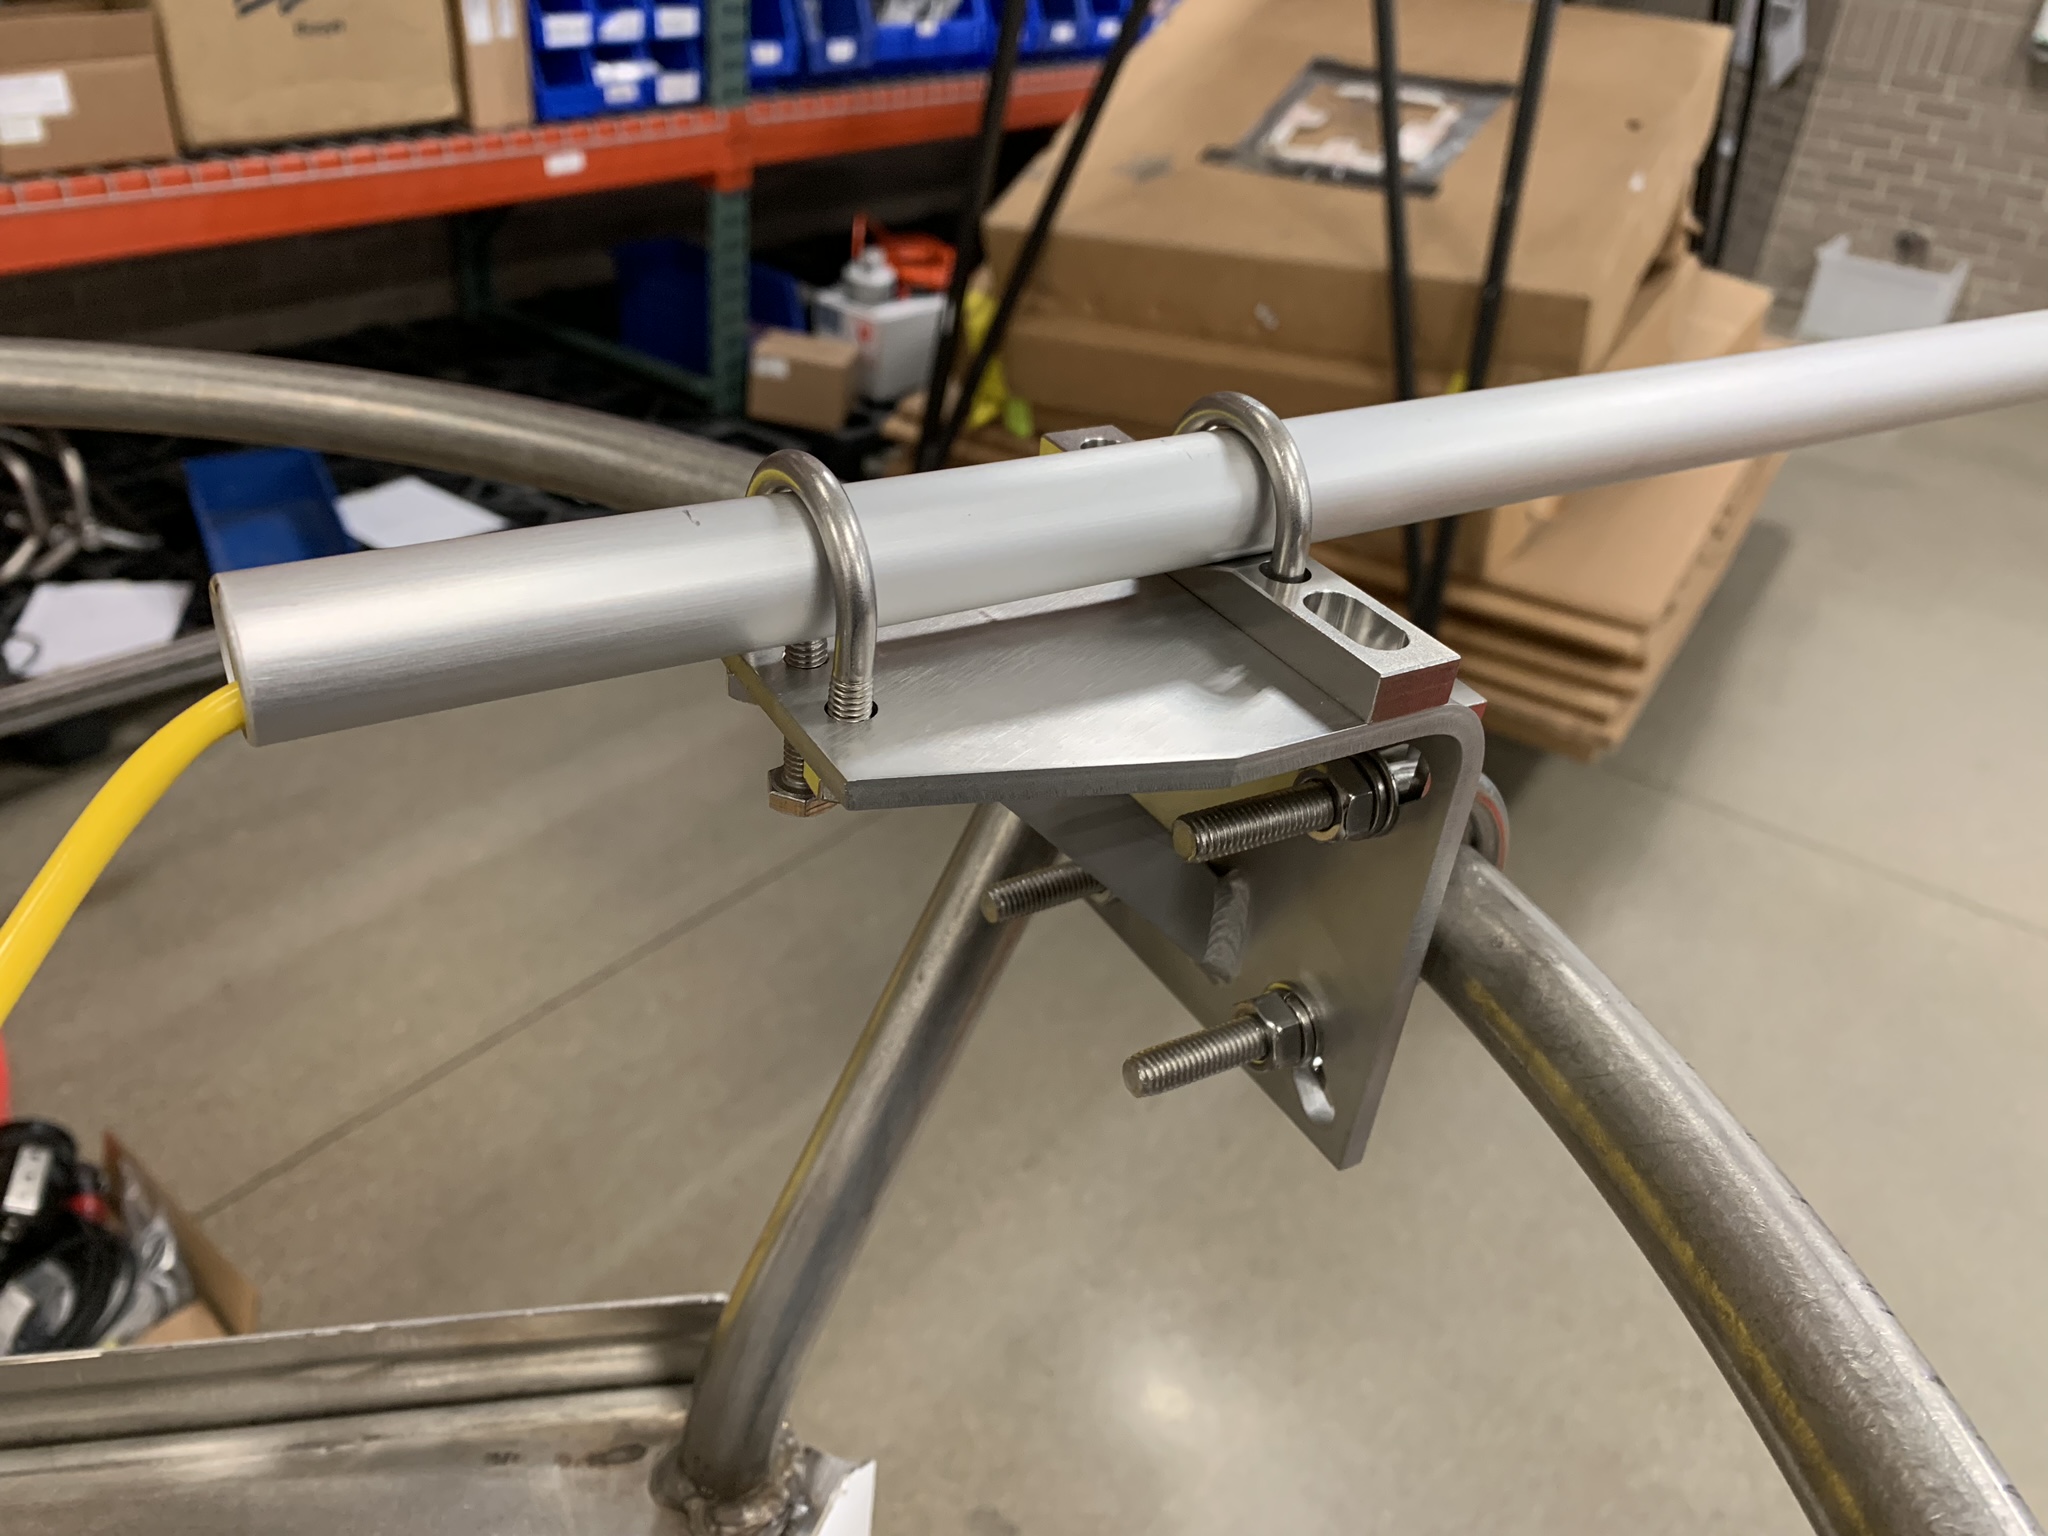
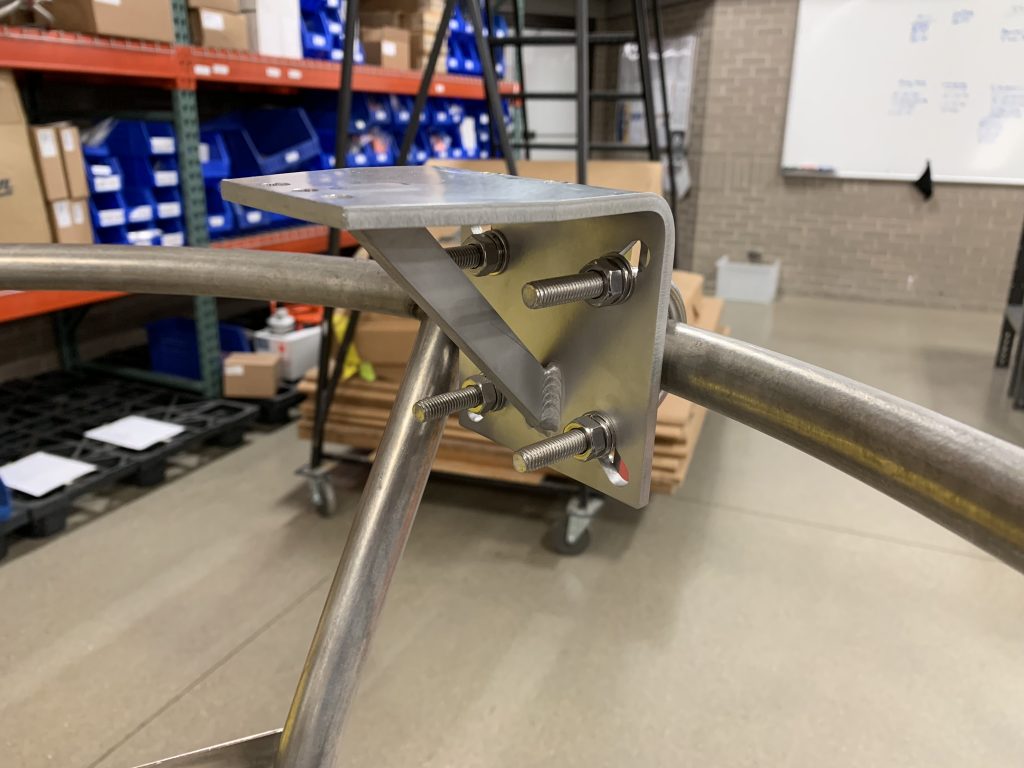
Affix the CMB 1 mounting bracket to the solar tower
- Align the bracket so it faces inwards towards the center of the tower
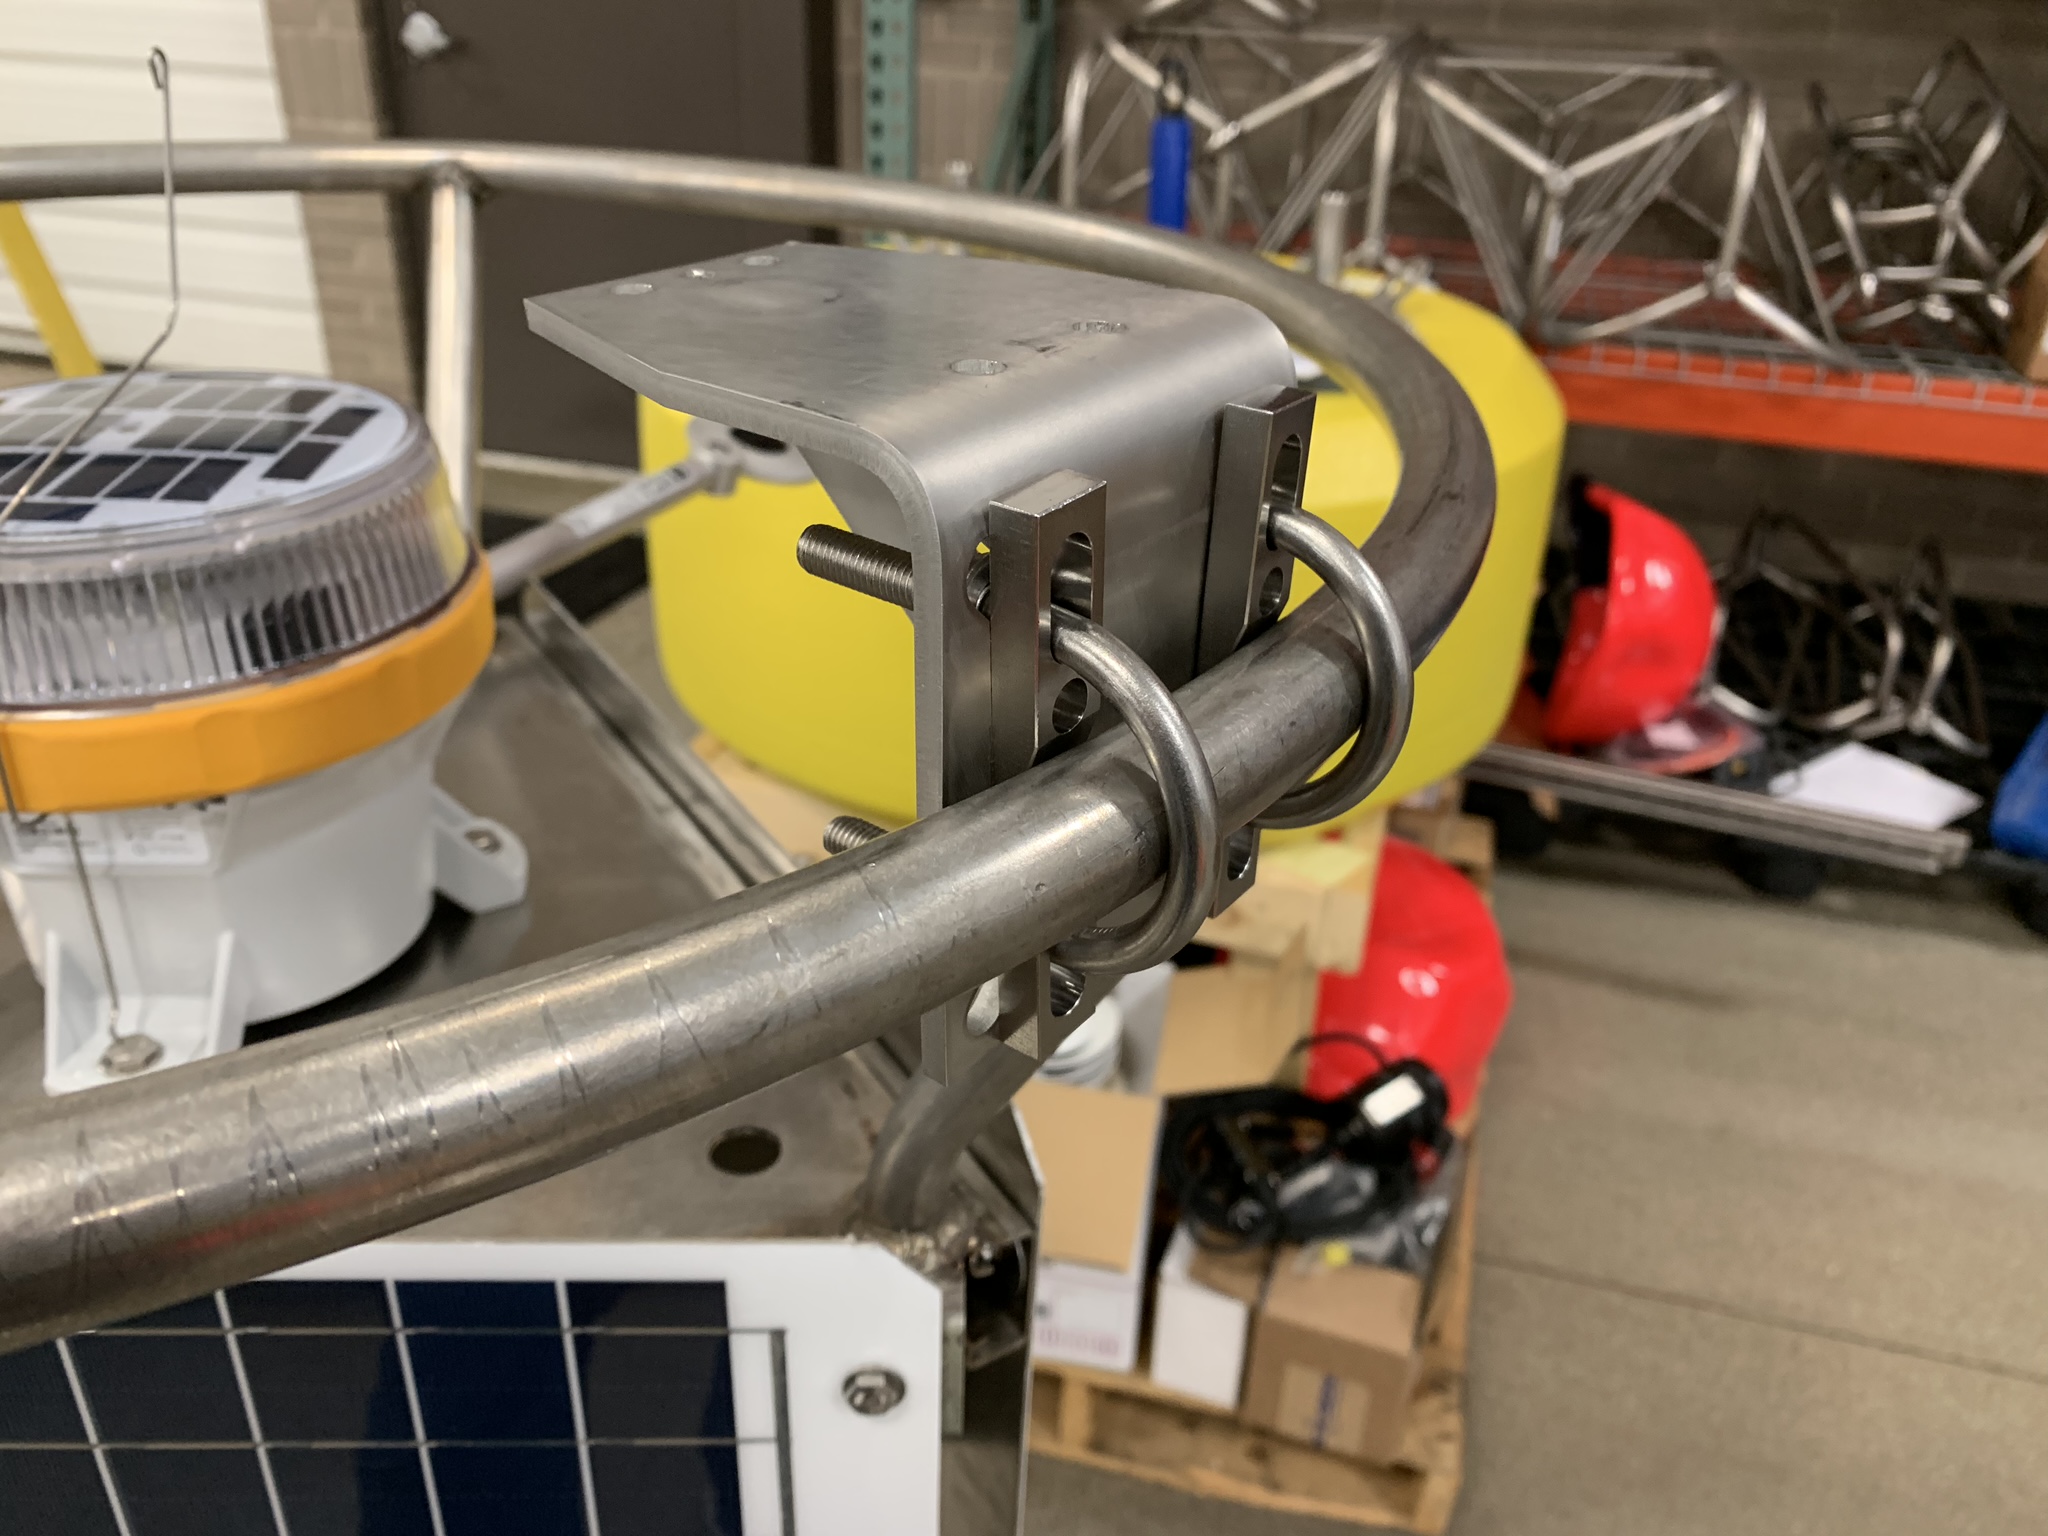
- Insert (2) V-blocks between the bracket and the tower, such that the notches contact the rail.

Back side of bracket with M8 U-bolt installation
- Run the large U-bolts through the V-blocks and bracket from the outside. Secure them to the inside of the bracket using the M8 flat washer, lockwasher, and nut and a 13mm wrench or hex driver.
Front side of bracket with M8 U-bolt installation
- Use a level to adjust the mount as necessary.
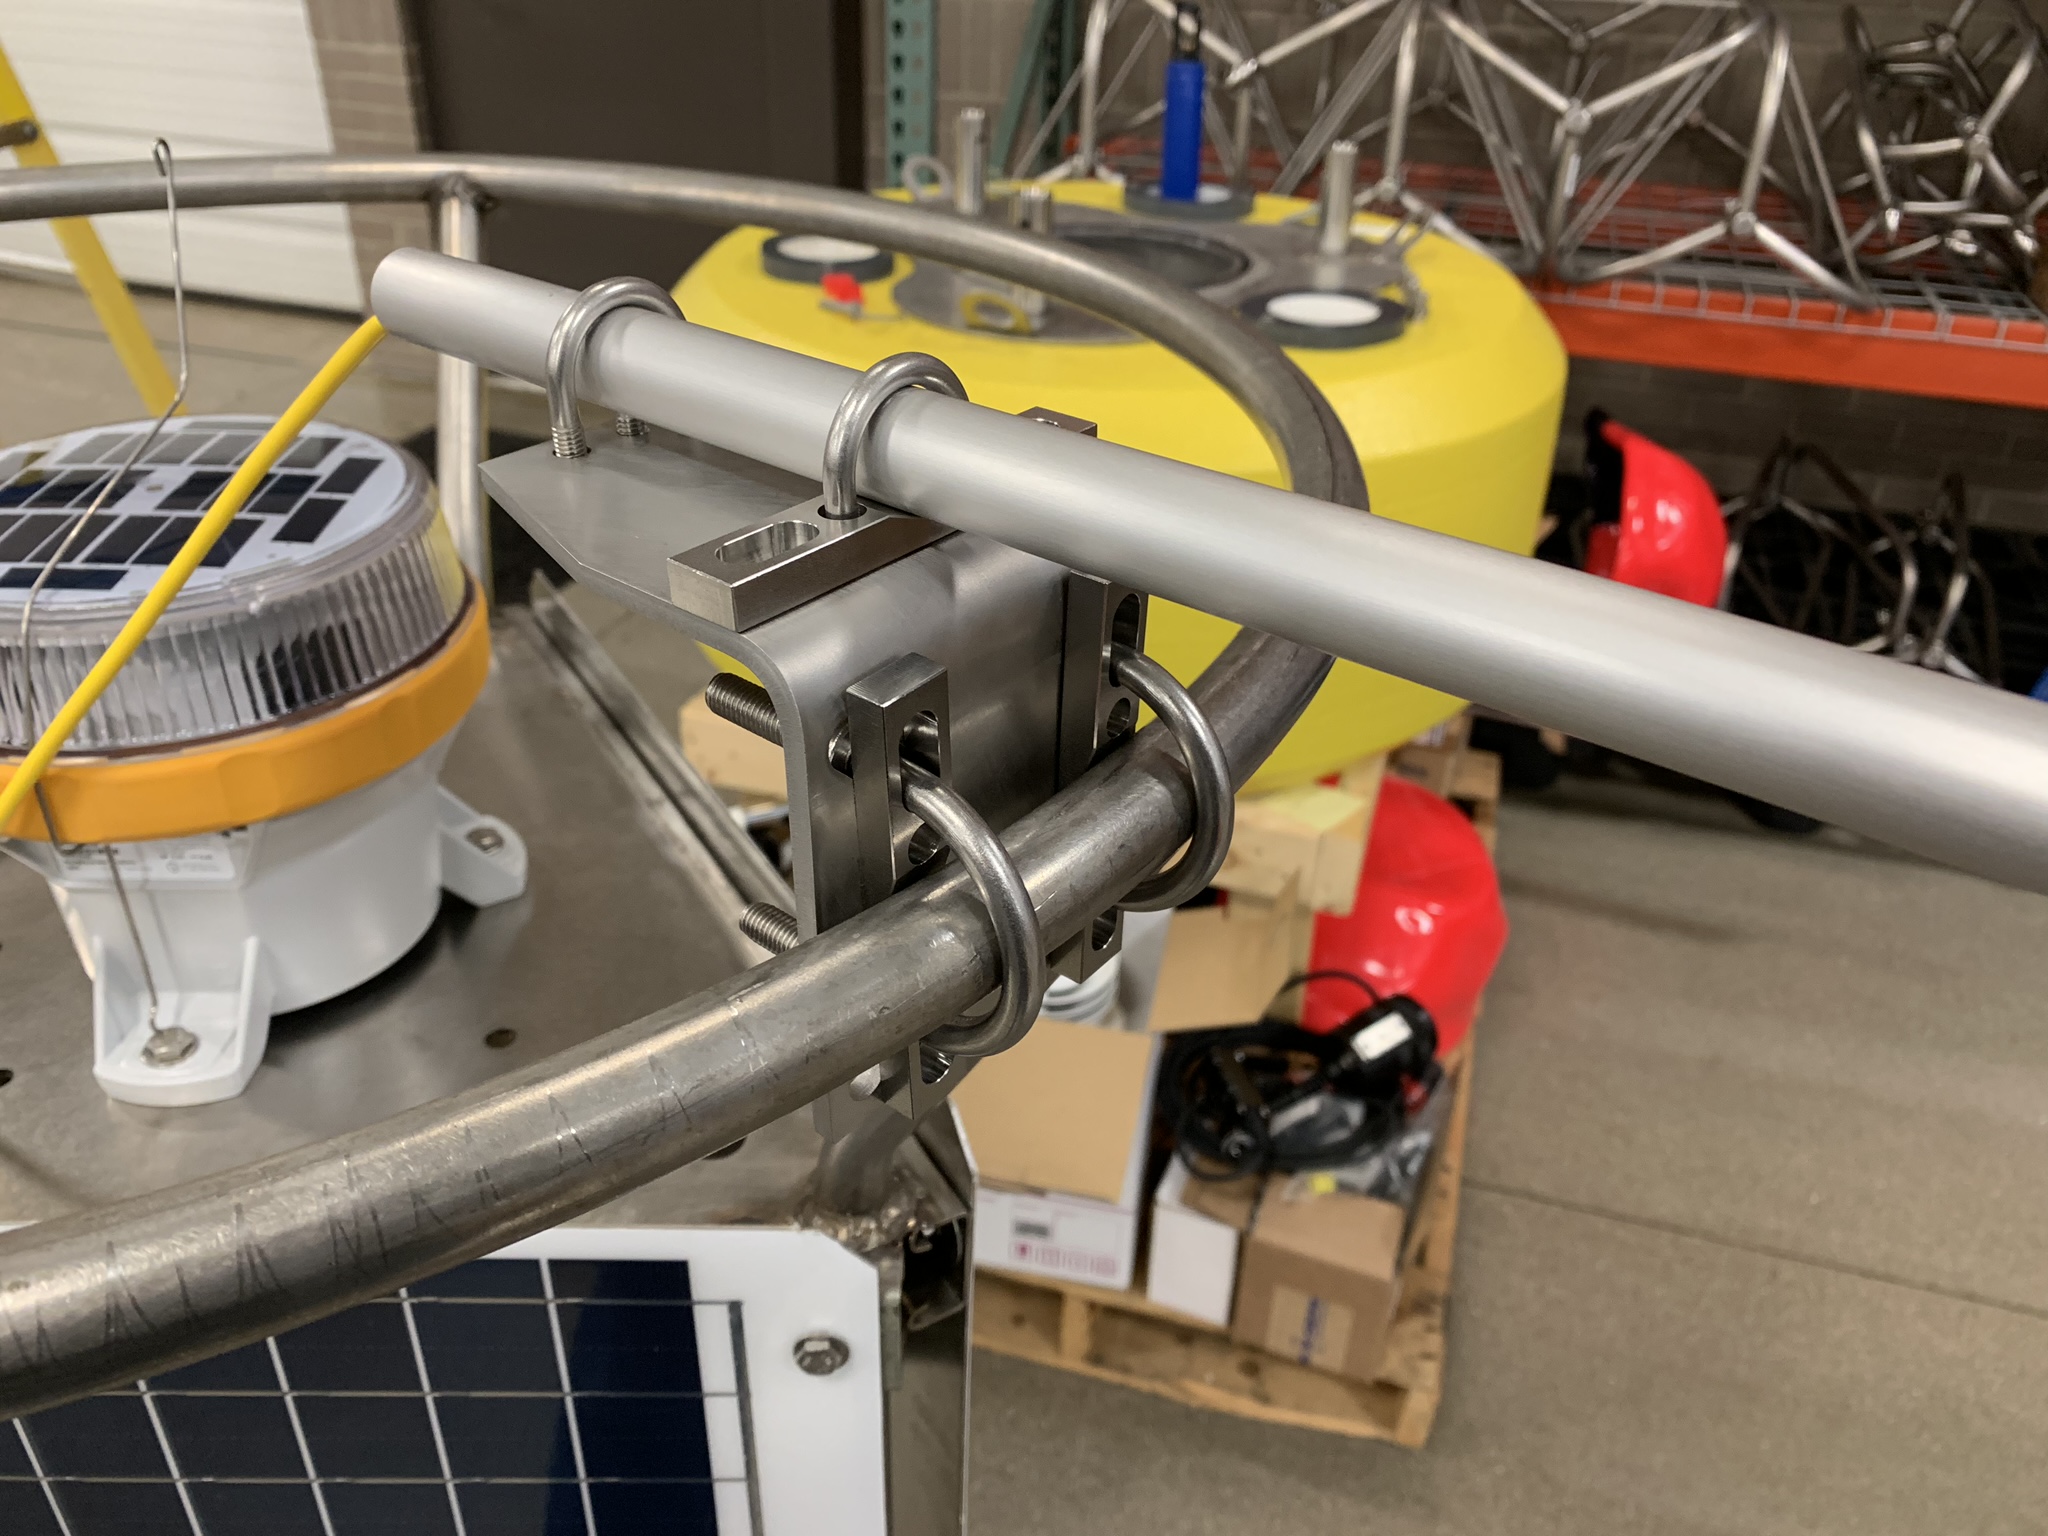
Attach the NR Lite2 to the CMB 1 mounting bracket
- Set the remaining V-block on top of mount nearest the railing with the notch facing upwards.
- Orient the PAR Arm such that the disc extends outwards from the tower.

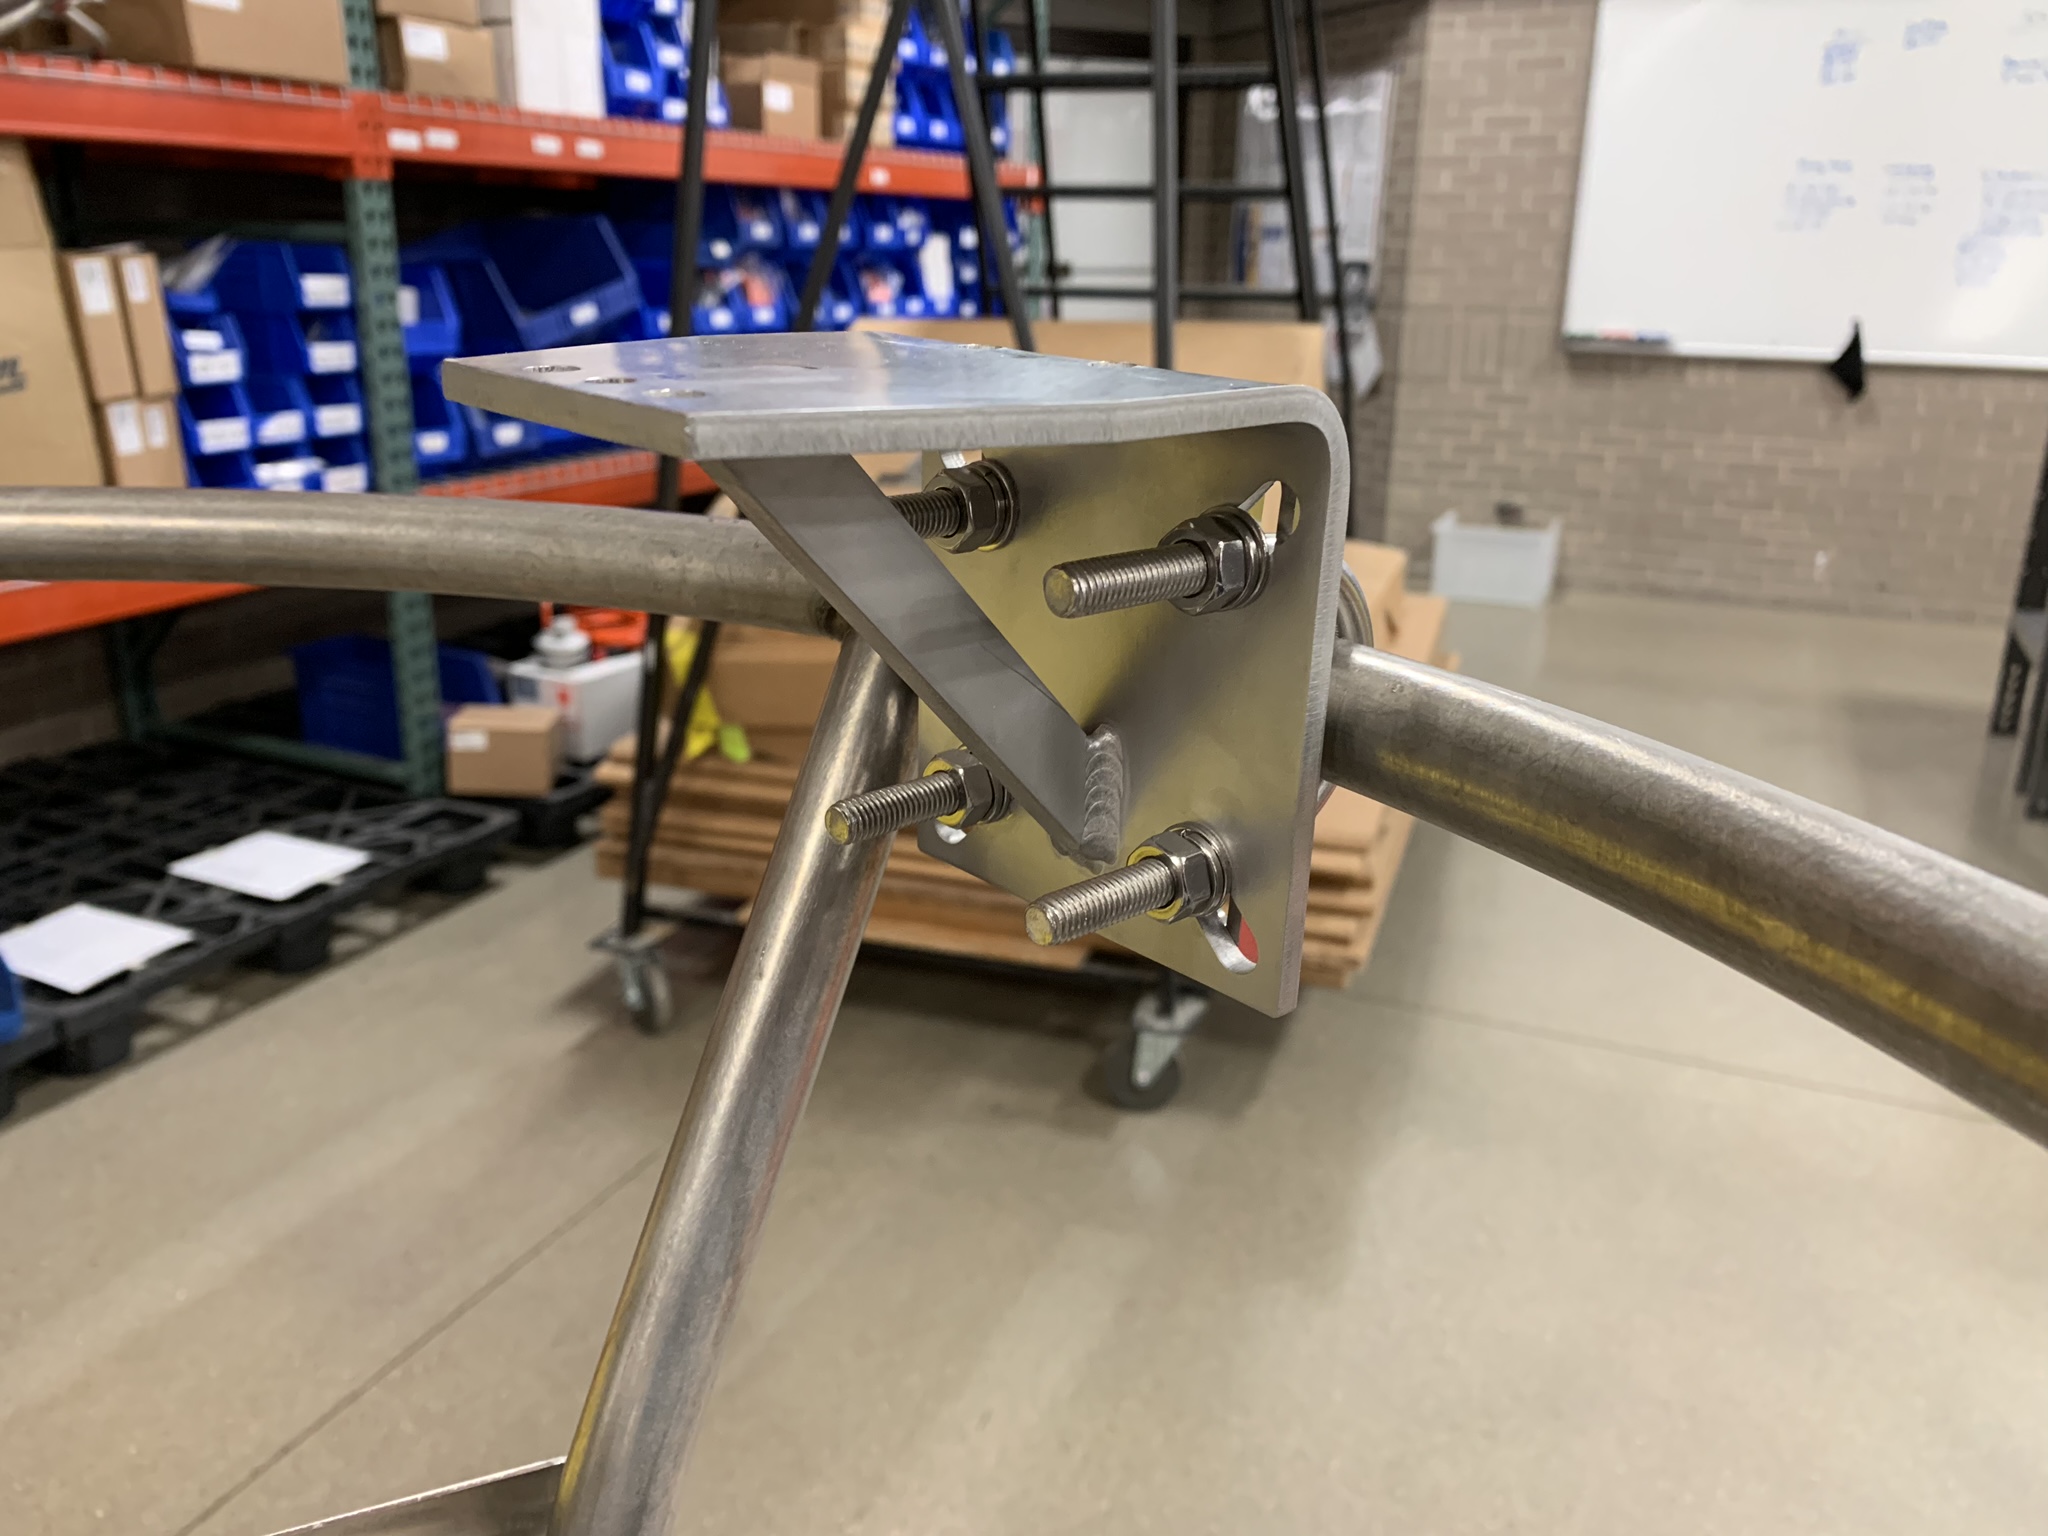
Back side of bracket with M6 U-bolt installation
- Secure the PAR Arm to the bracket using the two M6 U-bolts, flat washers, lockwashers, and nuts. Tighten evenly using a 10mm wrench.
- Thread the M6 bolt through the base of the mount opposite the V-block until it makes contact with the PAR Arm.

Front side of bracket with M6 U-bolt installation
- Carefully tighten/loosen the M6 bolt to assist with level adjustments for the PAR sensor disc.