
Generic File Import in Setup Device Wizard
iChart can import CSV files, as this is a common format and most databases supply some form of export to CSV.
The best way to import data is to set up iChart to automatically retrieve data from a file. An import schedule can be specified to do this automatically. Note that data must be imported in chronological order. Once data has been imported for a certain date, iChart will only process data after that date.
Before importing, format CSV files by opening them in Microsoft Excel. Copy and paste columns as necessary. Columns may also be copied from one spreadsheet and pasted into another.
To setup a file import in iChart, access the Setup Device Wizard by clicking File | New Project for a new project or Project | Setup Device Wizard for an existing project. The Setup Device Wizard will appear. Click Next to proceed past the introduction screen to Step 1.
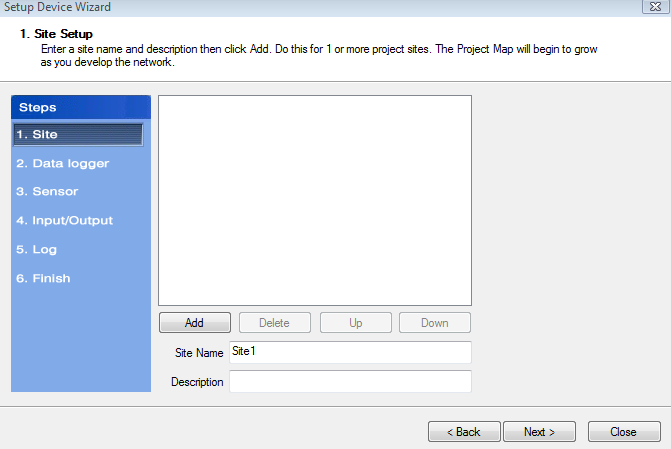
Figure 1: Setup Device Wizard, Step 1
Enter a site name and click Add. Click Next to go to Step 2.

Figure 2: Adding File Import in Step 2
Select Import from the drop-down menu to the right. Select File Import from the scrolling window below it. Click Add to add it to the site. The File Import Properties window will appear.

Figure 3: File Import Properties
The File Import Properties window allows for setting up the parameters and units of measurement of the imported data. Select the parameters that are in the columns of the CSV file being imported. If a parameter needs to be skipped, select _None. Note that the Date and Time columns must be specified.
Select Comma separated value format as the file format to import a CSV file. Click the “…” button to select the file that will be imported. If only one device is using the file import site, check Archive File in the After auto-import section. This will keep the import file from growing too large and it will take less time to process data.
If a Campbell Scientific data logger is being used, select CSI array base format as the File format. Make sure to add the date and time as they appear and in the same order as in the Campbell file. The typical setup is:
- _CSI Array No
- _Date (year)
- _Day
- _Time (hhmm)
- _Sec
- Parameters
If more than one array number will be contained in a single Campbell file, use the Filter feature to limit which array is logged for this site. To setup multiple devices, one for each array, set up each one with a different filter for the array number. The Archive File option can be used only on the last device added so that all devices can retrieve data from the same file.
To filter imported data, click Filter in the File Import Properties window. The Import Filter window will appear.

Figure 4: Import Filter window
Select parameters from the list and check the filter conditions. After entering filter settings, click OK. In the File Import Properties window, click OK to return to the Setup Device Wizard.
All date and time-related parameters are combined into a single timestamp and the list of parameter columns is displayed in the order they will be imported. With the import site setup, click Next until reaching Step 6 in the Setup Device Wizard. Click Finish.

Figure 5: Setup Device Wizard, Step 6
ODBC Database in Setup Device Wizard
To add an ODBC (Open Database Connectivity) database, the steps are similar to adding a generic file. Access the Setup Device Wizard by clicking File | New Project for a new project or Project | Setup Device Wizard for an existing project. The Setup Device Wizard will appear. Click Next to proceed past the introduction screen to Step 1.
Figure 1: Setup Device Wizard, Step 1
Enter a site name and click Add. Click Next to go to Step 2.

Figure 6: Adding ODBC Import in Step 2
Select Import from the drop-down menu to the right. Select ODBC Import from the scrolling window below it. Click Add to add it to the site. The ODBC Import Properties window will appear.

Figure 7: ODBC Import Properties
Click on the “…” next to the ODBC Connection to open the Select Data Source window.

Figure 8: Select Data Source window
Select the data source ODBC Connection to the ODBC database. If an ODBC database connection is not setup, see this article on ODBC Connection Setup. Select the table from the data source where the data to be imported is located. To import multiple tables, add ODBC Import devices for each table – one at a time.

Figure 9: Adding a table in ODBC Import Properties
Next, move the parameters located in the Available Parameters list to the Selected Parameters list by clicking Add. Select _None for columns that won’t be imported. The number of columns in the Num Columns field must match the number of Selected Parameters.
Click OK and the ODBC import will be added in the Setup Device Wizard. With the ODBC import site setup, click Next until reaching Step 6 in the Setup Device Wizard. Click Finish.
Working with Imported Files
After adding the import site to the database, the auto-import schedule can be edited by clicking Schedule in the instrument control screen.

Figure 10: Instrument Control Screen
The Setup Device window will appear. By default, iChart will interrogate the device five minutes after every hour. Adjust the schedule as needed for the monitoring application.

Figure 11: Setup Device window
To manually import data, click Import. Note that data must be imported in chronological order.
REV: 13D11