Changing Lufft local altitude setting via SDI-12
The Lufft line of weather sensors can be configured using SDI-12 protocol through iChart software.
1. Open iChart with the current project.
2. Right click on the Lufft sensor in the Navigation Panel.
3. Select Property. The Smart Sensor Properties window should appear.

Figure 1: Lufft Smart Sensor Properties
4. Record the number in the SDI-12 Address box.
5. Click Cancel.
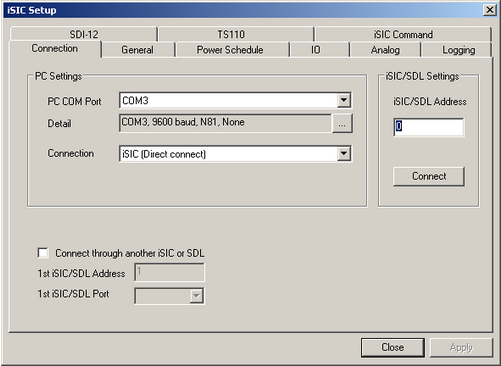
6. Select Advanced | iSIC | iSIC.
7. Select the correct COM port and connection type.

Figure 2: iSIC Setup
8. Click Connect.
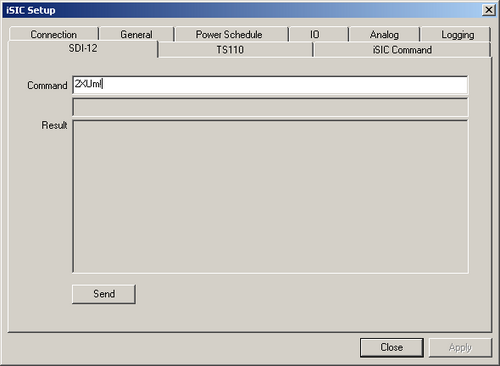
9. Select the SDI-12 tab.

Figure 3: SDI-12 Tab
10. To adjust the local altitude setting, enter the appropriate command.
Note:
- All commands should be entered in the Command box
- Click Send in order to send the command
- “a” is the SDI-12 address that was recorded in step 4
- “nnnn” is local altitude in meters
Enter this command to change the local altitude setting:
aXH+nnnn!
The following response should appear:
aXH+nnnn<CR><LF>
11. The local altitude setting has been changed. If a response of “NAK” or “Fail to send CMD” appears, check to make sure all communication cables are securely attached.
Set the heating mode for Lufft via SDI-12
The Lufft line of weather sensors can be configured using SDI-12 protocol through iChart software.
1. Open iChart with the current project.
2. Right click on the Lufft sensor in the Navigation Panel.
3. Select Property. The Smart Sensor Properties window should appear.
4. Record the number in the SDI-12 Address box.
5. Click Cancel.
6. Select Advanced | iSIC | iSIC.
7. Select the correct COM port and connection type.
8. Click Connect.
9. Select the SDI-12 tab.
10. To set the heating mode, enter the appropriate command.
Note:
- All commands should be entered in the Command box
- Click Send in order to send the command
- “a” is the SDI-12 address recorded in step 4
- “n” is heating operating mode, denoted by numbers (0 = Automatic; 1 = Mode 1; 2 = Off; 3 = Eco Mode)
To set the heating mode, enter this command:
aXMn!
The following response should appear:
aXMnm<CR><LF>
The heating mode is now set. If a response of “NAK” or “Fail to send CMD” appears, check to make sure all communication cables are securely attached.
Changing Lufft measurement units via SDI-12
The Lufft line of weather sensors can be configured using SDI-12 protocol through iChart software.
1. Open iChart with the current project.
2. Right click on the Lufft sensor in the Navigation Panel.
3. Select Property. The Smart Sensor Properties window should appear.
4. Record the number in the “SDI-12 Address” box.
5. Click Cancel.
6. Select Advanced | iSIC | iSIC.
7. Select the correct COM port and connection type.
8. Click Connect.
9. Select the SDI-12 tab.
10. To change the measurement units between US and metric, enter the appropriate command.
Note:
- All commands should be entered in the Command box
- Click Send in order to send the command
- “a” is the SDI-12 address recorded in step 4
- “u”: US units
- “m”: metric units
To change to US units, enter:
aXU<u>!
The following response should appear:
aU<u><CR><LF>
To change to metric units, enter:
aXU<m>!
The following response should appear:
aU<m><CR><LF>
The measurement units have been changed. If a response of “NAK” or “Fail to send CMD” appears, check to make sure all communication cables are securely attached.
Putting Lufft into low power mode via SDI-12
The Lufft line of weather sensors can be put in low power mode using the SDI-12 protocol through iChart software.
1. Open iChart with the current project.
2. Right-click on the Lufft sensor in the Navigation Panel.
3. Select Property. The Smart Sensor Properties window will appear.
4. Record the number in the “SDI-12 Address” box.
5. Click Cancel.
6. Select Advanced | iSIC | iSIC.
7. Select the correct COM port and connection type.
8. Click Connect.
9. Select the SDI-12 tab.
10. To put the Lufft into low power mode, there are two command options.
Note:
- All commands should be entered in the Command box
- Click Send in order to send the command
- “a” is the SDI-12 address recorded in step 4
Option 1: Enter this command to turn the heat and fan off:
aXLs!
The following response should appear:
aXLs<CR><LF>
Option 2: Enter this command to put the Lufft into sleep mode:
aXLw!
The following response should appear:
aXLw<CR><LF>
11. Low power mode has been set. To return the Lufft to normal operation, enter this command:
aXLn!
If a response of “NAK” or “Fail to send CMD” appears, check to make sure the Lufft weather sensor’s firmware is up to date and that all communication cables are securely attached.
REV: 13G18
