
The inability to communicate to an iSIC data logger can be caused by a variety of reasons: problems on the computer, problems on the iSIC, or problems with communication between the two.
Before troubleshooting any iSIC communication problem, it is best to turn Auto interrogation off in iChart. Do this by selecting Project | Pause Auto Interrogation in iChart. Resume automatic data retrieval by selecting the Unpause Auto-Interrogation command in the Project menu.
Step 1: Quick Communication Check
If an iChart project file has been created, the best way to start is to see if it is possible to communicate with the iSIC in iChart. Right-click on the data logger in the Navigation panel and select Property.
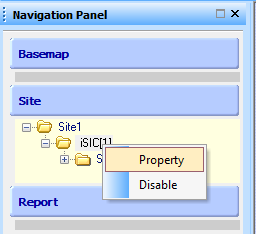
Figure 1: Right-click Property in Navigation Panel
The iSIC Data Logger Communication Properties window will open.

Figure 2: iSIC Data Logger Communication Properties window
Make sure the COM port selected is available in the drop down menu of COM ports. iChart will only show the available COM ports in the list. Click Test Connection after picking the correct COM port.
If the test failms check to make sure the data logger is powered.
Step 2: Check power
Go to the iSIC data logger and cycle the power by removing the two fuses on the top left hand side on the inside of the enclosure. This will remove both battery and external (such as a solar panel or float charger) power. Look at the small hole between the analog terminal strip and the DB9 serial connector. Place the two fuses back into their holders and after a few seconds you should see a green LED blink several times.
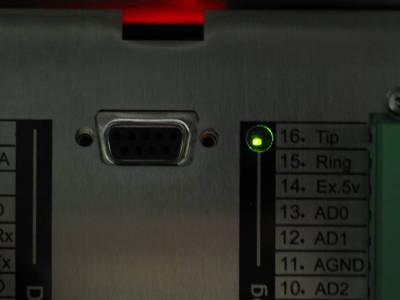
Figure 3: Green blinking LED
If the light doesn’t blink, try again just to be sure. If there is still no green light, then the iSIC is not getting powered on. If you have a multi-meter and are able to measure voltage, do so making sure the battery is above 10.7V.
Make sure the fuses are not blown. It’s possible to tell if a fuse is blown by visual inspection (a good fuse will have a single solid piece of metal that runs from one end of the fuse to the other – if the piece is broken, the fuse is blown).

Figure 4: Blown Fuse
If an A11 AC Float charger is being used, check to make sure the float charger is plugged into the wall and that its LED is on (located on the top right side facing out from the wall). If not, check to make sure the outlet has power by plugging in another device into the wall and making sure it turns on.
If the data logger is still not powering with new batteries and fuses, try:
- Disconnecting power to the data logger by removing the two fuses
- Disconnecting the solar panel or float charger (MS2 connector on the bottom of the data logger). This is to make sure the solar panel or float charger isn’t shorted out for some reason.
- Measure the battery with a multimeter – make sure the voltage is above 10.7V. It should be close to 12V
- Remove the two green terminal strips on the data logger to make sure no sensors are pulling down the power
- Reconnect the two fuses and look for the green LED
If the data logger now powers:
- Try connecting the solar panel or float charger to see if the data logger stays powered
- Try connecting one sensor at a time to determine which one is causing the problem
Then trace the cabling to see if there are any breaks that would short out power and ground. If none, check to see if it is the sensor or cable that is bad by swapping it with a known good setup.
REV: 13G31