
The iSIC plate is designed to hide all the parts that are not meant to be altered by the customer. However, there are a few occasions when it is necessary to remove the plate. For example, parts could fall behind the plate, or the PCB may need to be sent back to NexSens for repair.
1. Disconnect the fastons from the battery terminals inside the iSIC.
2. Remove the two screws on the battery plate with a #3 Phillips head screwdriver. Store the battery, battery plate and screws.
3. Unplug any external power devices connected to the MS2 port.
4. Unplug the two green terminal strips. Any wirings do not need to be disconnected from the terminal strips.
5. Remove the (4) mounting screws and lock washers with a #3 Phillips head screwdriver. The plate can now be lifted to access hidden components. Continue only if removing the plate entirely for a repair shipment.
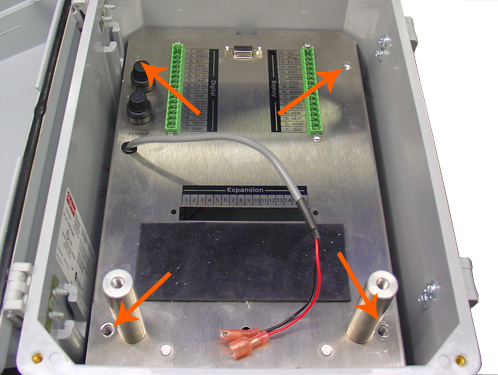
Figure 3: Removing the iSIC mounting plate
6. Cut off the cable tie shown.

Figure 4: Cable tie
7. Disconnect all connectors wired to the circuit board.
8. Leave the PCB mounted to the iSIC plate. Package with an abundant amount of protection for return shipments.

Figure 5: PCB attached to the mounting plate
REV: 13G18