
RS232
In addition to the single RS232 port located externally on the iSIC via the MS8 connector, three RS232 ports are available on the internal Digital terminal strip. Ports 1, 2, and 3 are available for use. To connect your RS232 sensor to the iSIC, open the enclosure, unscrew the correct pins on the terminal strip, and attach the wires from your sensors cable to the connector. A diagram showing the proper wiring for Port 1 is shown below:
Simply connect the Rx pin of the sensor to the Tx pin on the iSIC and the Tx pin of the sensor to the Rx pin on the iSIC.

Figure 1: RS232 Sensor
RS232 Ports 2 and 3 can be accessed through the same terminal strip. Port 2 uses pins 7 through 9, Port 3 uses pins 10 through 12. RS232 Sensors requiring a 12V power supply to operate should connect the wire for power to pin 3, BAT, on the terminal strip.
The RS232 sensor should support standard protocols such as Modbus RTU, NMEA0183 or ASCII.
Troubleshooting RS232 Sensors
Any NexSens iSIC data logger can “pass-through” telemetry and open a terminal directly to RS232 sensors. Sensors such as YSI sondes, or other ASCII communication devices can be directly accessed through this menu.
In iChart, select Advanced | Terminal, and select the PC COM Port the data logger is currently connected to from the drop down menu. Next place a check in Use iSIC and select the iSIC model number from the Connection drop down menu.

Figure 2: Check Use iSIC
The iSIC Address will typically be 1 unless changed by the user.
The iSIC Port will be the port that the device is wired to. Select Port 0 if you are using the iSIC MS8 connector, located on the front of the iSIC. Otherwise, select the Port number that reflects the Rx and Tx pins the device is wired to (P1 was used in the wiring section of this manual).
Note: the iSIC will use the RS232 baud rate and frame it is programmed with. If an RS232 sensor has not been already configured on the data logger the iSIC will default the terminal to 9600 baud N81.
Click OK and the terminal window will appear:
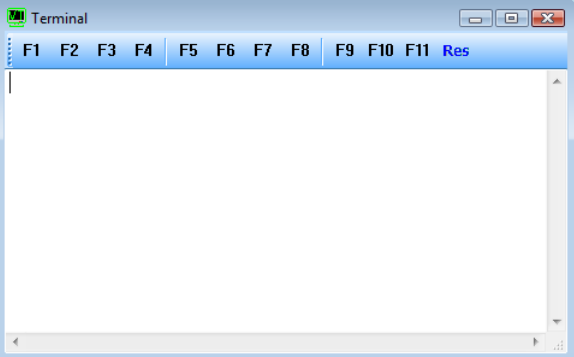
Figure 3: Terminal
RS485
The NexSens iSIC supports RS485 communication, up to 57600 baud, between the data logger and a RS485 network. RS485 connections are available on the MS8 connector, located on the outside of iSIC enclosures. RS485 connections are available through the MS8 connector for iSIC data loggers with Hardware version 6 or earlier. On iSIC data loggers with hardware version 7 or beyond, the MS8 connector is mostly used for connecting water quality sondes and other sensors. Host RS485 is available through the iSIC data logger DB9 port, while Sensor RS485 is available through the iSIC data logger’s digital terminal strip.

Figure 4: MS8 Connector
RS485 networks can connect to an RS485 iSIC using an RS485 MS8-Flying lead cable. The RS485 sensor should support standard protocols such as Modbus RTU, NMEA0183 or ASCII.
Troubleshooting RS485 Sensors
Any NexSens iSIC data logger can “pass-through” telemetry and open a terminal directly to RS485 sensors. RS485 sensors using ASCII communication devices can be directly accessed through this menu.
In iChart, select Advanced | Terminal, and select the PC COM Port the data logger is currently connected to from the drop down menu. Next place a check in Use iSIC and select the iSIC model number from the Connection drop down menu.
Modbus RTU
NexSens iSIC data loggers support Modbus RTU sensors connected to a data logger via RS232 or RS485.
Implementation:
- RS232 and RS485, baud rates 1200 to 57600 supported.
- Addresses from 1 to 247 are supported.
- Registers 0 to 65535 are supported. The software assumes each parameter is in sequential register order. When registers are not in sequential order, the modbus device can be added as multiple sensors.
- Commands 0x03 for reading holding registers and 0x04 for reading input registers are supported.
- User specified timeout available.
- Data types of 2-byte Integer, 4-byte Integer (big-endian), 4-byte IEEE Float (bigendian), 4-byte Integer (little-endian), and 4-byte IEEE Float (little-endian) are available.
NMEA 0183
NexSens iSIC data loggers support NMEA 0183 sensors connected to a data logger via RS232.
Implementation:
- RS232, baud rates 1200 to 57600 supported.
- Up to (3) messages per sensor can be configured (note: devices that output more than three messages can be logged as more than one sensor)
- Optional checksum: if a checksum is present in the NMEA message, the iSIC will use that checksum to determine if the message is valid. If a checksum is not present, the checksum requirement will be ignored.
- The iSIC follows the NMEA 0183 protocol specification of 82 characters per message (including $ sign and line feed)
- iChart will automatically arrange selected parameters according to the their message (ie if three parameters from GGA and two parameters from VTG are selected, iChart will group the parameters together based on the message name regardless of the message order selected.
Additionally, there are a few data marker messages that the iSIC uses to help diagnose NMEA 0183 communication problems. These markers will be logged instead of the actual data message in the case of error.
Note: a “primary field” is a field in a sentence that is to be parsed and log. A “qualifier field” is a second field that adds meaning to the primary field. For example, in a GCC sentence, field 2 is lat., field 3 is either ‘E’ or ‘W’. Field 2 is the primary field, field 3 is the qualifier field. Another example, in DBT sentence, field 1 is the primary field, field 2 is the qualifier field and it must be ‘f’ indicate field 1 unit is in feet.
Marker Messages:
1) -100002: empty primary field
2) -100004: empty qualifier field
3) -100006: invalid qualifier field
4) -100008: reach the end of a sentence
5) -100010: complete sentence is not detected.
SDI-12
Connect SDI-12 sensors to the pin labeled “SDI-12” on the Digital terminal strip. A sample wiring diagram is below:

Figure 5: SDI-12 Sample Wiring
REV:13D26