
Data API Key
The ADMIN menu allows project administrators to create new API keys and edit existing keys. WQData LIVE permits generation of up to 10 API keys for each Project.
Create a New Key
- Navigate to ADMIN | API on the WQData LIVE Project Dashboard.
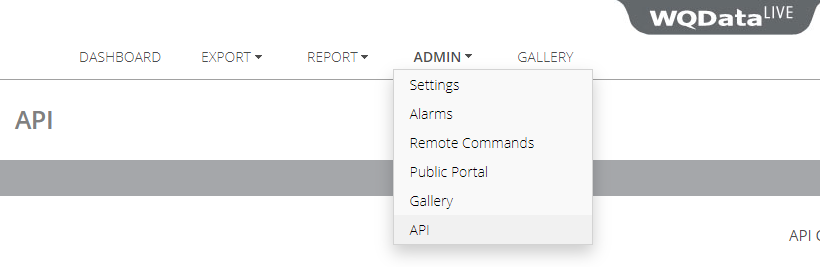
Figure 1: Access WQData LIVE API menu.
- Expand the API Keys section by clicking on the gray bar (if it is not already showing).
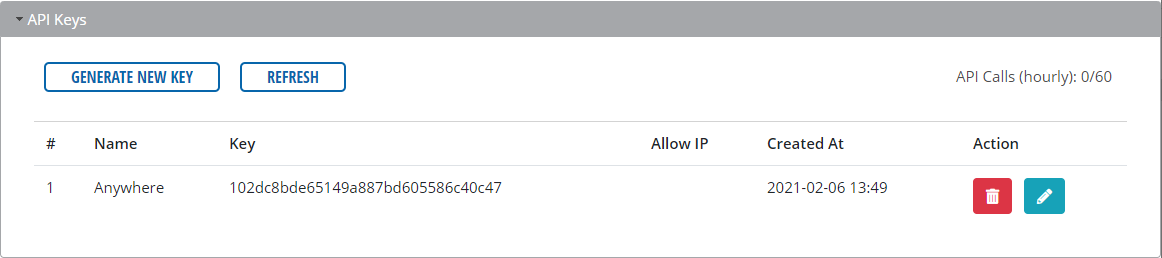
Figure 2: API Keys section.
- Click Generate New Key. In the popup menu that appears, give the API key a Name (required). To restrict the access of the API key to an IP Address, enter either an IPv4 or IPv6 address in the Allow IP field. If left empty, the API key will be accessible from any IP address.
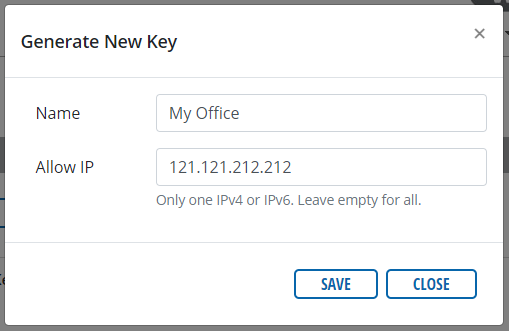
Figure 3: Generate New Key menu.
- Click SAVE, then confirm the message indicating successful creation of the key.
Edit an Existing Key
- Click the Edit button (blue pencil icon) of the API key in the Action column of the API Keys table. The popup menu that appears will show the fields Key, Name, and Allow IP. Editing the Name and Allow IP fields is permitted.
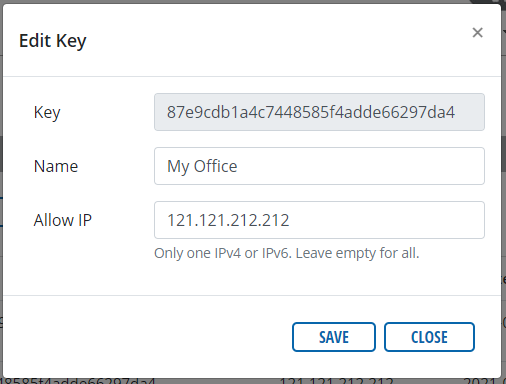
Figure 4: Edit Key menu.
- Click SAVE, then confirm the message indicating successful updating of the key.
Delete an Existing Key
- Click the Delete button (red trashcan icon) of the API key in the Action column of the API Keys table. In the popup menu, confirm the deletion by entering the API Key name into the confirmation box. Once the correct name is entered, the Delete button will no longer be grayed out.
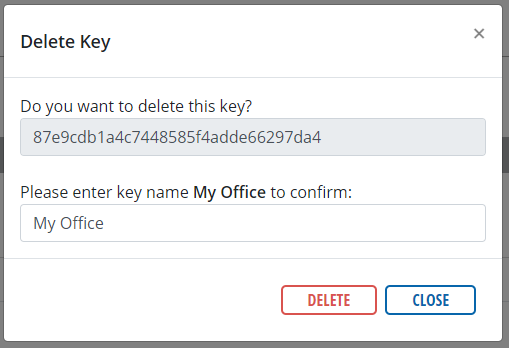
Figure 5: Delete Key menu.
- Click DELETE, then confirm the message indicating successful deletion of the key. Once deleted, the API Keys list will no longer contain the deleted key. This action is irreversible.
Data API Documentation
For complete information on working with WQData LIVE REST APIs, see the Data API Doc.