
Add a Data Logger to a WQData LIVE Project
During first-time configuration, data loggers are added to WQData LIVE projects using a Claim Code supplied with each data logger.
To assign a data logger using a Claim Code:
- Log in to WQData LIVE and find the username in the top right-hand corner of the page. Mouse over the username to reveal a drop-down menu, and click PROJECTS.
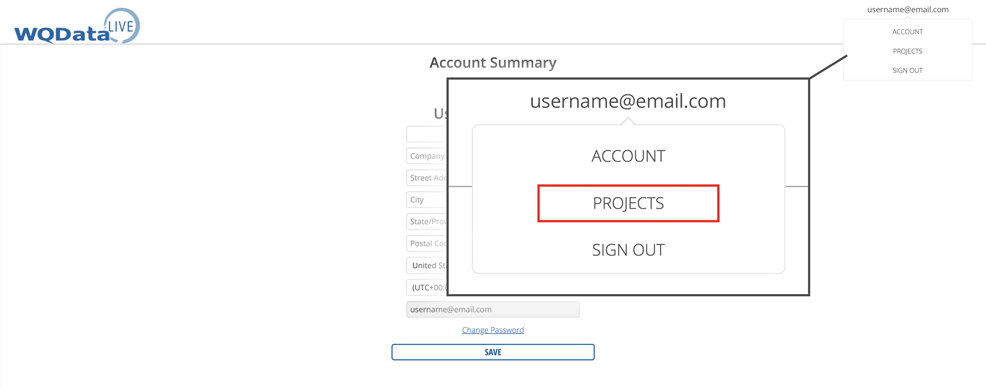
Figure 1: Open the accounts project page.
- Choose an existing project or select Create New Project. Follow the link below for additional information on creating a new project.
- After selecting or creating a project, click ADMIN | Settings, located at the top of the dashboard.
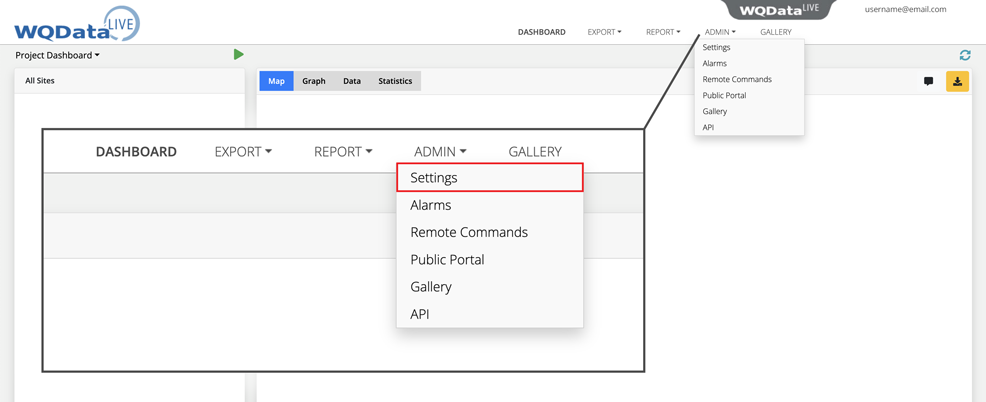
Figure 2: Access the administrator settings on the WQData LIVE project.
- Click on the gray bar that says Project/Site to open a drop-down menu. Choose Sites to open a second drop-down menu.
- The sites drop-down menu displays all of the current sites within the project. View the site settings by clicking on the name.
- Locate the Claim Code on the serial label attached to the data logger’s Quick Start Guide or System Integration Guide.
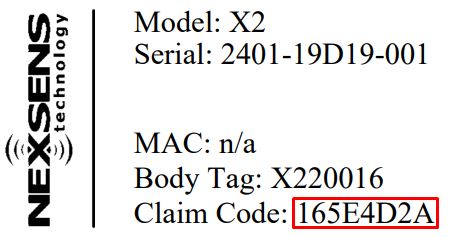
Figure 3: Data logger serial label.
- Add a new logger by entering the Claim Code in the field near the bottom of the sites menu. Then click Add Device.
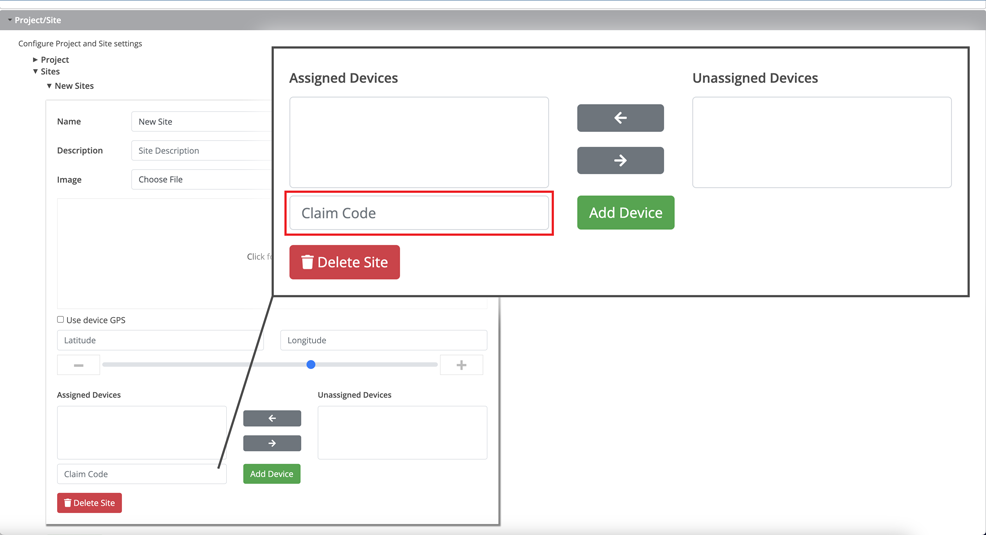
Figure 4: Enter the claim code in the space provided to add the data logger.
- The device name will appear in the Assigned Devices box.
- Click SAVE when finished.
- All parameters and data for the logger will now be visible on the project and site dashboard.