
Configure RV50 Modem Settings
All cellular modems that are used with a NexSens iSIC data logger must be configured with the proper settings to communicate and transmit data. While NexSens generally makes the required changes prior to shipping the modem, it may become necessary for a user to verify or change a setting.
This can be accomplished by connecting remotely or directly to the modem and using the Sierra Wireless ACEmanager utility.
Establish Modem ACEmanger Connection
Remote Connection
Use a remote connection if the static IP address of the modem is known and it successfully connects to the network.
- Launch an internet browser and type the static IP address of the modem followed by port 9191, or 9443 for https connections, into the search bar and hit enter . The ACEmanager login should appear if the connection was successful.
- Example entries for an IP address of 166.165.251.xxx
- http://166.165.251.xxx:9191
- https://166.165.251.xxx:9443
- Internet Explorer, Firefox, and Chrome are compatible. Other browsers may work, but have not been tested.
- Note that you may be required to update your browser if ACEmanager does not display properly.
- Example entries for an IP address of 166.165.251.xxx
Direct Connection
Use a direct connection if a static IP address is not assigned to the modem, or if it is unable to connect to the network.
Requirements:
Windows Computer
Power Source for RV50
Micro-USB to USB or Ethernet (RJ45) Cable
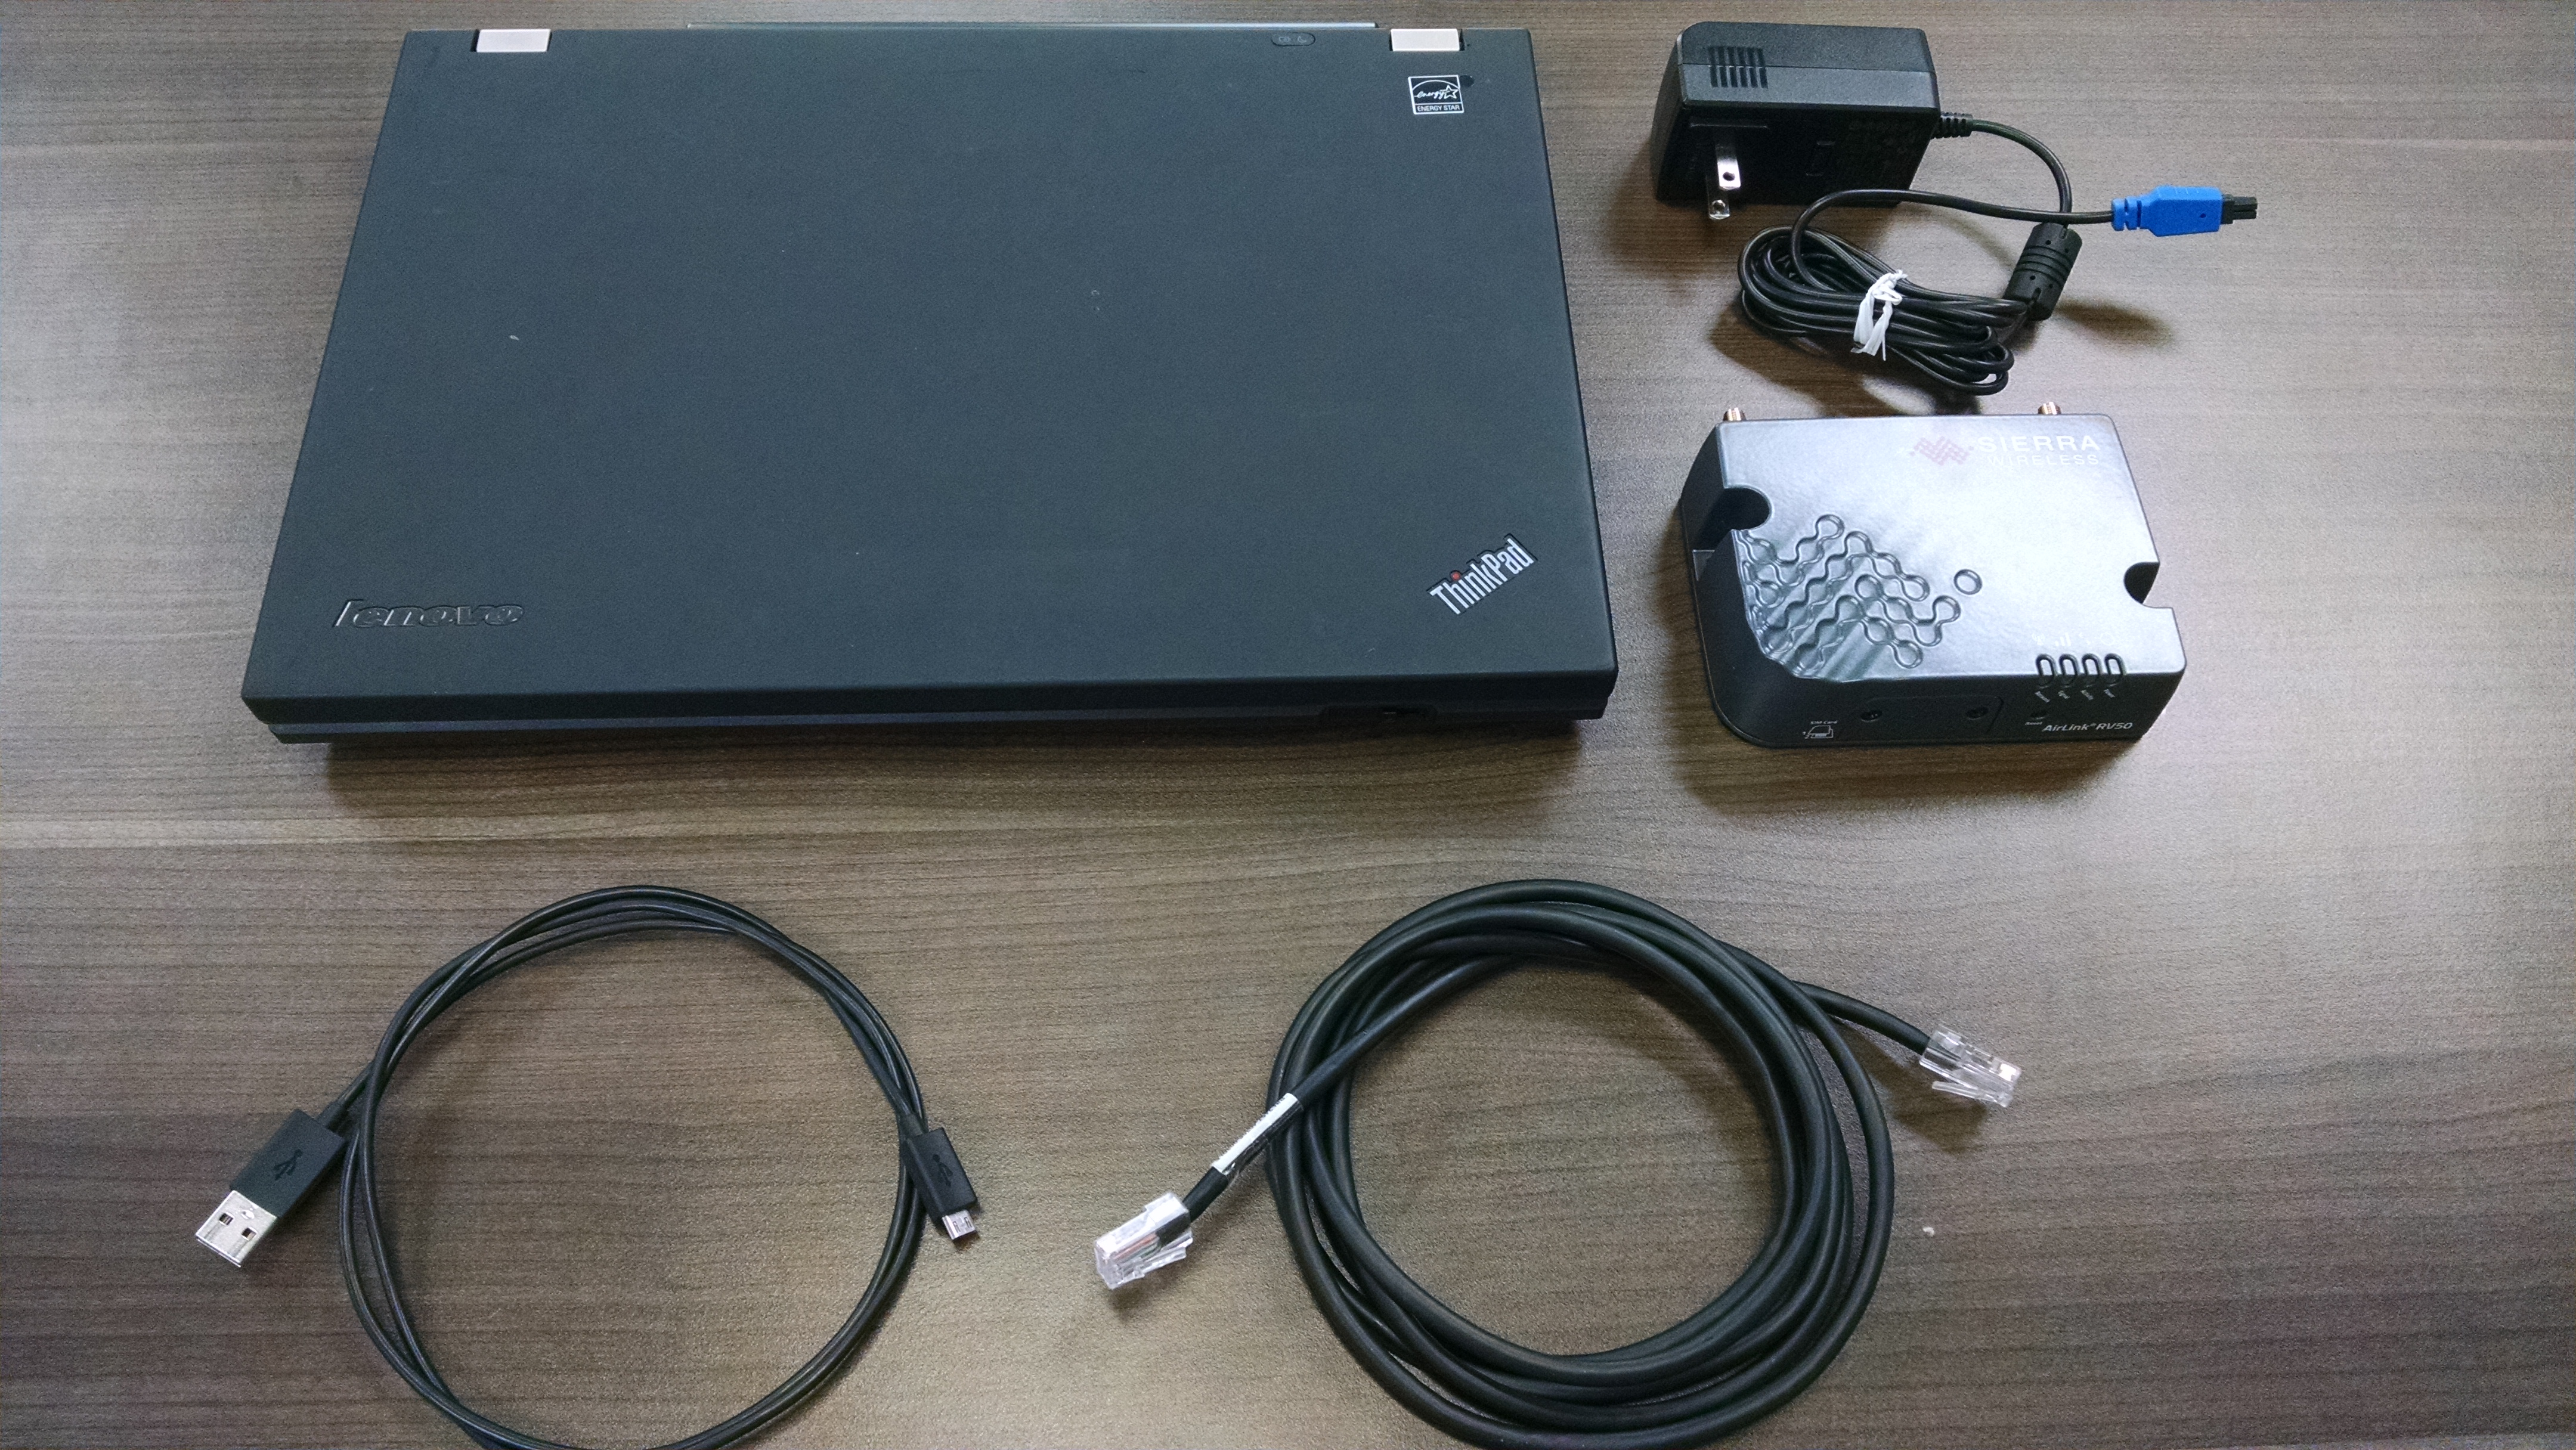
Figure 1: Required Components for a Direct ACEmanager Connection
- Disconnect any antennas directly connected to the modem.
- This will ensure the modem is disconnected from the network while settings are being changed. If the modem has an active network connection, the computer may utilize the modem’s network and this may incur extra data charges.
- For modems installed in 3100-iSIC or MAST systems, disconnecting the N-style RF cable from the base of the iSIC enclosure is sufficient.
- Apply Power to the modem by plugging in the iSIC battery or AC adapter.
- Connect either the micro-USB to USB or Ethernet cable to the RV50 and the computer.
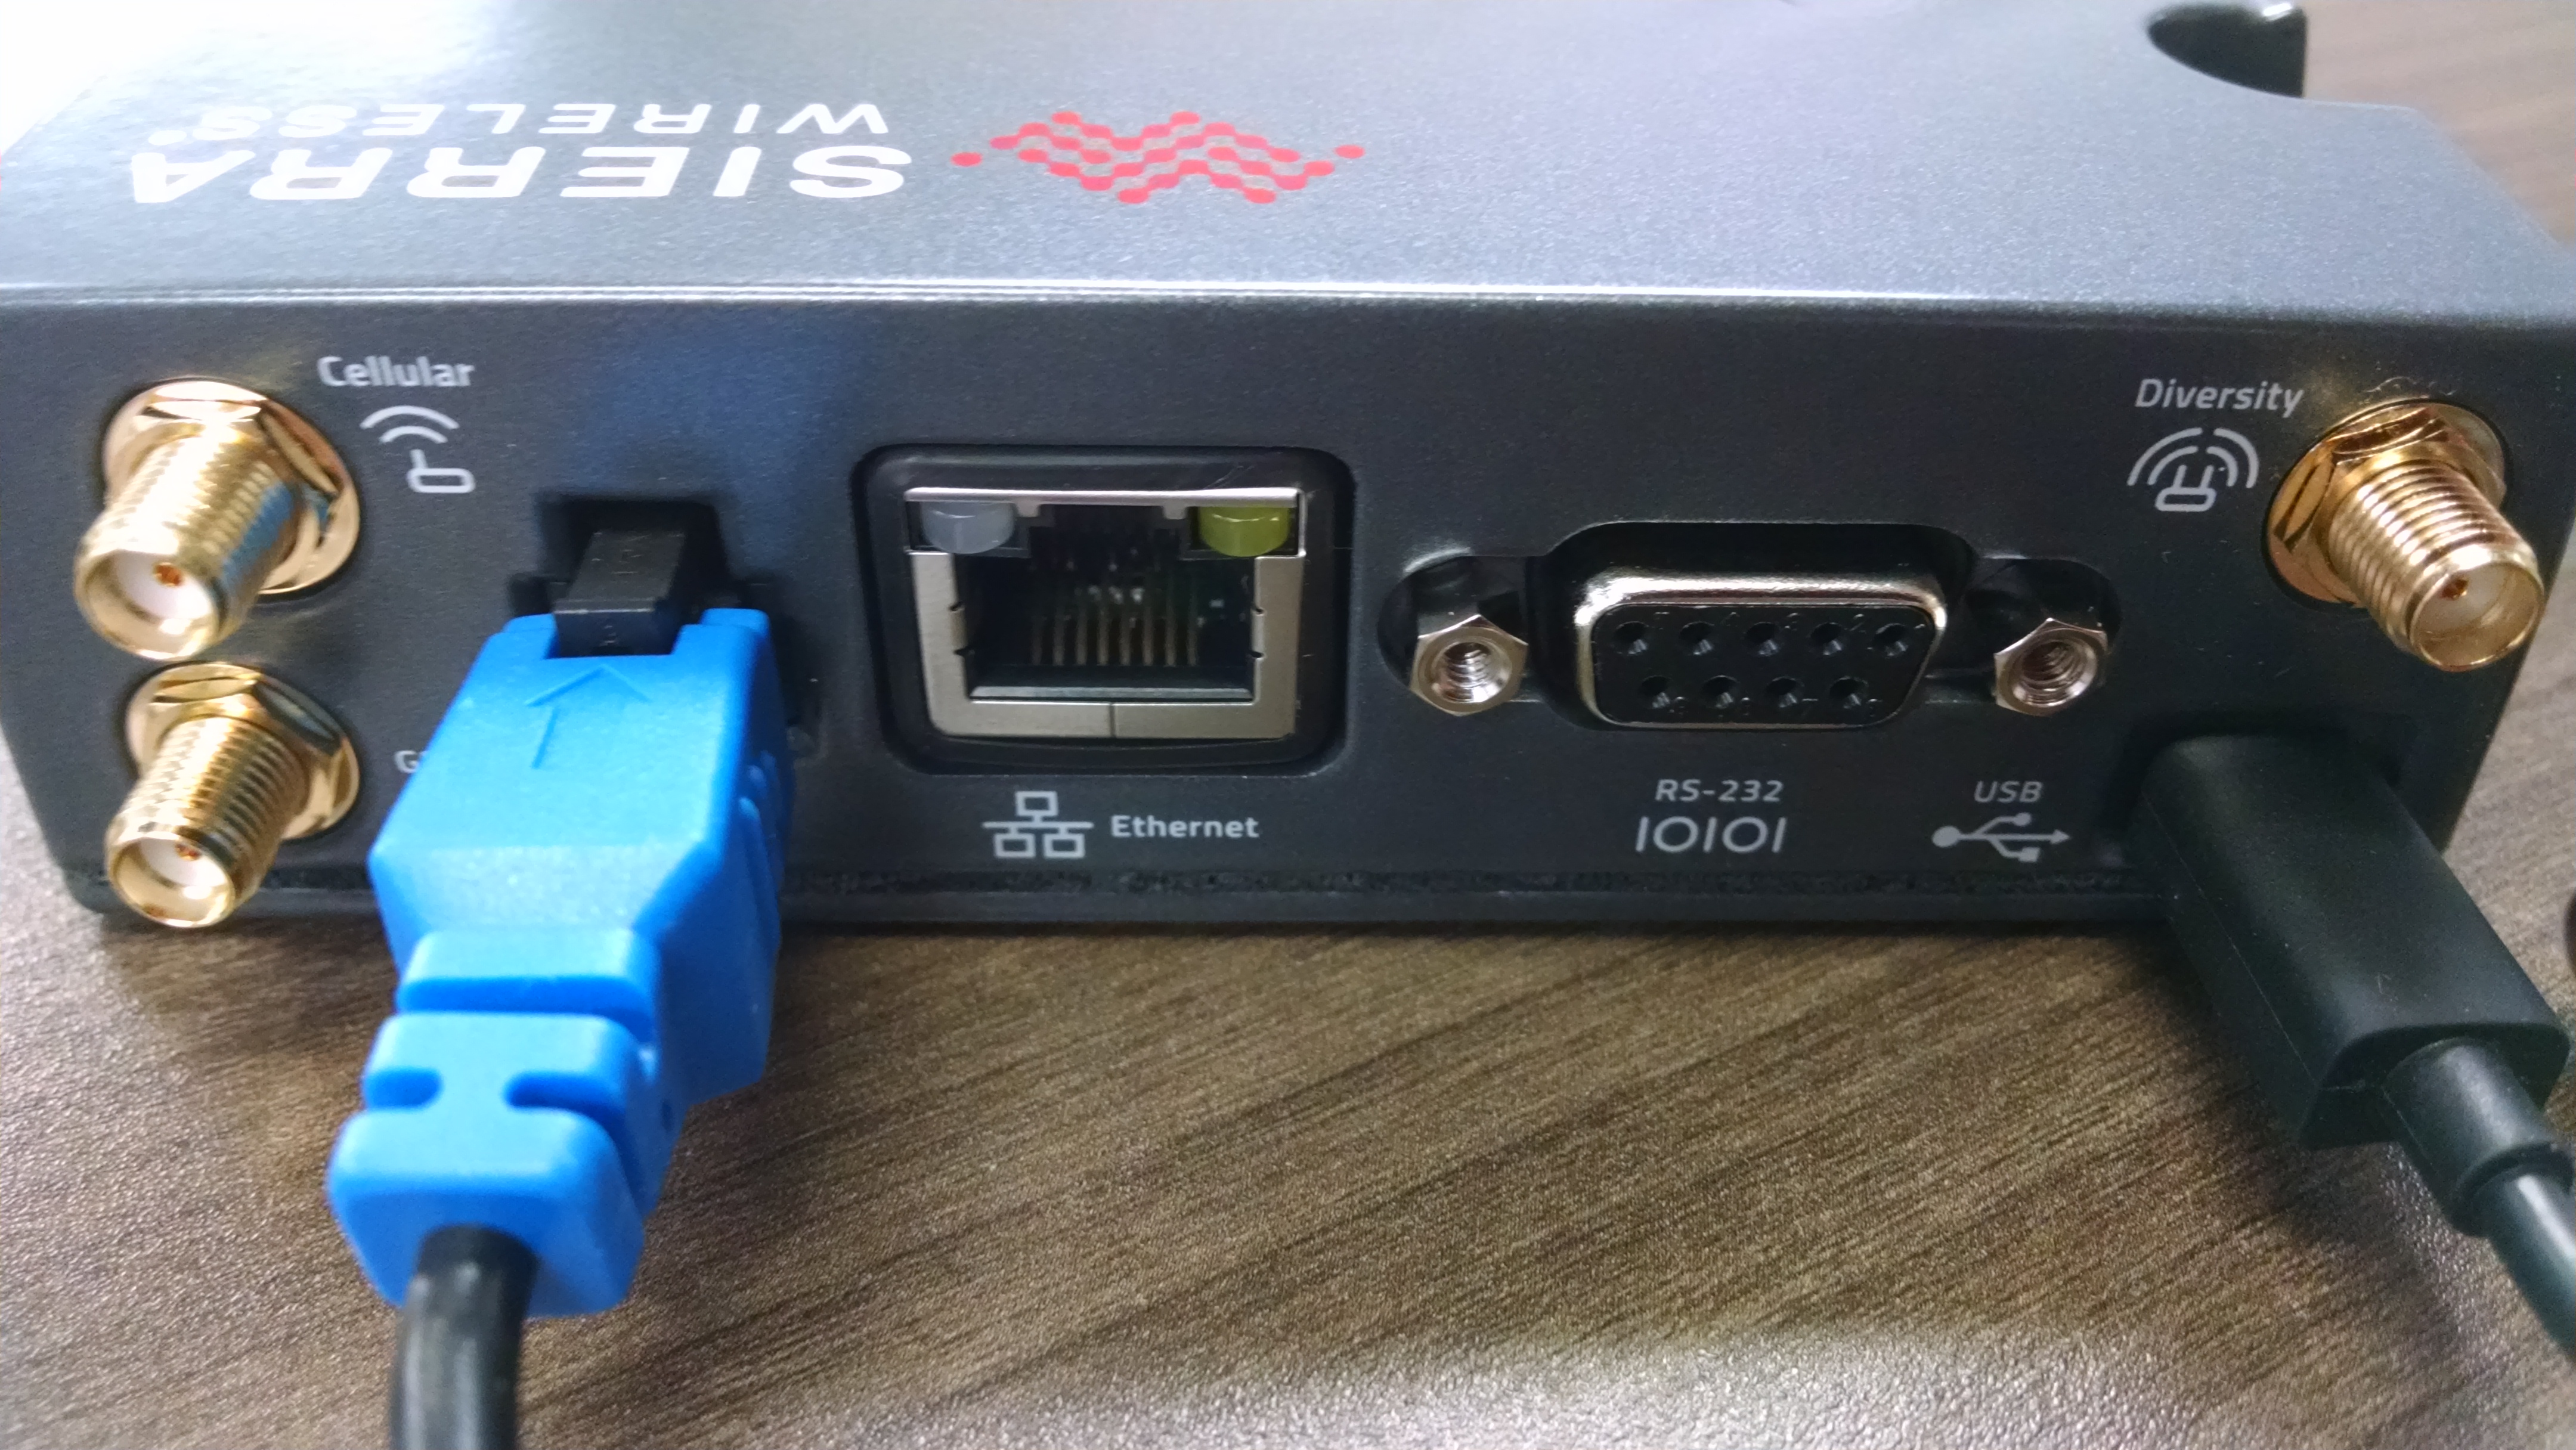
Figure 2: Power and Micro-USB connection to RV50
- Launch an internet browser and type http://192.168.13.31:9191 (ALEOS 4.13.0 or previous) or https://192.168.13.31:9443 (ALEOS 4.14.0 and later) into the search bar and hit enter. The ACEmanager login should appear if the connection was successful.
- Internet Explorer, Firefox, and Chrome are all compatible. Other browsers may work, but have not been tested.
- Note that you may be required to update your browser if ACEmanager does not display properly.

Figure 3: AceManager login screen.
ACEmanager Login & Required Settings
- New RV50X modems will contain a default password on the serial label located on the bottom of the modem.
- Enter this password to access AceManager.
- user should be entered in User Name by default.

Figure 4: RV50X password location.
Once AceManager is accessed, the following settings must be entered. Note: After changing any settings in the modem, hit Apply before advancing to a new tab.
- –Services–
- ACEmanager
- General
- Remote Access & Local Access – Both HTTP and HTTPS
- General
- ACEmanager

Figure 5: Enable remote access.
- –Serial–
- RS232 Configuration
- General
- RS232 Port Configuration
- Configure RS232 Port = 9600,8N1
- RS232 Port Configuration
- General
- RS232 Configuration
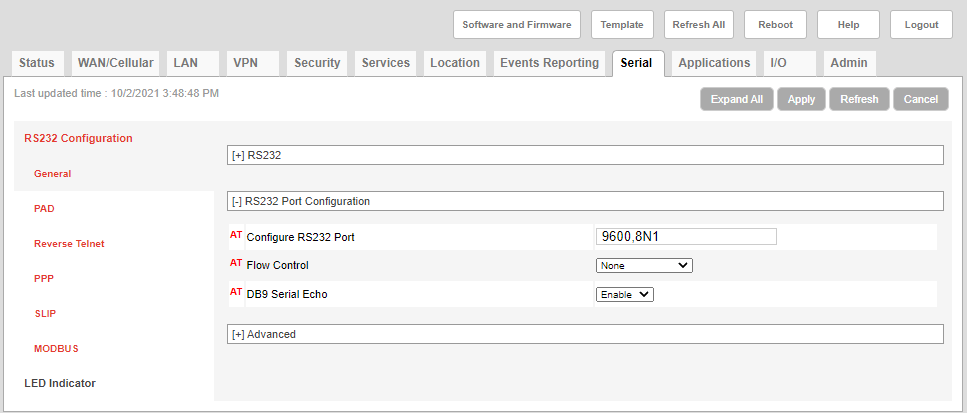
Figure 6: Change baud rate through RS232 communication.
- –Serial–
- RS232 Configuration
- PAD
- General
- Change to Device Port = 500
- General
- PAD
- RS232 Configuration

Figure 7: Change device port.
- –Serial–
- RS232 Configuration
- PAD
- TCP
- TCP Auto Answer = Enable
- TCP
- PAD
- RS232 Configuration

Figure 8: Enable TCP Auto Answer.
- Set the APN for the SIM card in the appropriate slot.
- The APN will vary depending on the service provider and deployment location. Shown below is the standard static Verizon 4G APN for the Northeastern United States.
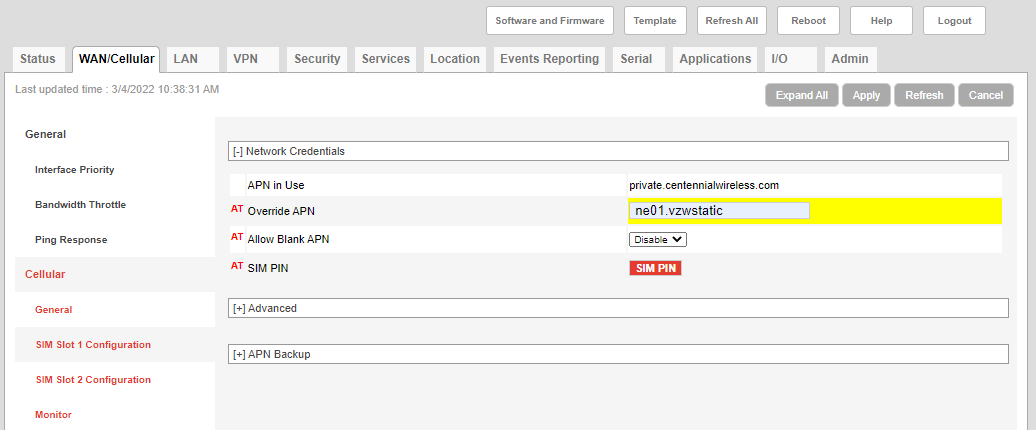
Figure 9: Set the appropriate APN provided by the cellular provider.
- Sierra Wireless recommends changing the default password for the RV50X after the first connection for security purposes. Go to the Admin tab, enter the old password and then enter the new password in the available fields. Click Change Password.

Figure 10: Change the default password.
Recommended ACEmanager Settings
Sierra Wireless recommends enabling Inbound IP Filtering (Friends List) to limit modem access to only trusted IP addresses. More detailed information about this can be found in this Sierra Wireless Technical Bulletin first posted on September 27th, 2016. Add the static Public IP address of any trusted network that will need to establish communication with the modem (AceManager or iChart use) in the Inbound Trusted IP List.
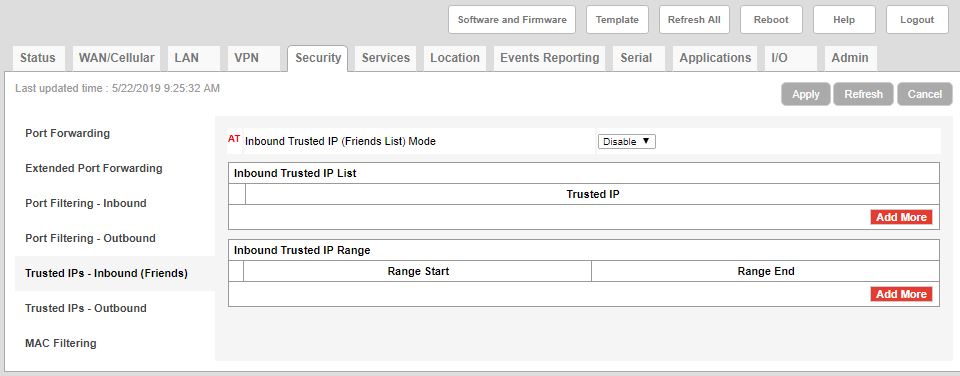
Figure 11: Inbound Trusted IP List
Reboot the RV50X
After all changes have been made, Reboot the device. Once the reboot is complete, enter the user name and password and double-check that all changes have been saved. Document the static IP address shown on the Status | Home page. Test the communication with an iSIC data logger through iChart by updating the logger IP address within the iChart project and connecting the serial and power cables between the modem and data logger.

Figure 12: Apply a reboot to permanently save the changes.
Figure 13: Reboot in progress.