
Remove the Main SD Card in a Pole Mount X2 Data Logger
In the event of an SD card failure, the user may be required to physically remove the main SD card from the X2. It is imperative to perform this operation indoors in a dry environment.
Caution- Be sure to statically ground yourself before touching any of the electronics inside the X2 logger.
SD Card Removal
- Remove power from the X2 by disconnecting any cable connected to the center 6-pin port.
- Ensure to give the X2 ~5 minutes to discharge any current before continuing the process.
- Locate the green plastic wire in the base of the X2’s aluminum housing.
- Slide tweezers or the tip of the NexSens screwdriver beneath the wire to push it away from the track.

Locate the bottom green wire holding the housing.
- Pull the end of the wire while applying pressure to the top of the X2 to remove it from the track.
- Tweezers or needle-nose pliers can be used if needed.
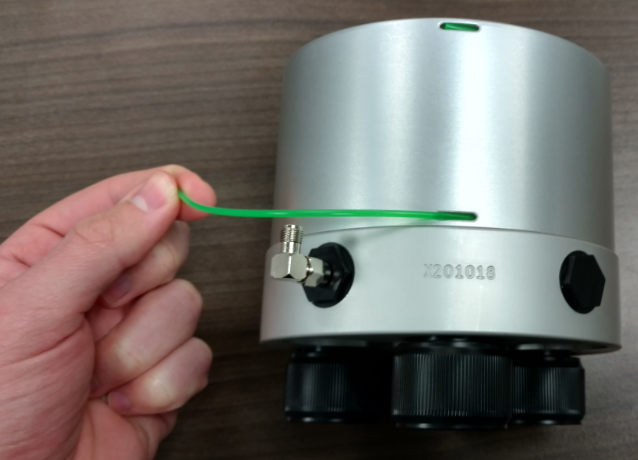
Remove the bottom green wire.
- Pull up on the enclosure to separate it from the X2 base.
- Due to the vacuum created when the enclosure is originally placed on the X2 base, there will be tension while removing the enclosure. Ensure to pull gently as the tension will release immediately once the enclosure is past the second O-ring on the base.
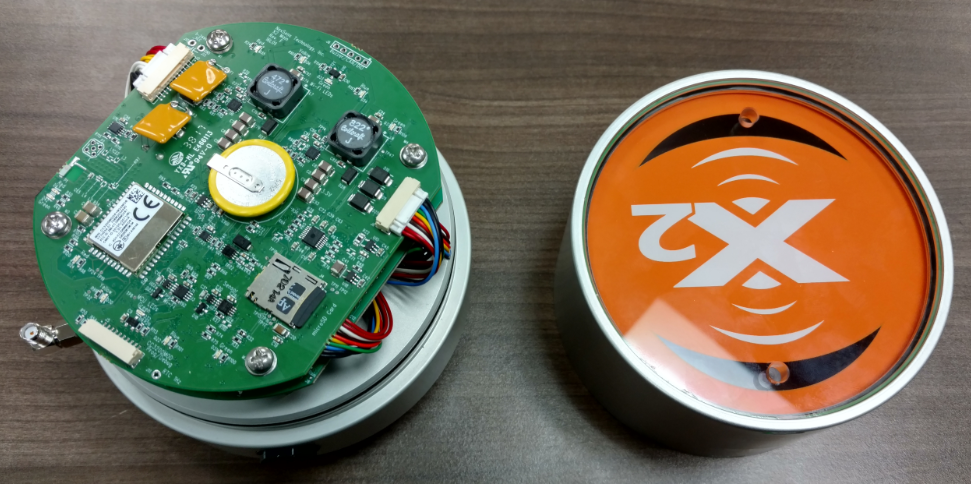
Top aluminum housing separated from the X2 base.
- Locate the X2 Main-PCB’s SD card (outlined in red), located on the top board.

X2 Main-PCB micro-SD Card Location.
- Push the SD card further into the mount and then release. The SD card can now be removed from the mount.
- Place the card into a micro-SD card reader to access its files.
Read the SD Card Contents
- A functional SD card will display the following folders when its directory is opened.
- Ensure the ‘date modified’ has a realistic timestamp.
- If working with a NexSens technician, ensure to supply all requested files for troubleshooting.

Main X2 SD card folders.
- Once the SD card is confirmed functional (or non-functional) and all necessary files are transferred, select the Eject option in Windows to safely remove the SD card.

Eject the SD card in Windows.
Re-install an SD Card
- If the SD card is functional, re-install the card back into the slot on the X2’s main PCB.
- If the SD card is not functional, the user will need to purchase a new 256MB microSD card from NexSens or a local source.
- Confirm with NexSens before purchasing from a local source to ensure the SD card is suitable for the X2. Additionally, a NexSens technician must supply the proper contents for the SD card before installation.
- Once an SD card is ready for installation, slide the enclosure back over the top of the X2 base, ensuring that no wires are pinched.
- Align the opening for the green wire with the machined body tag on the aluminum base.
- Push down on the top of the enclosure and feed the wire back into its track.
- Use the CONNECT software to communicate directly with the X2 and ensure proper functionality.
- The CONNECT SD Card Utility is a useful tool for confirming direct communication with the new SD card.