
Set Up a NexSens Radio Network
Each XBEE radio module that ships with a NexSens radio X2 has a unique identifier. Both the base and field nodes use this identifier to establish connections throughout the radio network. All field radios in the network must have the identifier information for the base station as a destination for their logged data. An RF transceiver from DigiKey and the Digi XCTU software provide a means of writing the base radio identifier into each field node on the network. Once the field nodes recognize the base station, WQData LIVE can force the base to detect all nodes in the network. The following process outlines setting up such a network of NexSens radio X2 data loggers.
Download the XCTU Software and Connect to the RF transceiver
- Download the XCTU software.
- Open the software, then connect the RF transceiver to an open USB port.
- The red LED on the transceiver should blink continuously while powered.
- Click the magnifying glass icon in the top left, then select the proper COM port. Enter the following communication settings:
- Baud Rate: 9600
- Data Bits: 8
- Parity: None
- Stop Bits: 1
- Flow Control: None

Figure 1: Discover available radios. |
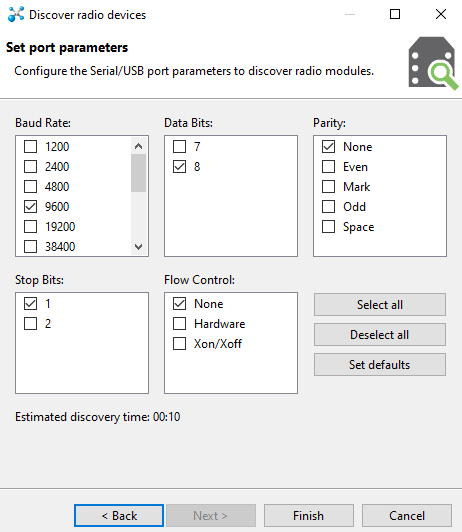
Figure 2: Radio communication settings. |
- Click the plus icon to the left of the magnifying glass to actively search for the Digi radio device using the previously set communication settings.

Figure 3: Add the base radio module.
- The Digi Base Radio station should soon appear in the Radio Modules list.
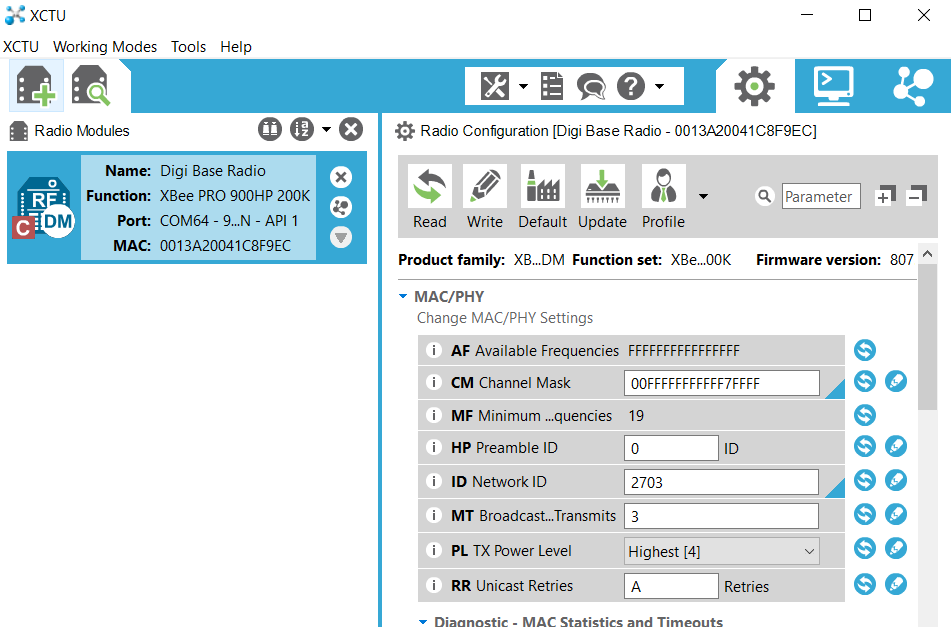
Figure 4: Digi Base Radio detection.
Establish Connection with the X2 Base Station
- Power on the NexSens base station, then click the Link icon next to the Digi Base Radio module to search for the NexSens base station.
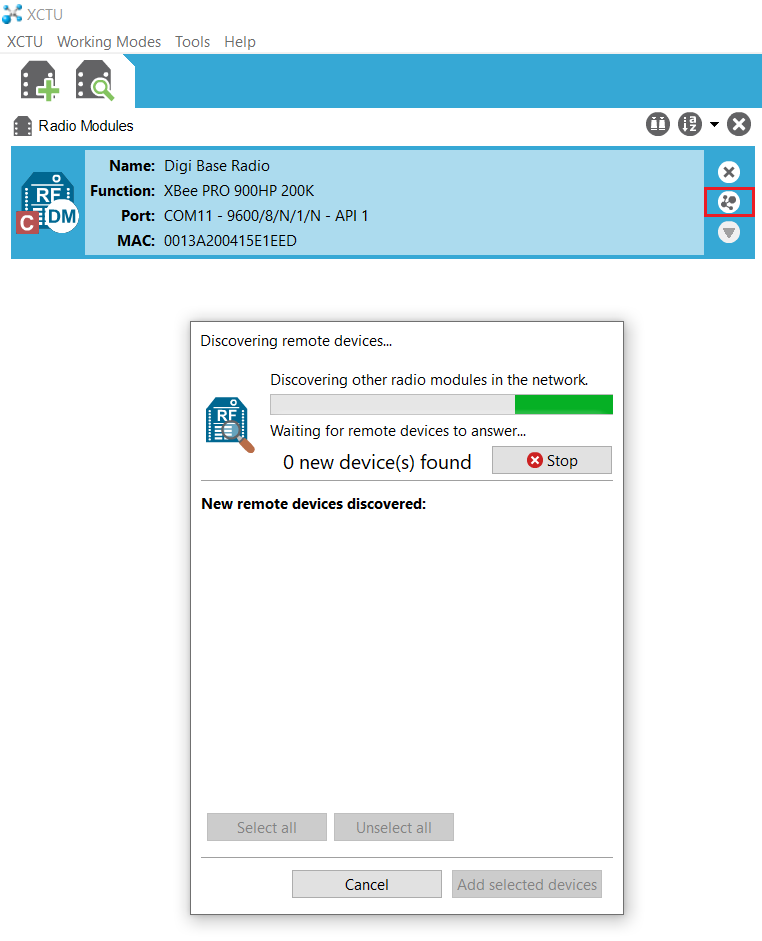
Figure 5: Digi base radio search for NexSens base station.
- Once the NexSens base station is found, select Add selected devices at the bottom of the interface.
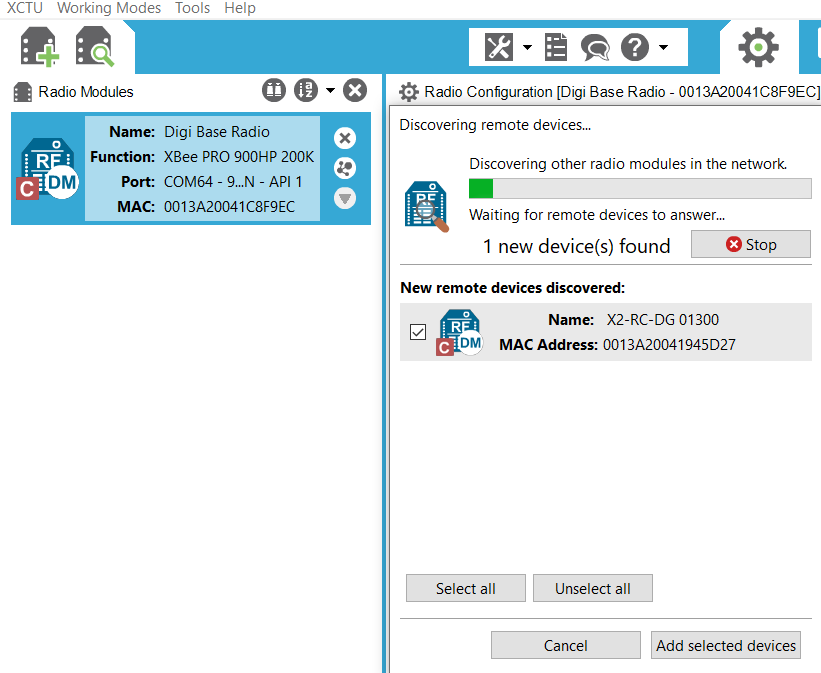
Figure 6: NexSens base station found.
- Open the NexSens base radio settings by selecting the NexSens base station (Example: X2-RC-DG-01300) under the list of radio modules.
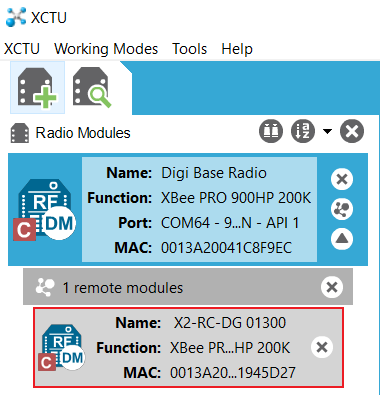
Figure 7: NexSens X2 base radio station.
- Scroll down to the Addressing section, then copy the SH Serial Number High and SL Serial Number Low.
- This is the identifier that will be written into the settings of each field node.

Figure 8: NexSens base radio unique serial number.
- After copying the information, power down the NexSens base station and apply power to all the field radios. Click the Link icon next to the Digi Base Radio module to search for the nodes.
Establish Connection with the Field Nodes
- Once one or all of the field radio nodes are visible, select Add selected devices at the bottom of the interface.
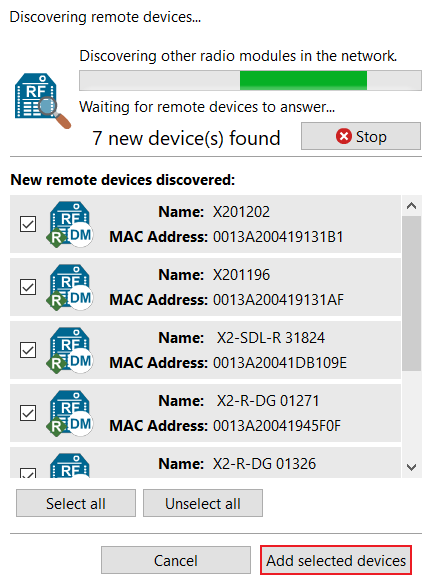
Figure 9: Field devices found.
- A new list of radio modules will then appear below the base station. Once populated, proceed to select one of the new modules to open the module settings.

Figure 10: Read the field radio settings.
- After the settings are completely loaded, scroll down to the Addressing section and insert the identifier copied previously into the DH Destination Address High and DL Destination Address Low.
- Write the new destination to the device by selecting the pencil icon next to the parameter.
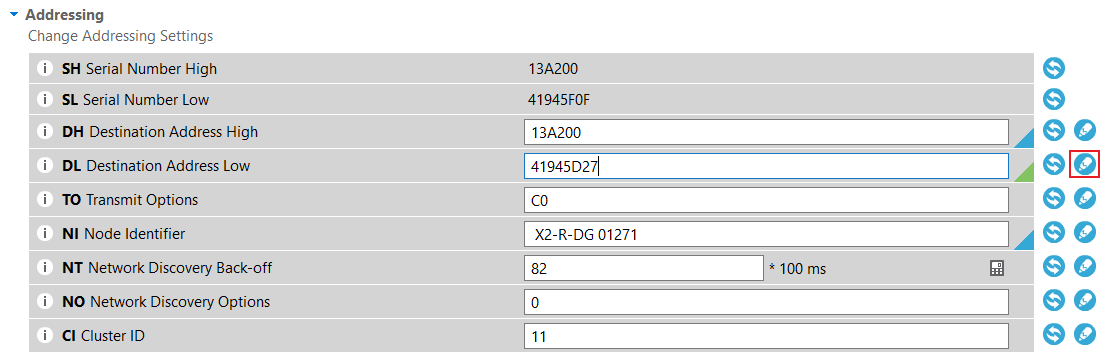
Figure 11: Enter DL Destination Address Low.
- Complete this process for all of the field radio nodes.
Detect Field Radios
- Power down the entire network, including the base station.
- On WQData LIVE, Access the Advanced Device Remote Configuration Tool.
- Scroll to Radio Settings at the bottom of the interface, then choose Yes for the New Value.
- A detect radios command has been sent to the command queue. Once the base station is powered on, it will pull that command and begin to detect the field nodes.

Figure 12: Send the detect radios command.
- Power on all of the field nodes first, and then power on the base station.
- This provides adequate time for the field radio nodes to start transmitting their signal to the base station.
- Once all of the field nodes have been found, they will display in the Radio Settings.
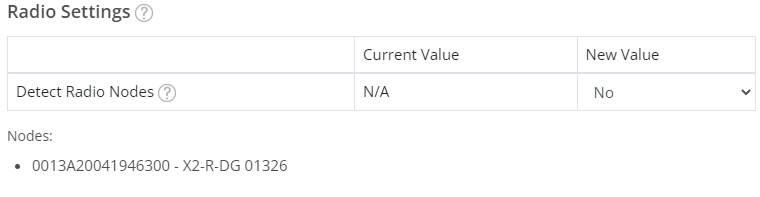
Figure 13: Successful radio detection of node 01326.
- All nodes within the radio network should thereafter contact and push data based on their internal log and transmit intervals.