
NexSens CB-Series Data Buoy Wet-Mate Lid Installation Guide
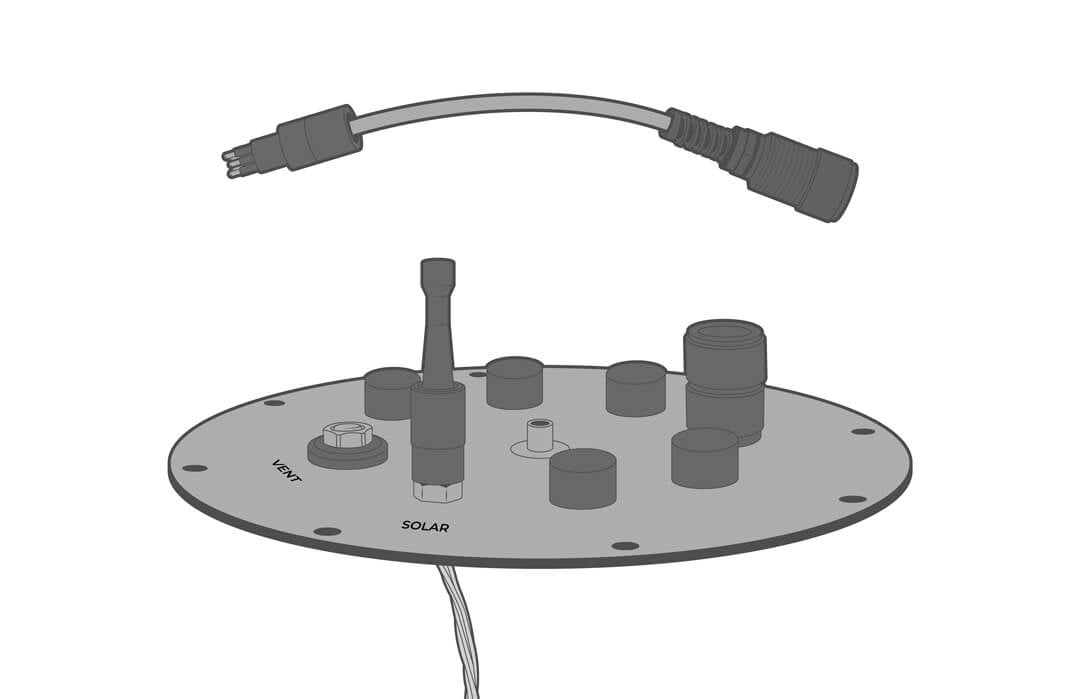
The NexSens Data Buoy Wet-Mate Lid (CB-MCL) allows for the integration of custom electronics onto NexSens CB-Series buoy platforms.
Installation
Custom cables and electronics can be used, but the MCBH bulkhead is designed for secure, wet-mate connections on the CB-MCL. For MCBH installation instructions, see below.
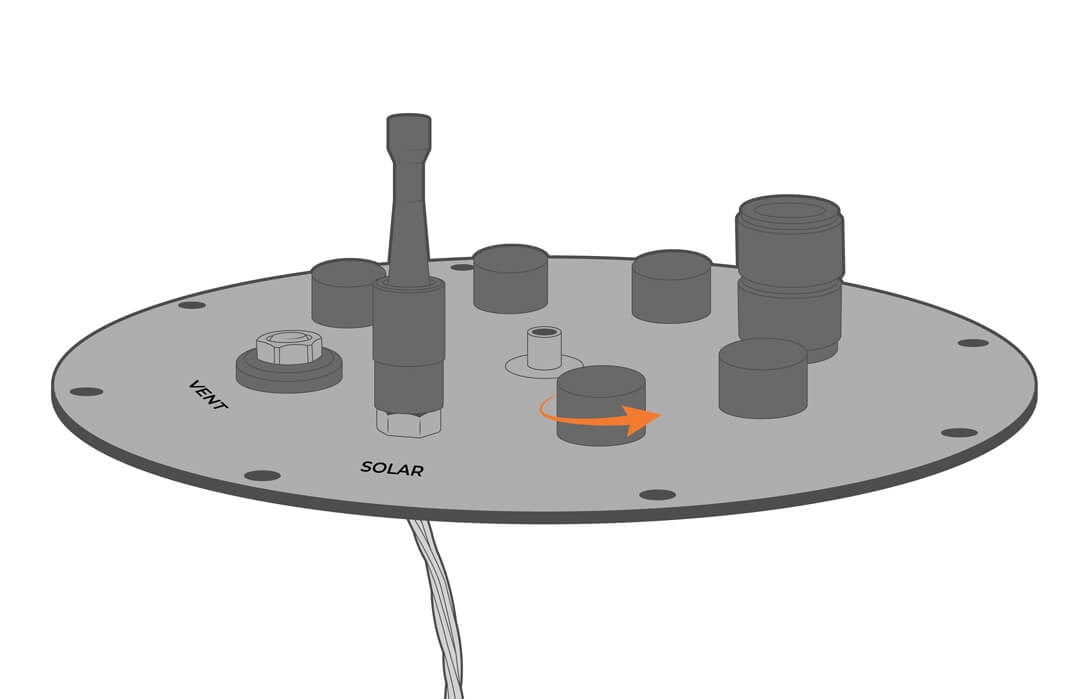
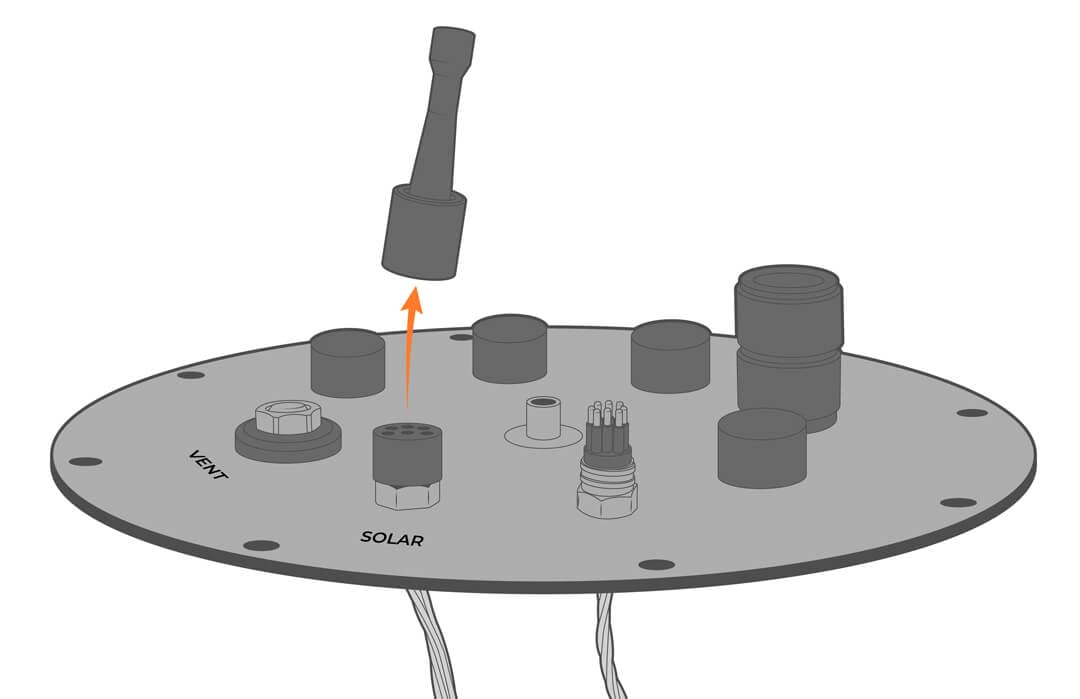
- Remove the cap from the desired port.
- Unthread the connecting hardware from the MCBH cable.
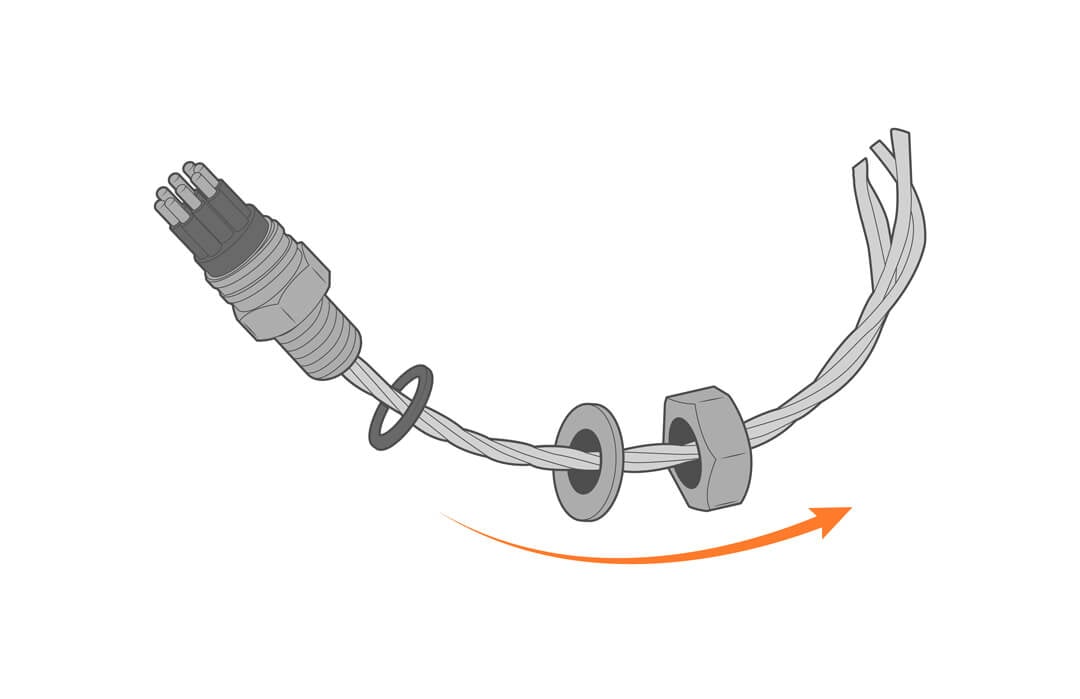
- Route the cable through the lid.

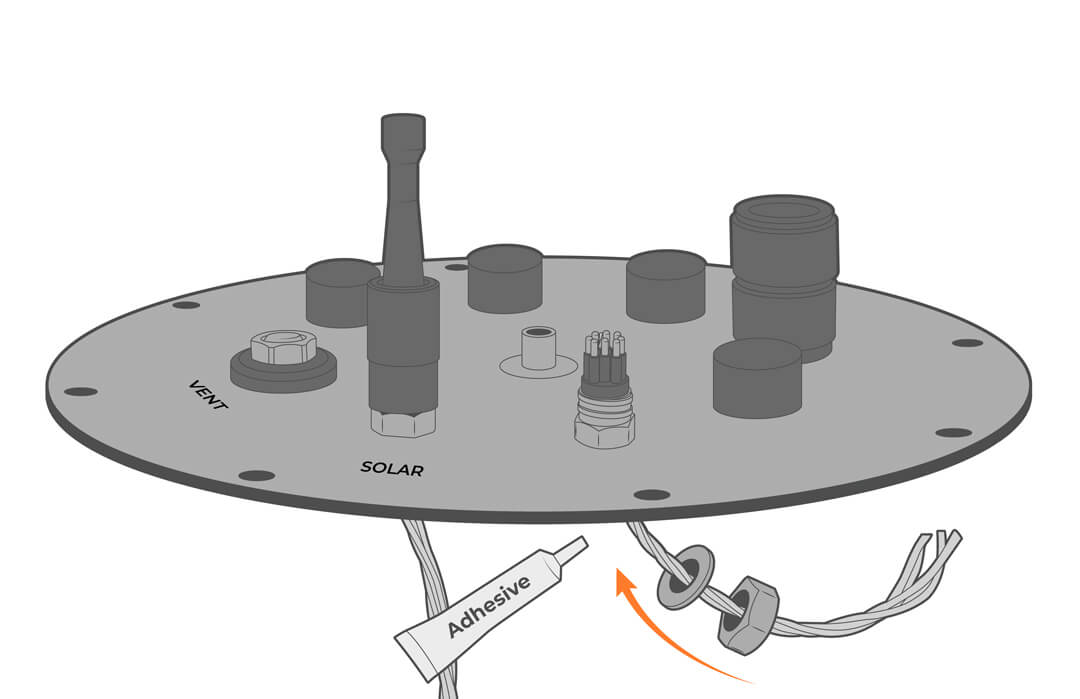
- Tighten the nut and apply adhesive, ensuring that the o-ring is in place
Wiring and Pinout
- Remove the cap from the SOLAR port.
- Plug in the solar adapter cable.
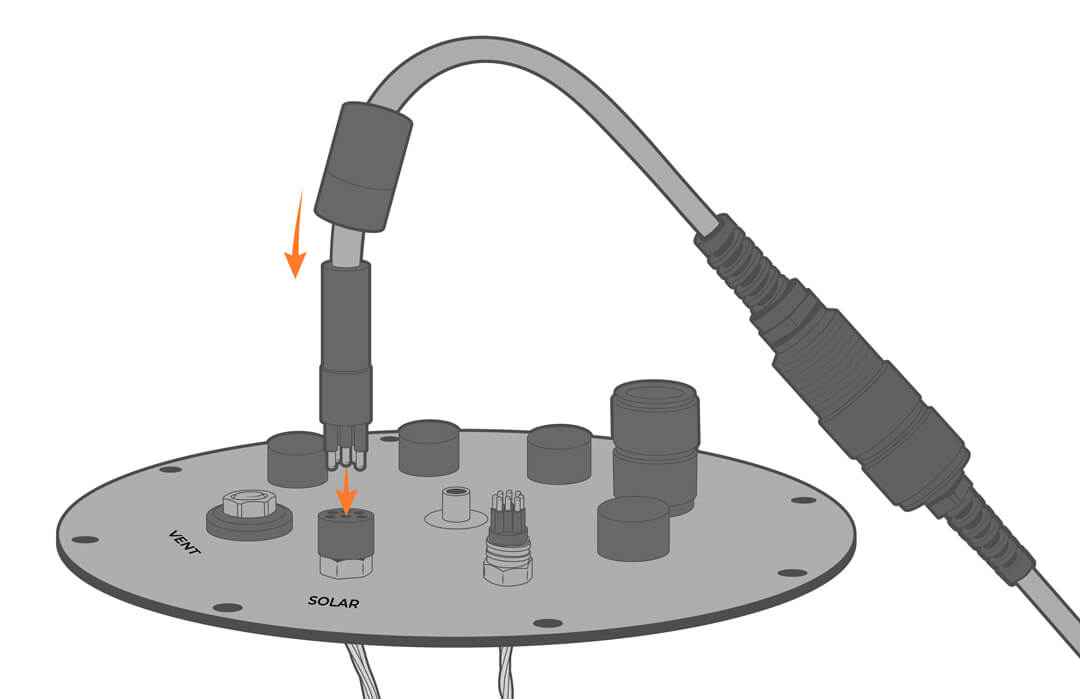
For the solar connector, see wiring below.
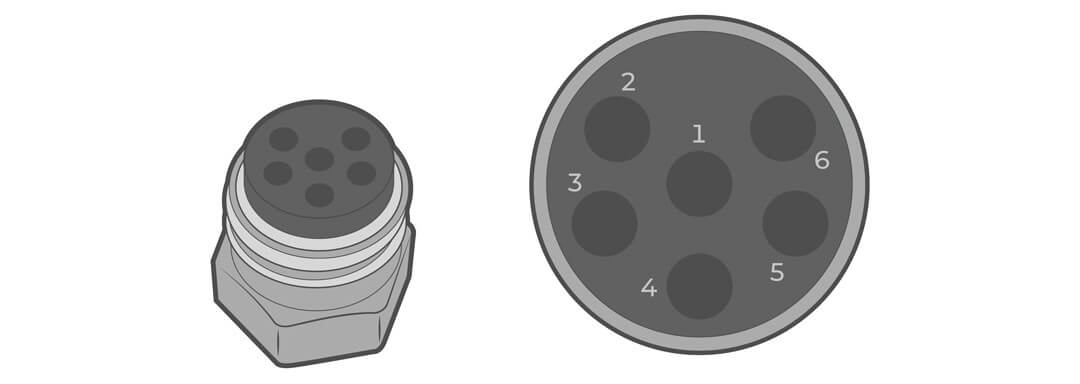
| Receptacle Pin | Wire Color | Description |
| 1 | Orange | Power to the device |
| 2 | Yellow | Solar in |
| 3 | Black (both black wires) | Battery Negative (Ground) |
| 4 | Red (only on molex connector) | Battery Positive |
| 5 | N/C | N/C |
| 6 | N/C | N/C |
- For connection with a NexSens solar tower:
- The solar tower plug is connected to both black wires (ground) and the single yellow wire (power).
- The orange wire and the red flying lead wire are shorted together.