
X2 Desiccant Replacement
Each X2 ships with a bag of desiccant placed underneath the data logger circuit boards. Replace this desiccant bag whenever:
- The X2 enclosure is opened.
- Moisture from condensation appears on the inside surface of the enclosure lid.
- The Internal Humidity diagnostic parameter reads 50% or greater.
Use a desiccant pack provided by NexSens or any other appropriately sized desiccant pack (the included pack is 2.8″x 1″ for reference) as a replacement.
Caution!!!- Be sure to statically ground yourself prior to touching any of the electronics inside the X2 logger!
Desiccant Replacement Process
- Locate the green track wire securing the enclosure lid to the base of the X2.

Figure 1: Locate green wire in the X2 housing.
- Slide tweezers or the tip of the screwdriver packaged with the X2 beneath the wire to expose it.
- Pull the end of the wire while applying pressure to the top of the X2 to remove it from the track. Use tweezers or needle-nose pliers if needed.
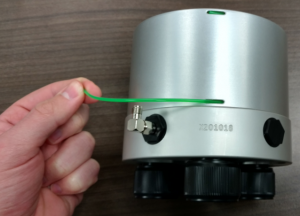
Figure 2: Remove the lid seal wire.
- Pull up on the enclosure lid to separate it from the X2 base, and then set aside.
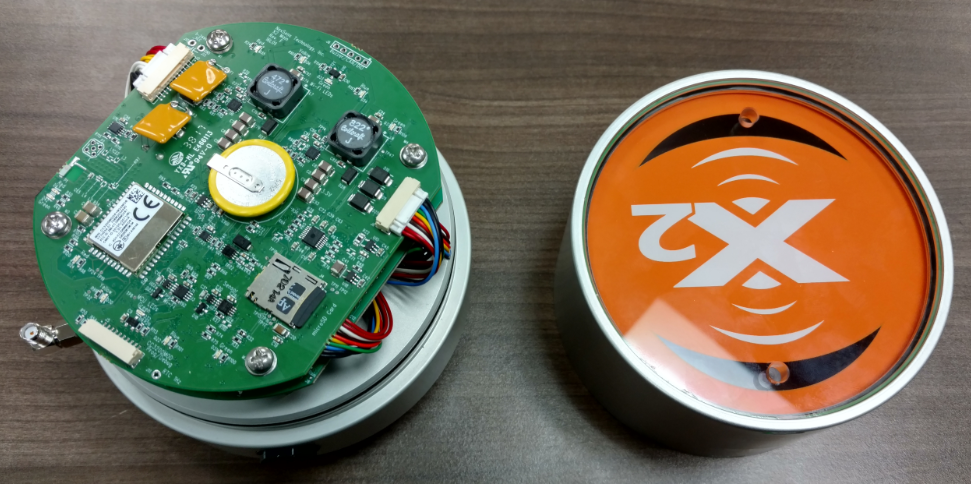
Figure 3: X2 lid removed from its base.
- Locate the old bag of desiccant laying beneath the X2 circuit boards and remove it, using tweezers if necessary.
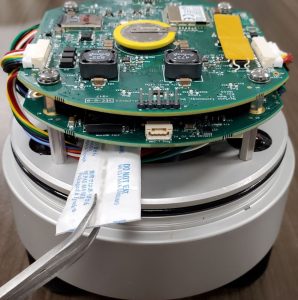
Figure 4: Remove old desiccant bag.
- Place a fresh bag of desiccant in its place.
- Slide the enclosure lid back over top the X2 base, taking care not to pinch any wires when doing so.
- Align the wire entry with the machined body tag on the aluminum base.
- If the 6-pin power port of the X2 contains a blank plug, there should be noticeable upward pressure on the lid when pressing it downward.
- If the 6-pin port is open, air should be heard escaping from the port when the X2 lid is pushed downward.
- Both of these behaviors signify there is a good O-ring seal that will keep moisture out of the logger.
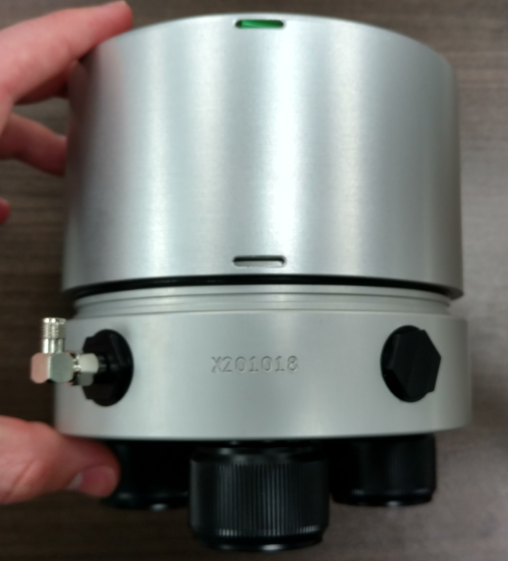
Figure 5: Carefully slide the lid back down onto the X2 base after installing new desiccant.
- Push down on the top of the enclosure, and then feed the wire back into its track. Maintain downward pressure on the lid as needed to keep the track aligned while inserting the wire.
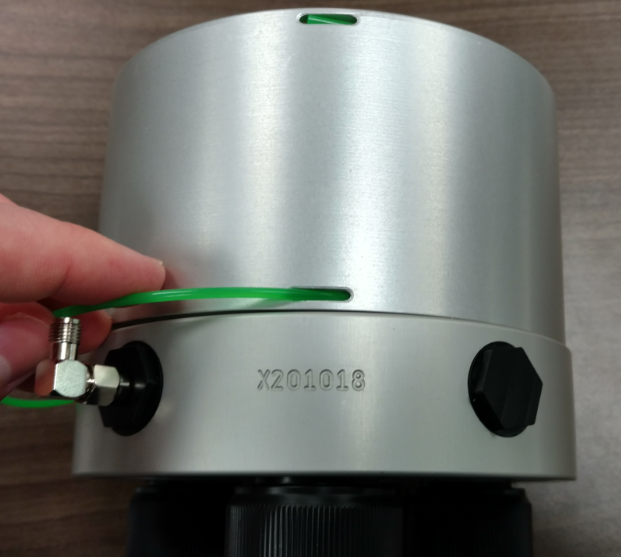
Figure 6: Reinsert the enclosure wire back into the lower track.