
Access the RTU SD card in an X2-SDL data logger
Follow the article below to access the RTU SD card within an X2-SDL data logger.
Caution!!!- Be sure to statically ground yourself prior to touching any of the electronics inside the X2-SDL logger or the SD card itself
Tools Required:
– 3/16″ Ball-Point Hex Driver (included in logger maintenance kit)
-3/16″ Nut driver
-Phillips Screw Driver
- Use the 3/16″ hex driver to remove the four screws on the bottom bulkhead of the X2-SDL (opposite the white battery lid).
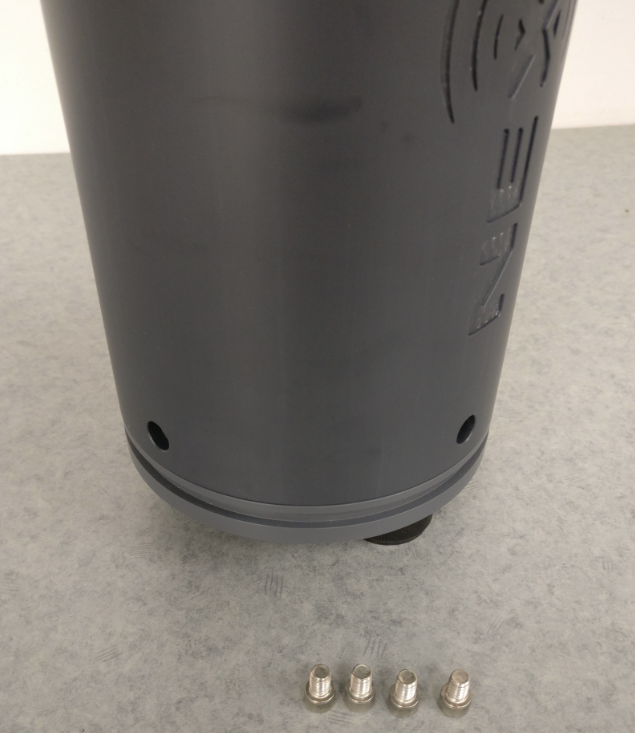
Removal of the four bottom screws.
- Carefully pull the bottom bulkhead off of the X2-SDL.
- Note that two connections for the battery and RF antenna (on cellular models) will be connected to the main body and can be damaged if pulled abruptly.

Remove the bottom X2-SDL bulkhead.
- Locate and remove the four Phillips-head screws and lock-washers holding the RTU board to the main board below it.
- Gently lift up on the RTU to disconnect the board to board connection with the main board.
- Ensure to grab from the sides of the board and lift up evenly.
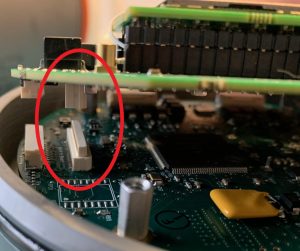
Board to board connection between the RTU board (top) and the main board (bottom).
- The RTU SD card is located underneath the RTU board, opposite the side of the board to board connector.
- Gently push in on the SD card and it will pop out upon release.
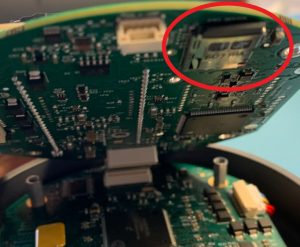
RTU SD card location.
- Use an SD card reader to download and transfer files from the SD card.
- Once the appropriate files are transferred, reconnect the RTU board, screw down the pan head screws, and reconnect the battery cable and RF antenna.
- It is recommend to apply O-ring grease before reconnecting the bulkhead to the SDL tube.