
Remove an X2-CB for repair
If an X2-CB data logger needs to be sent in for evaluation or repair, please reference the following steps for removal:
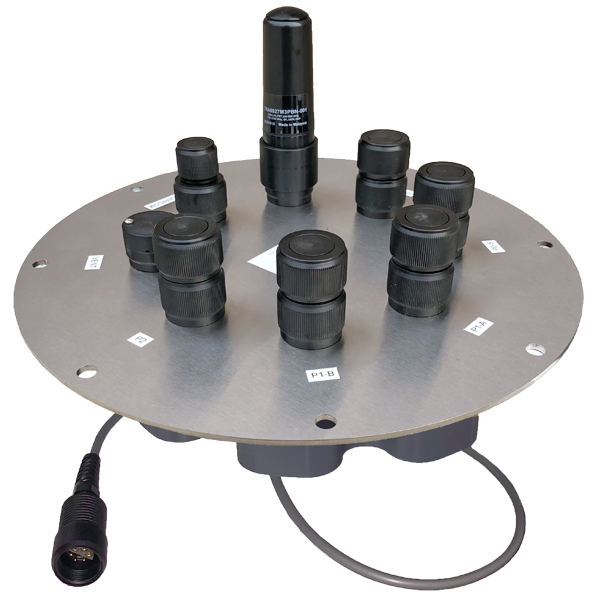
Figure 1: X2-CB data logger.
Tools Required
- 9/16″ Socket Wrench
Instructions
- Disconnect the 6-pin solar panel or UW-6 USB cable from the X2-CB/X2-CBMC SOLAR/COM port to remove power from the data logger.
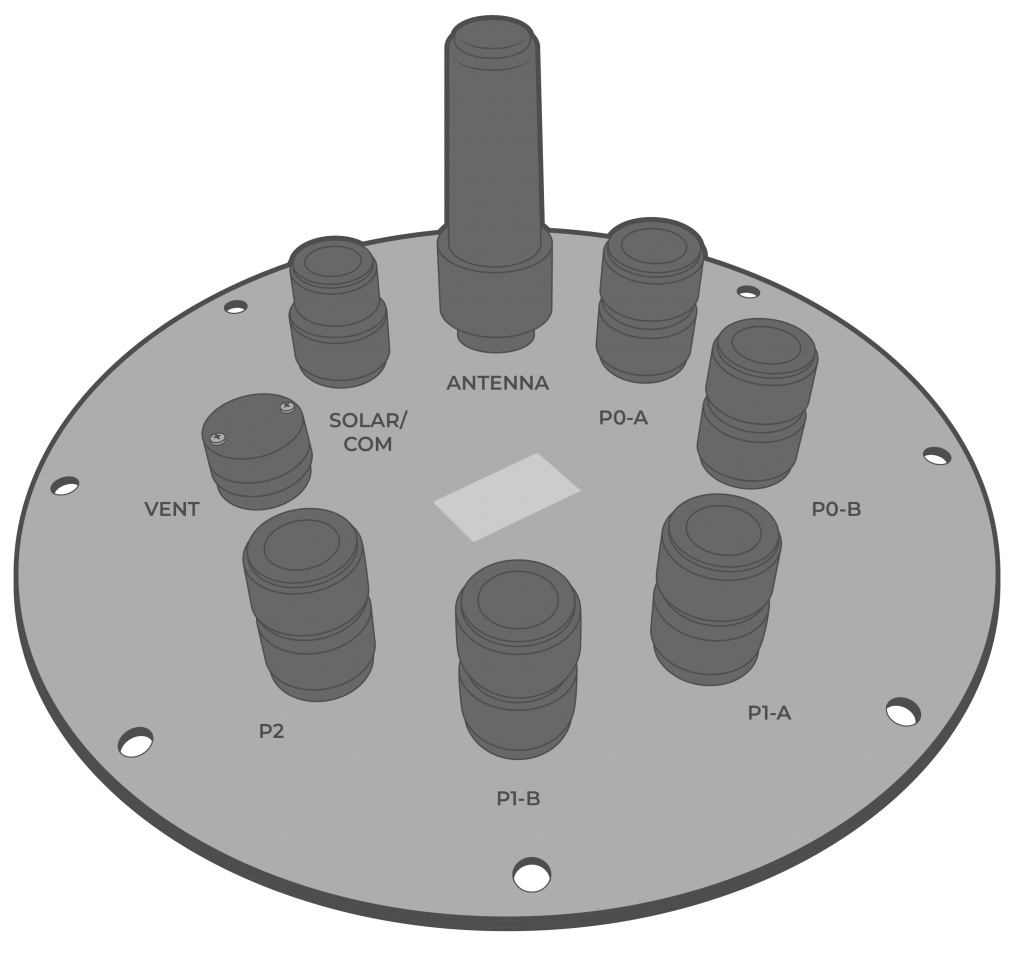
Figure 2: X2-CB port configuration. |
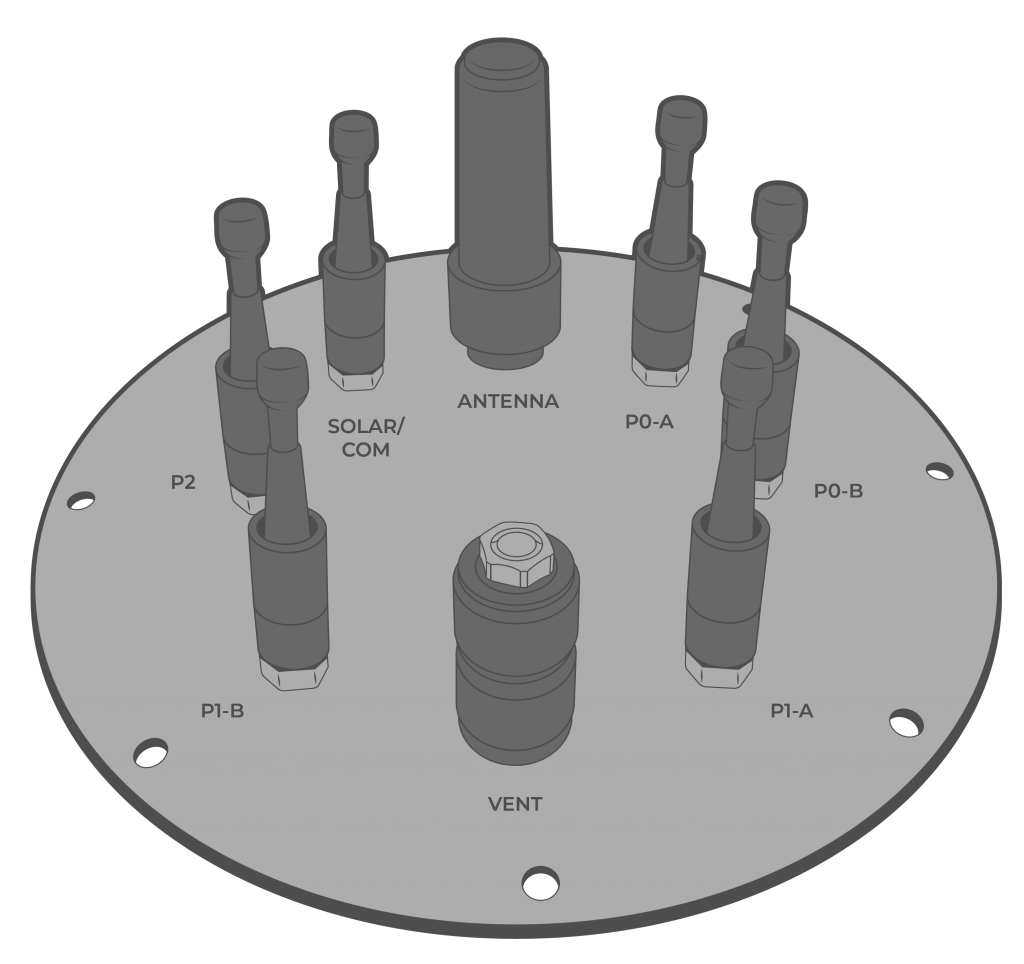
Figure 3: X2-CBMC port configuration. |
- [For CB-150/250/450 buoys only] Use a 9/16″ socket wrench to remove the (6) bolts holding the buoy’s solar tower to access the data well.
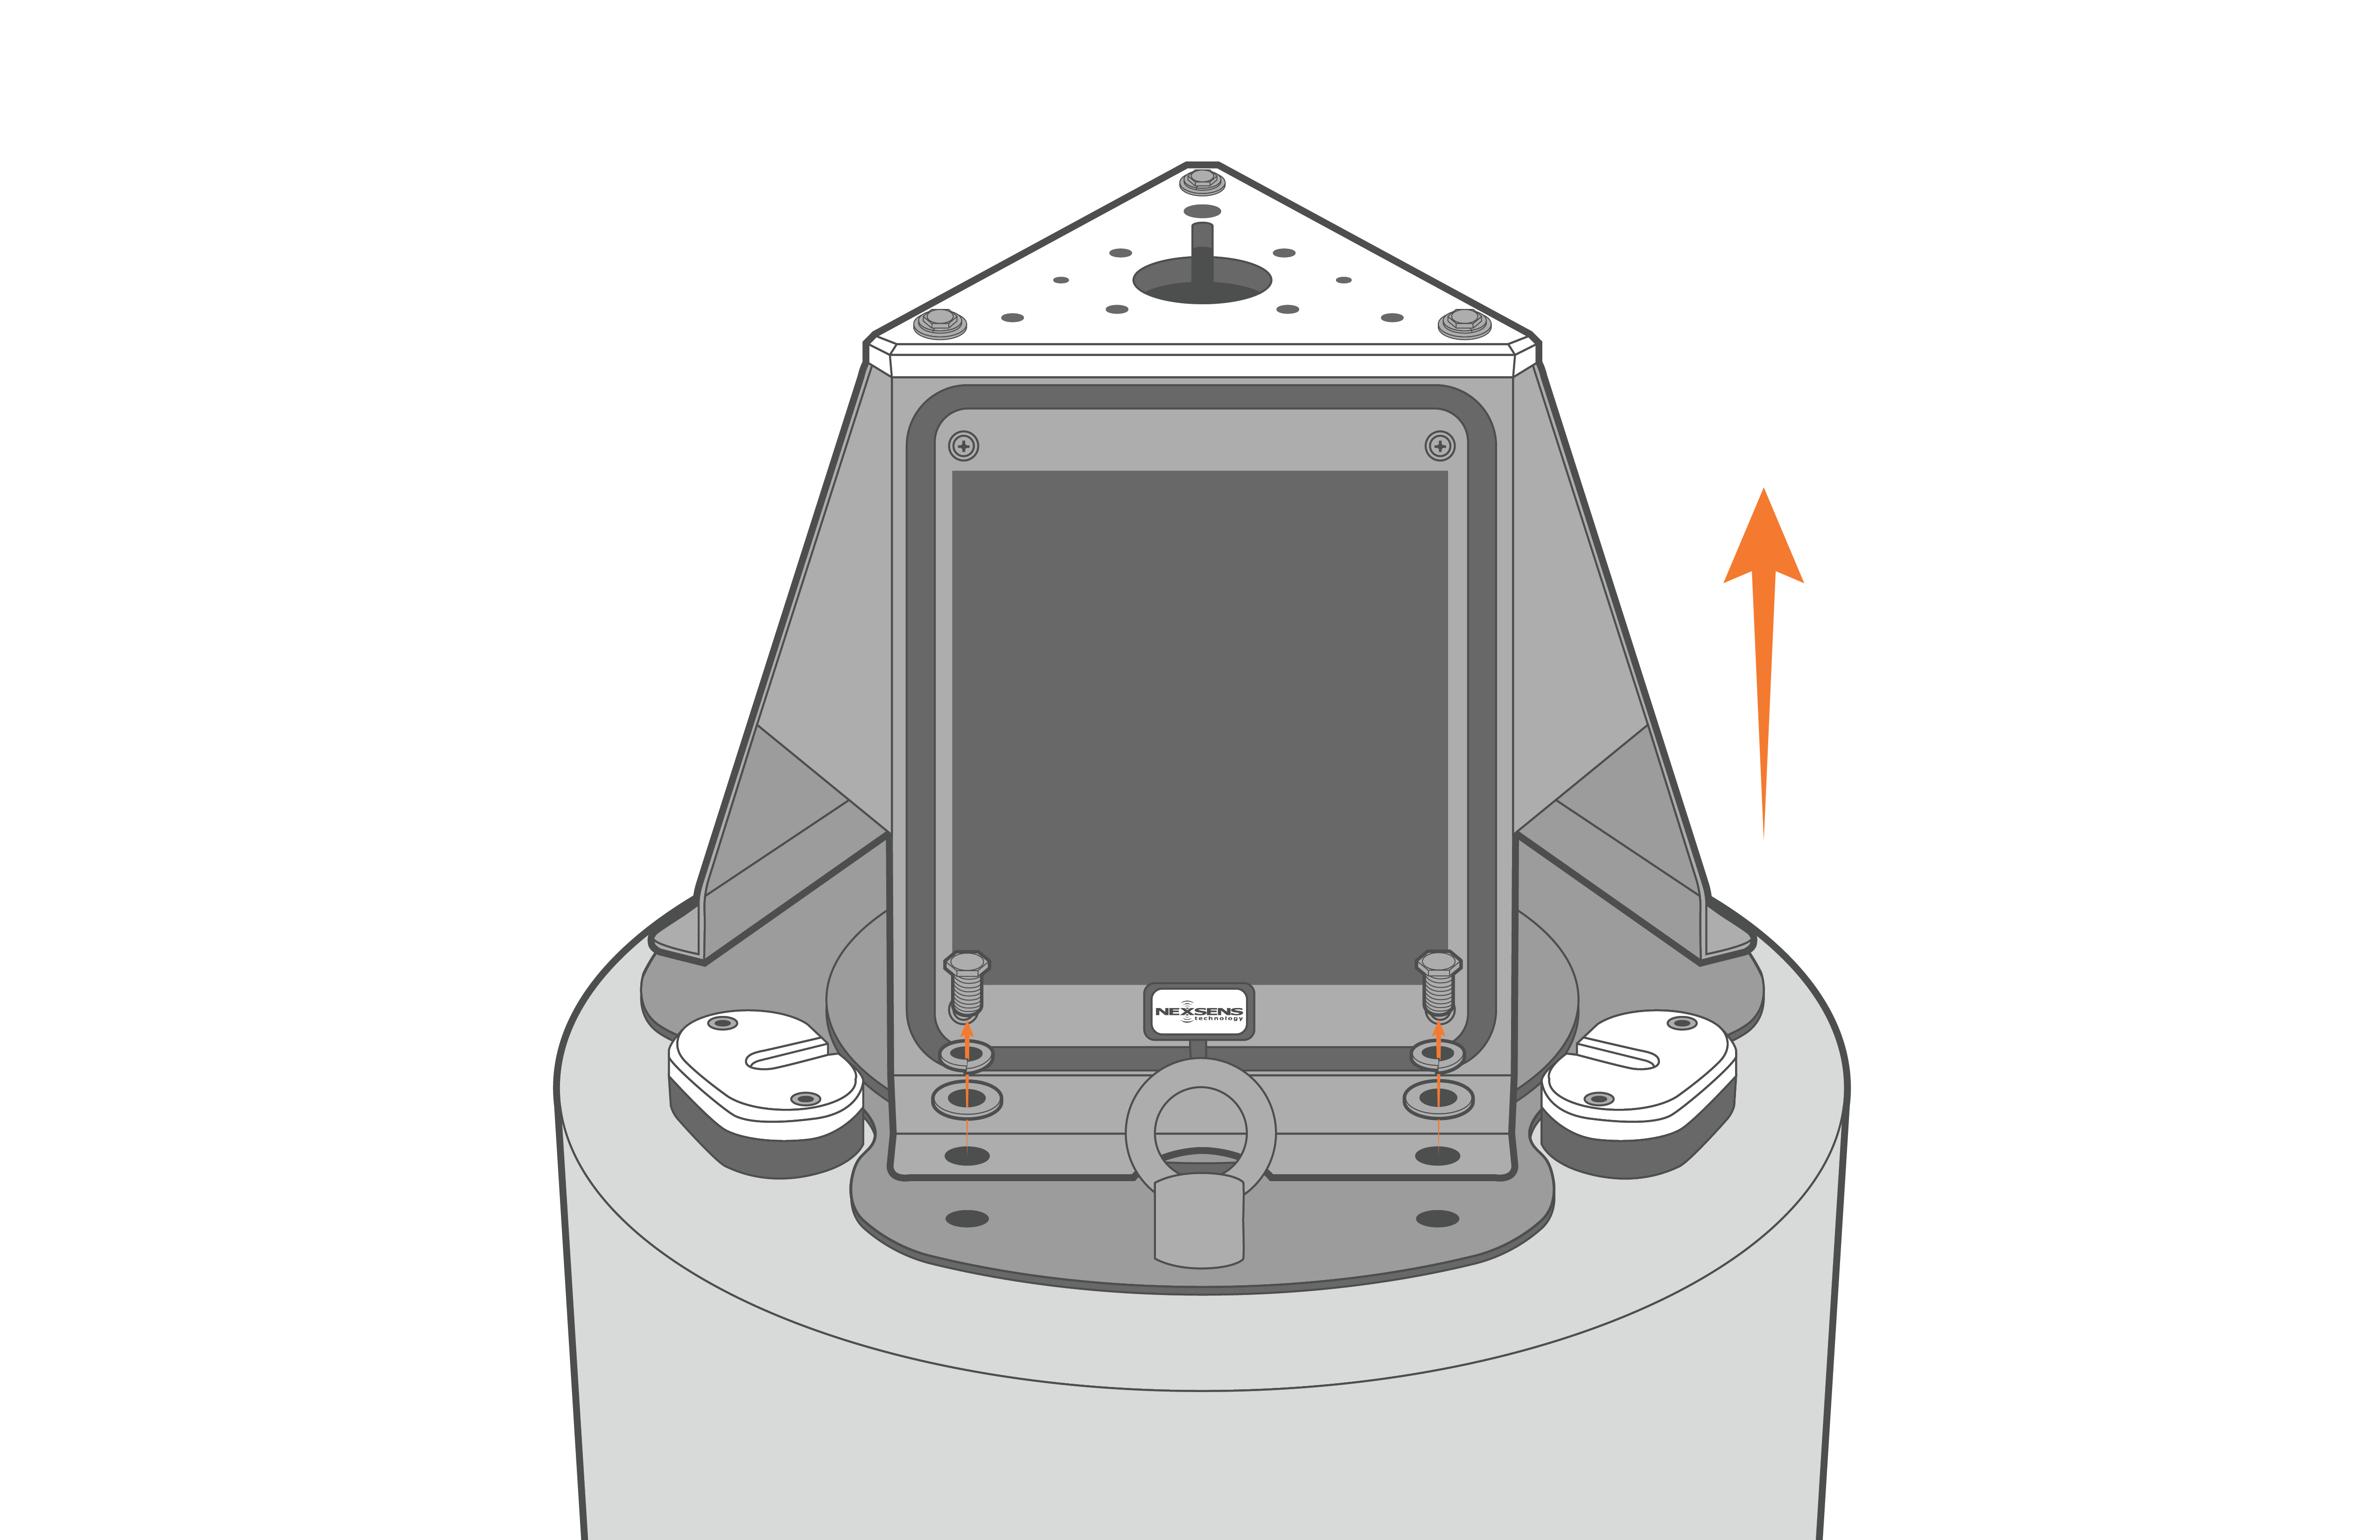
Figure 4: Remove solar tower from CB-150/250/450 buoys.
- Remove the (8) bolts from the X2-CB/X2-CBMC using a 9/16″ socket wrench.
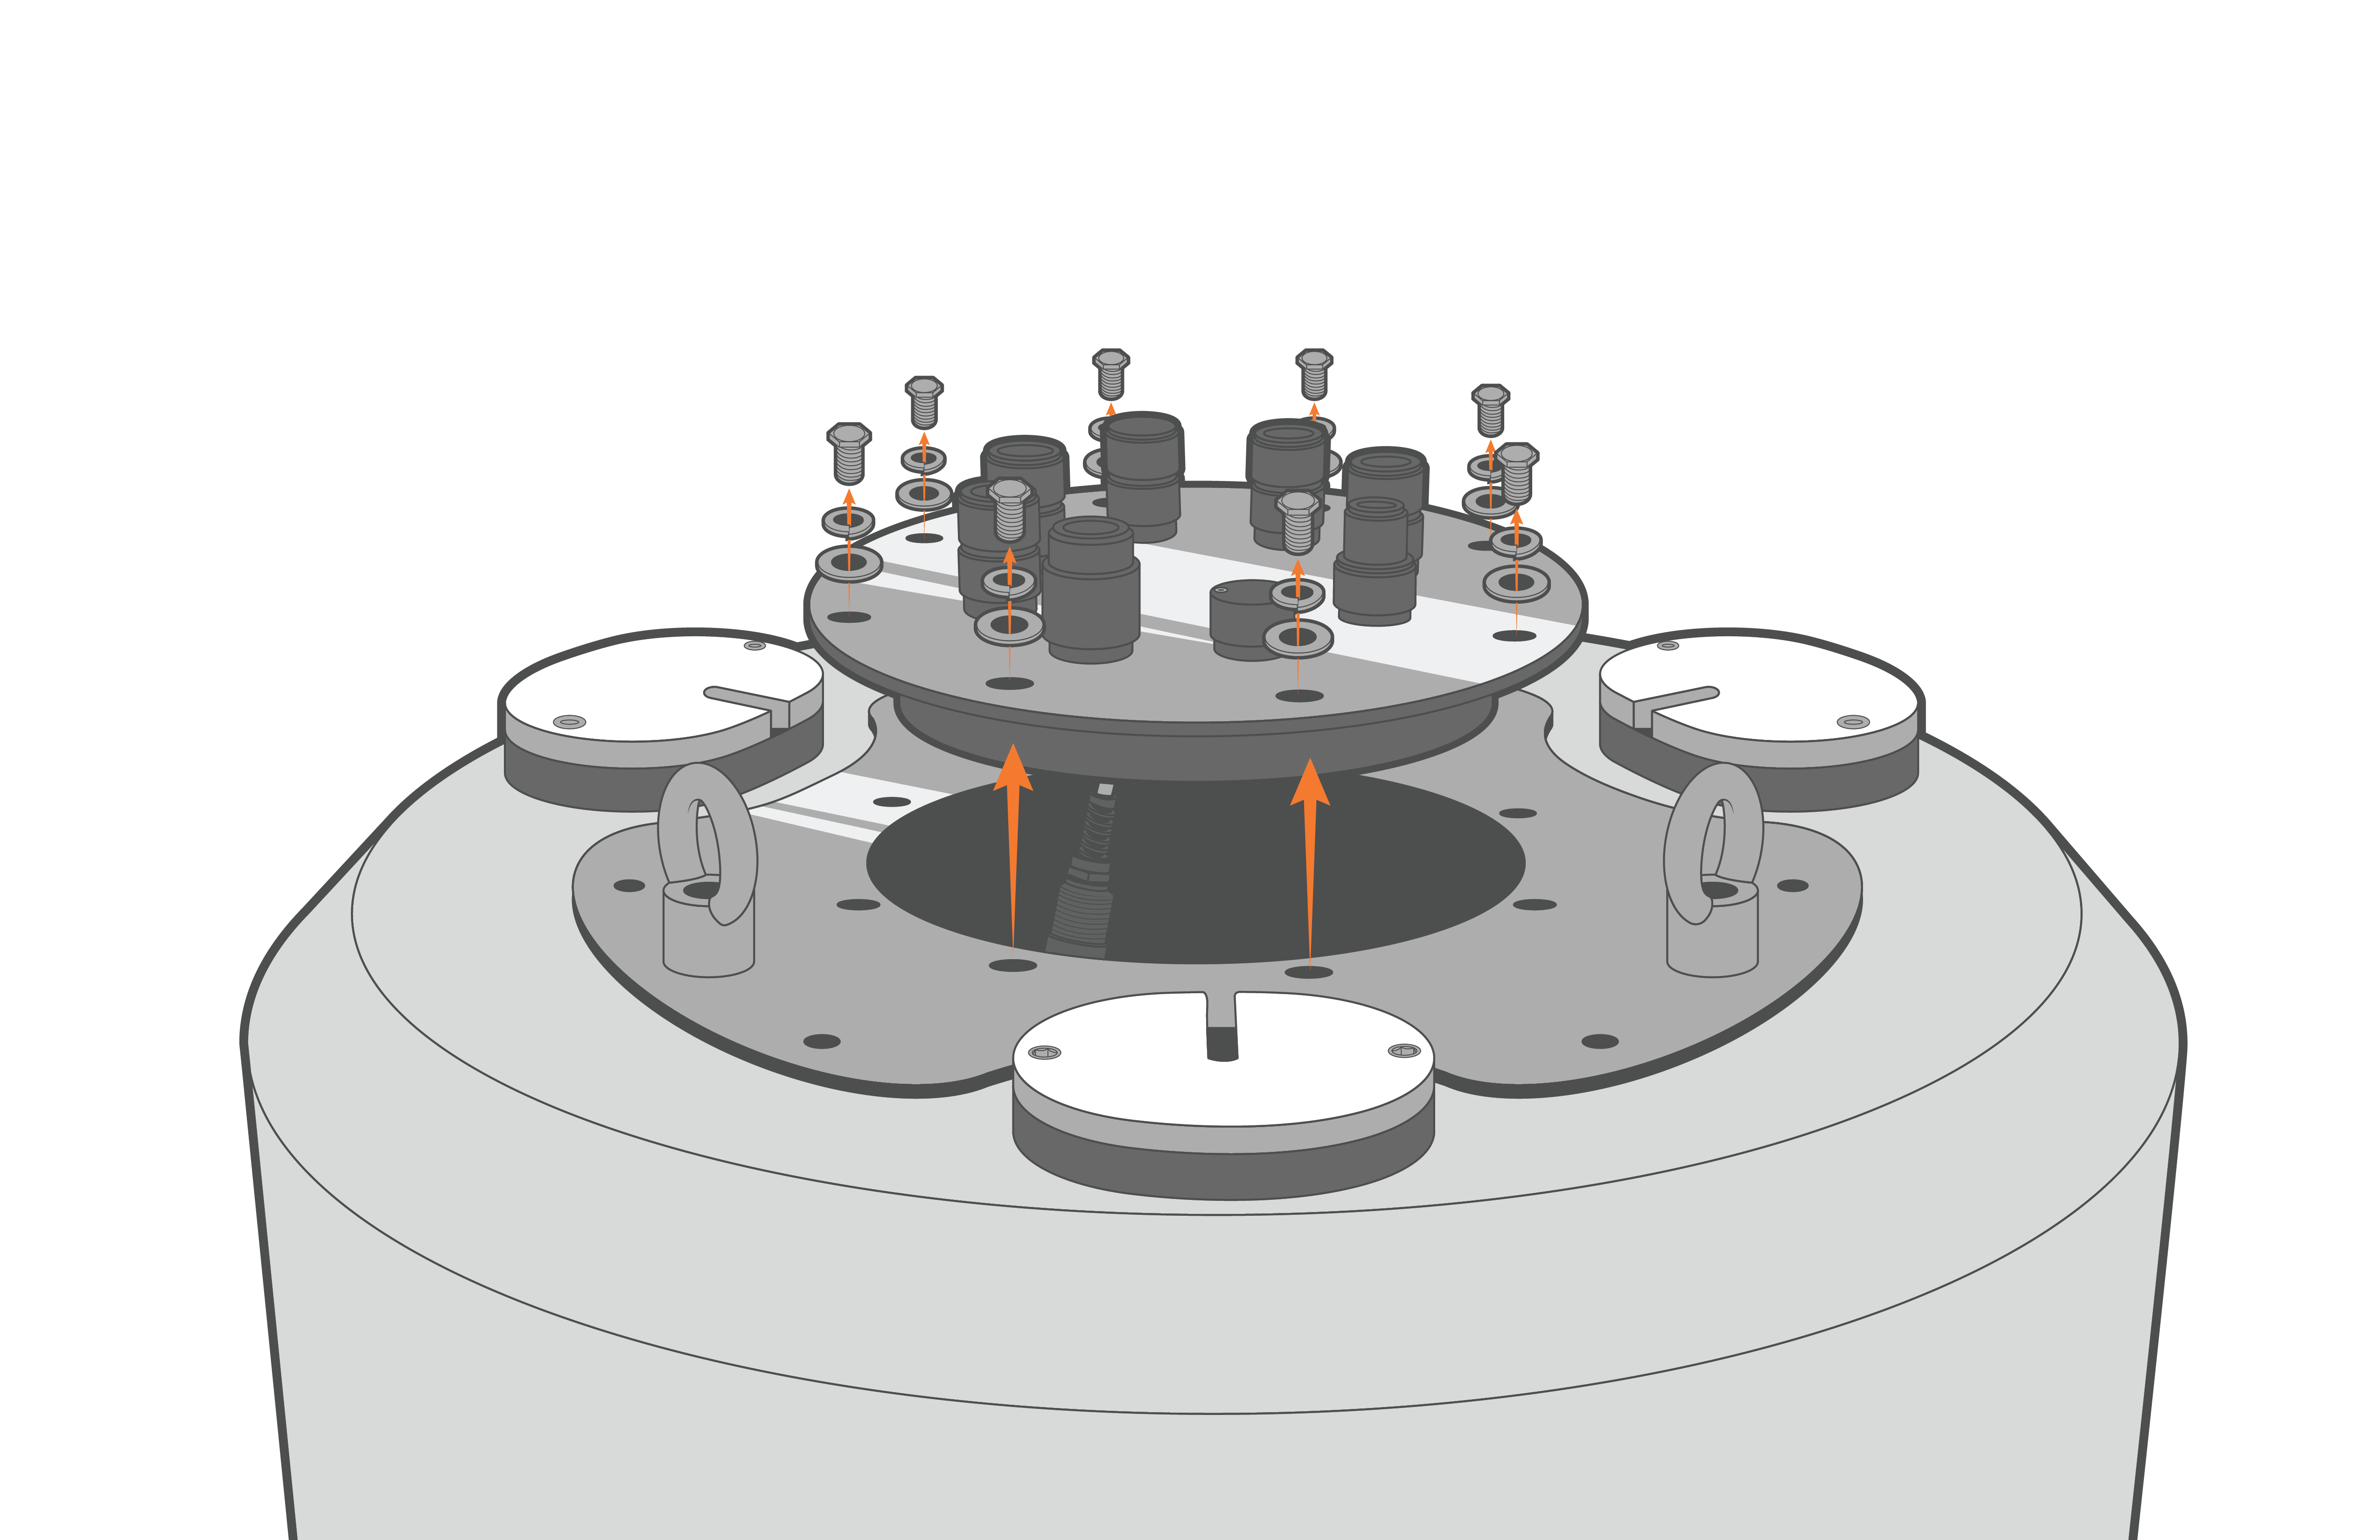
Figure 5: X2-CB removal from CB-150/250/450 buoys. |
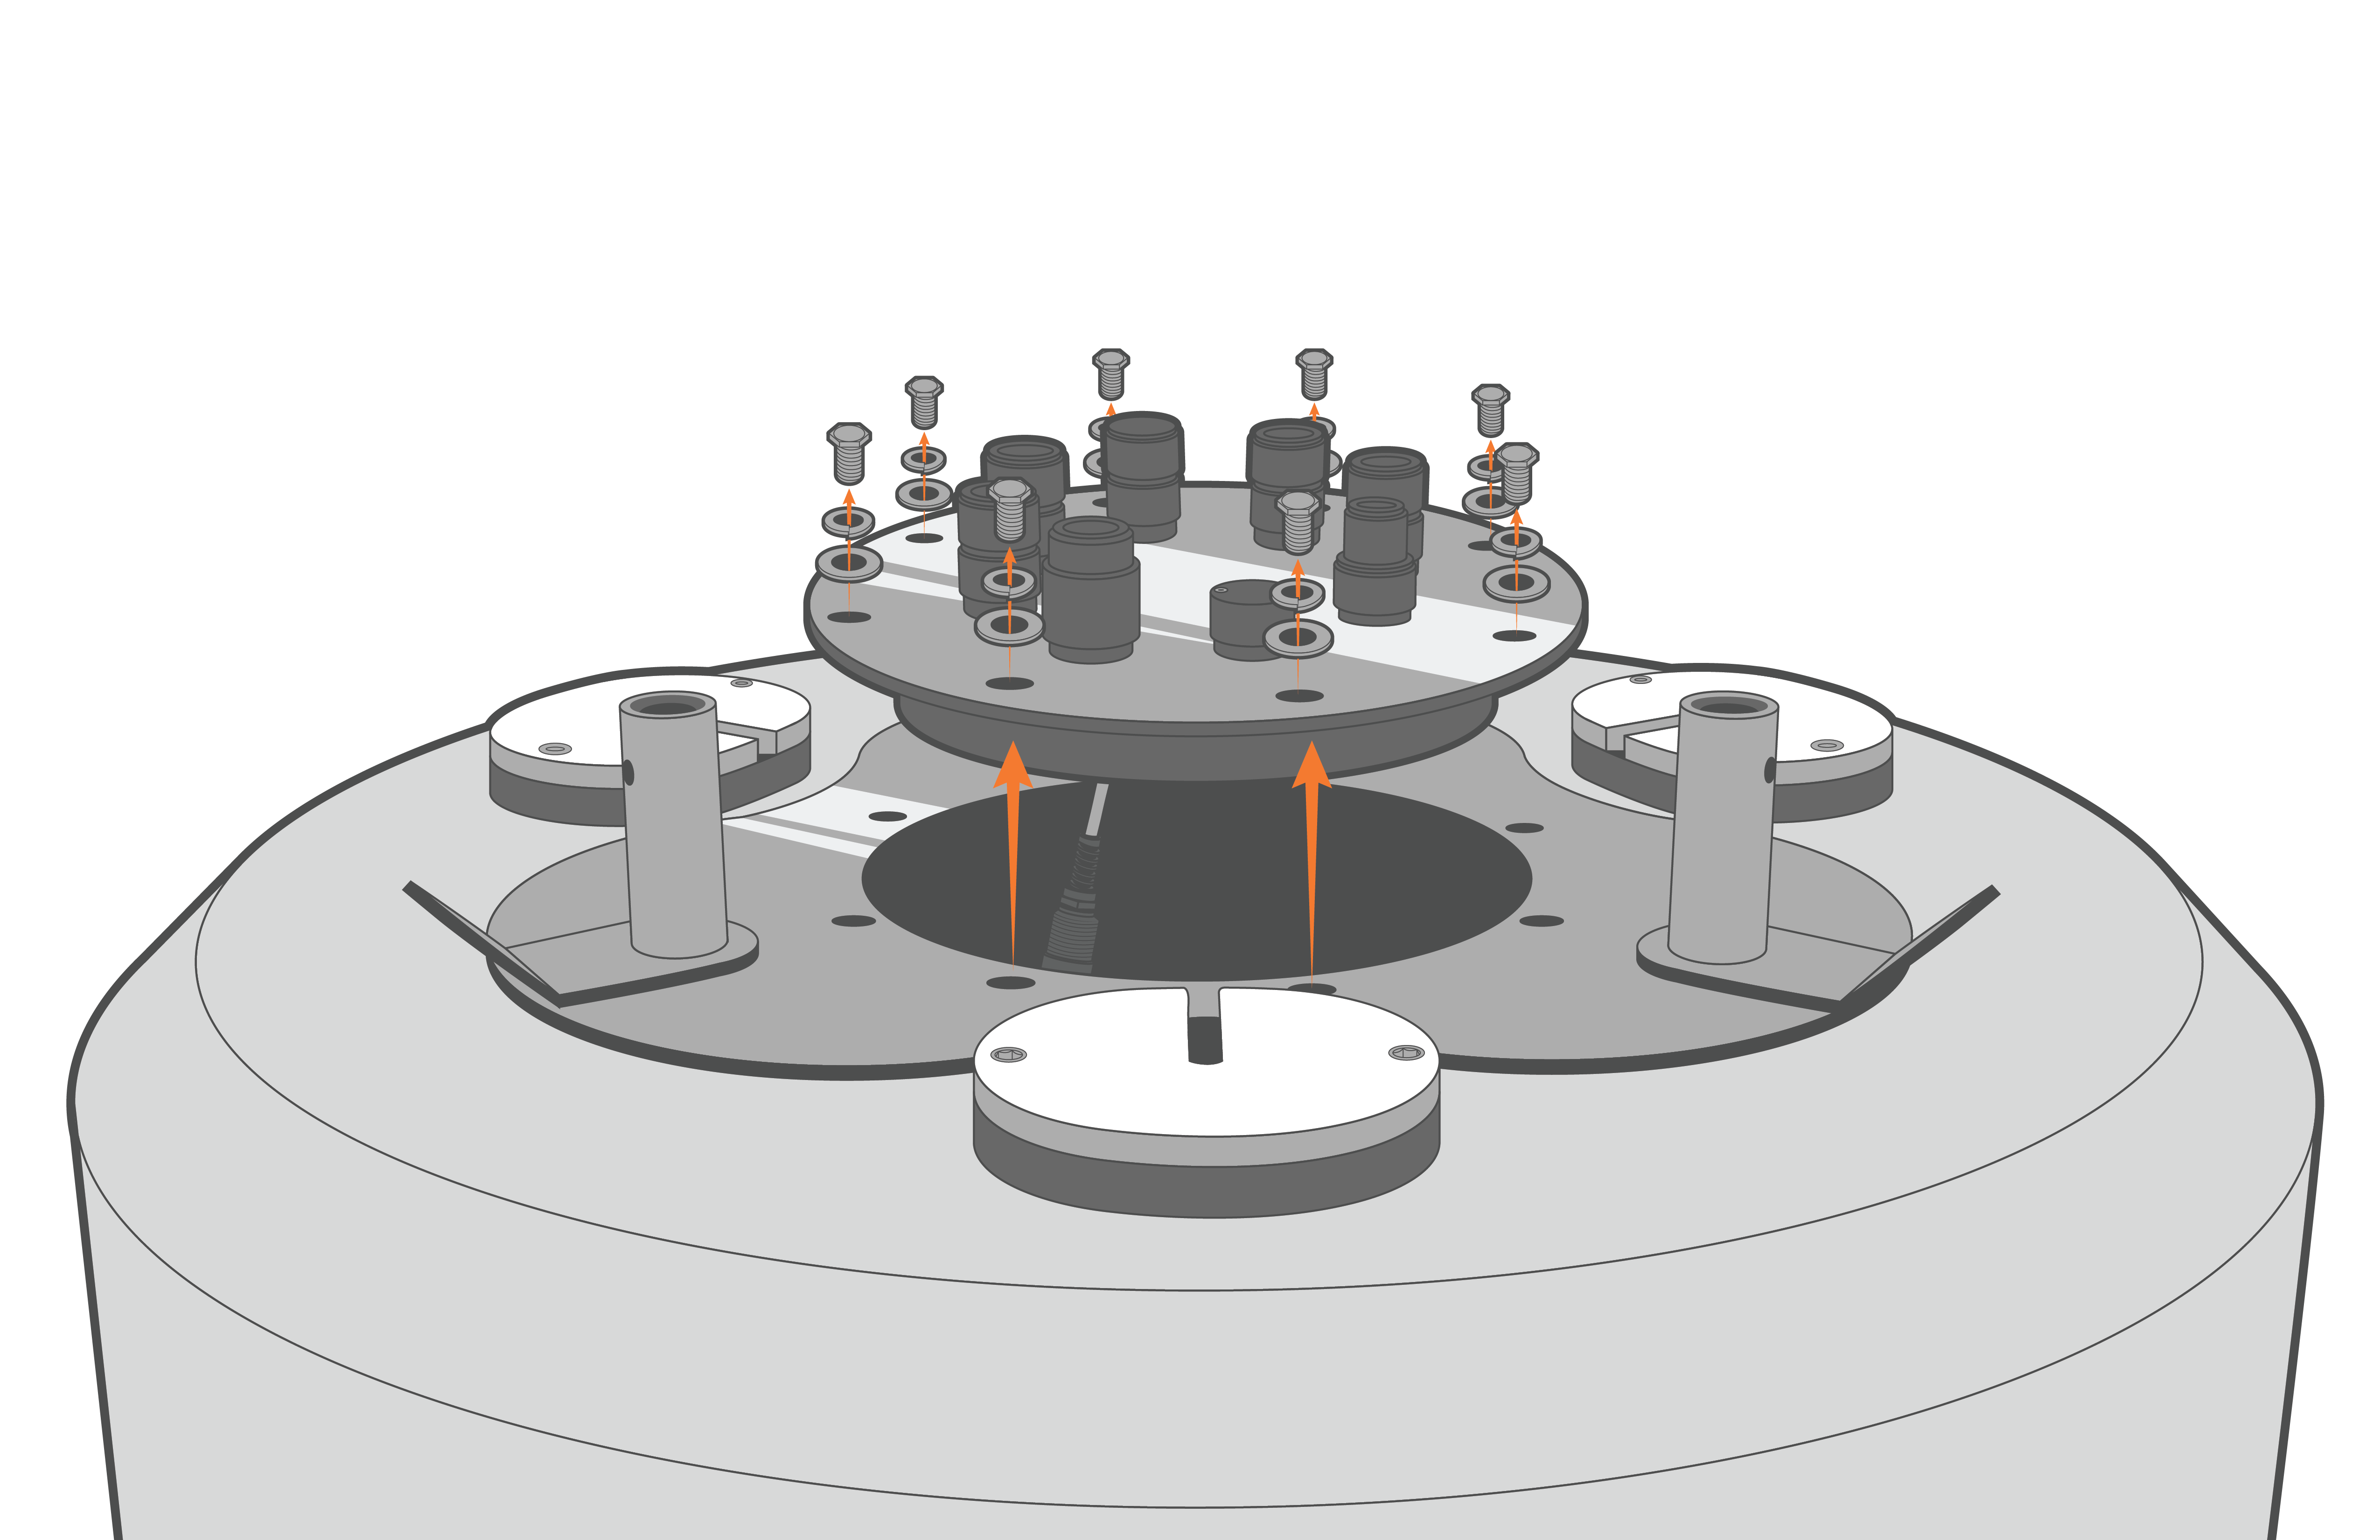
Figure 6: X2-CB removal from CB-650/950/1250 buoys. |
- Lift up the logger and then disconnect the 6-pin plug connecting the battery harness to the bottom cable of the X2 logger.
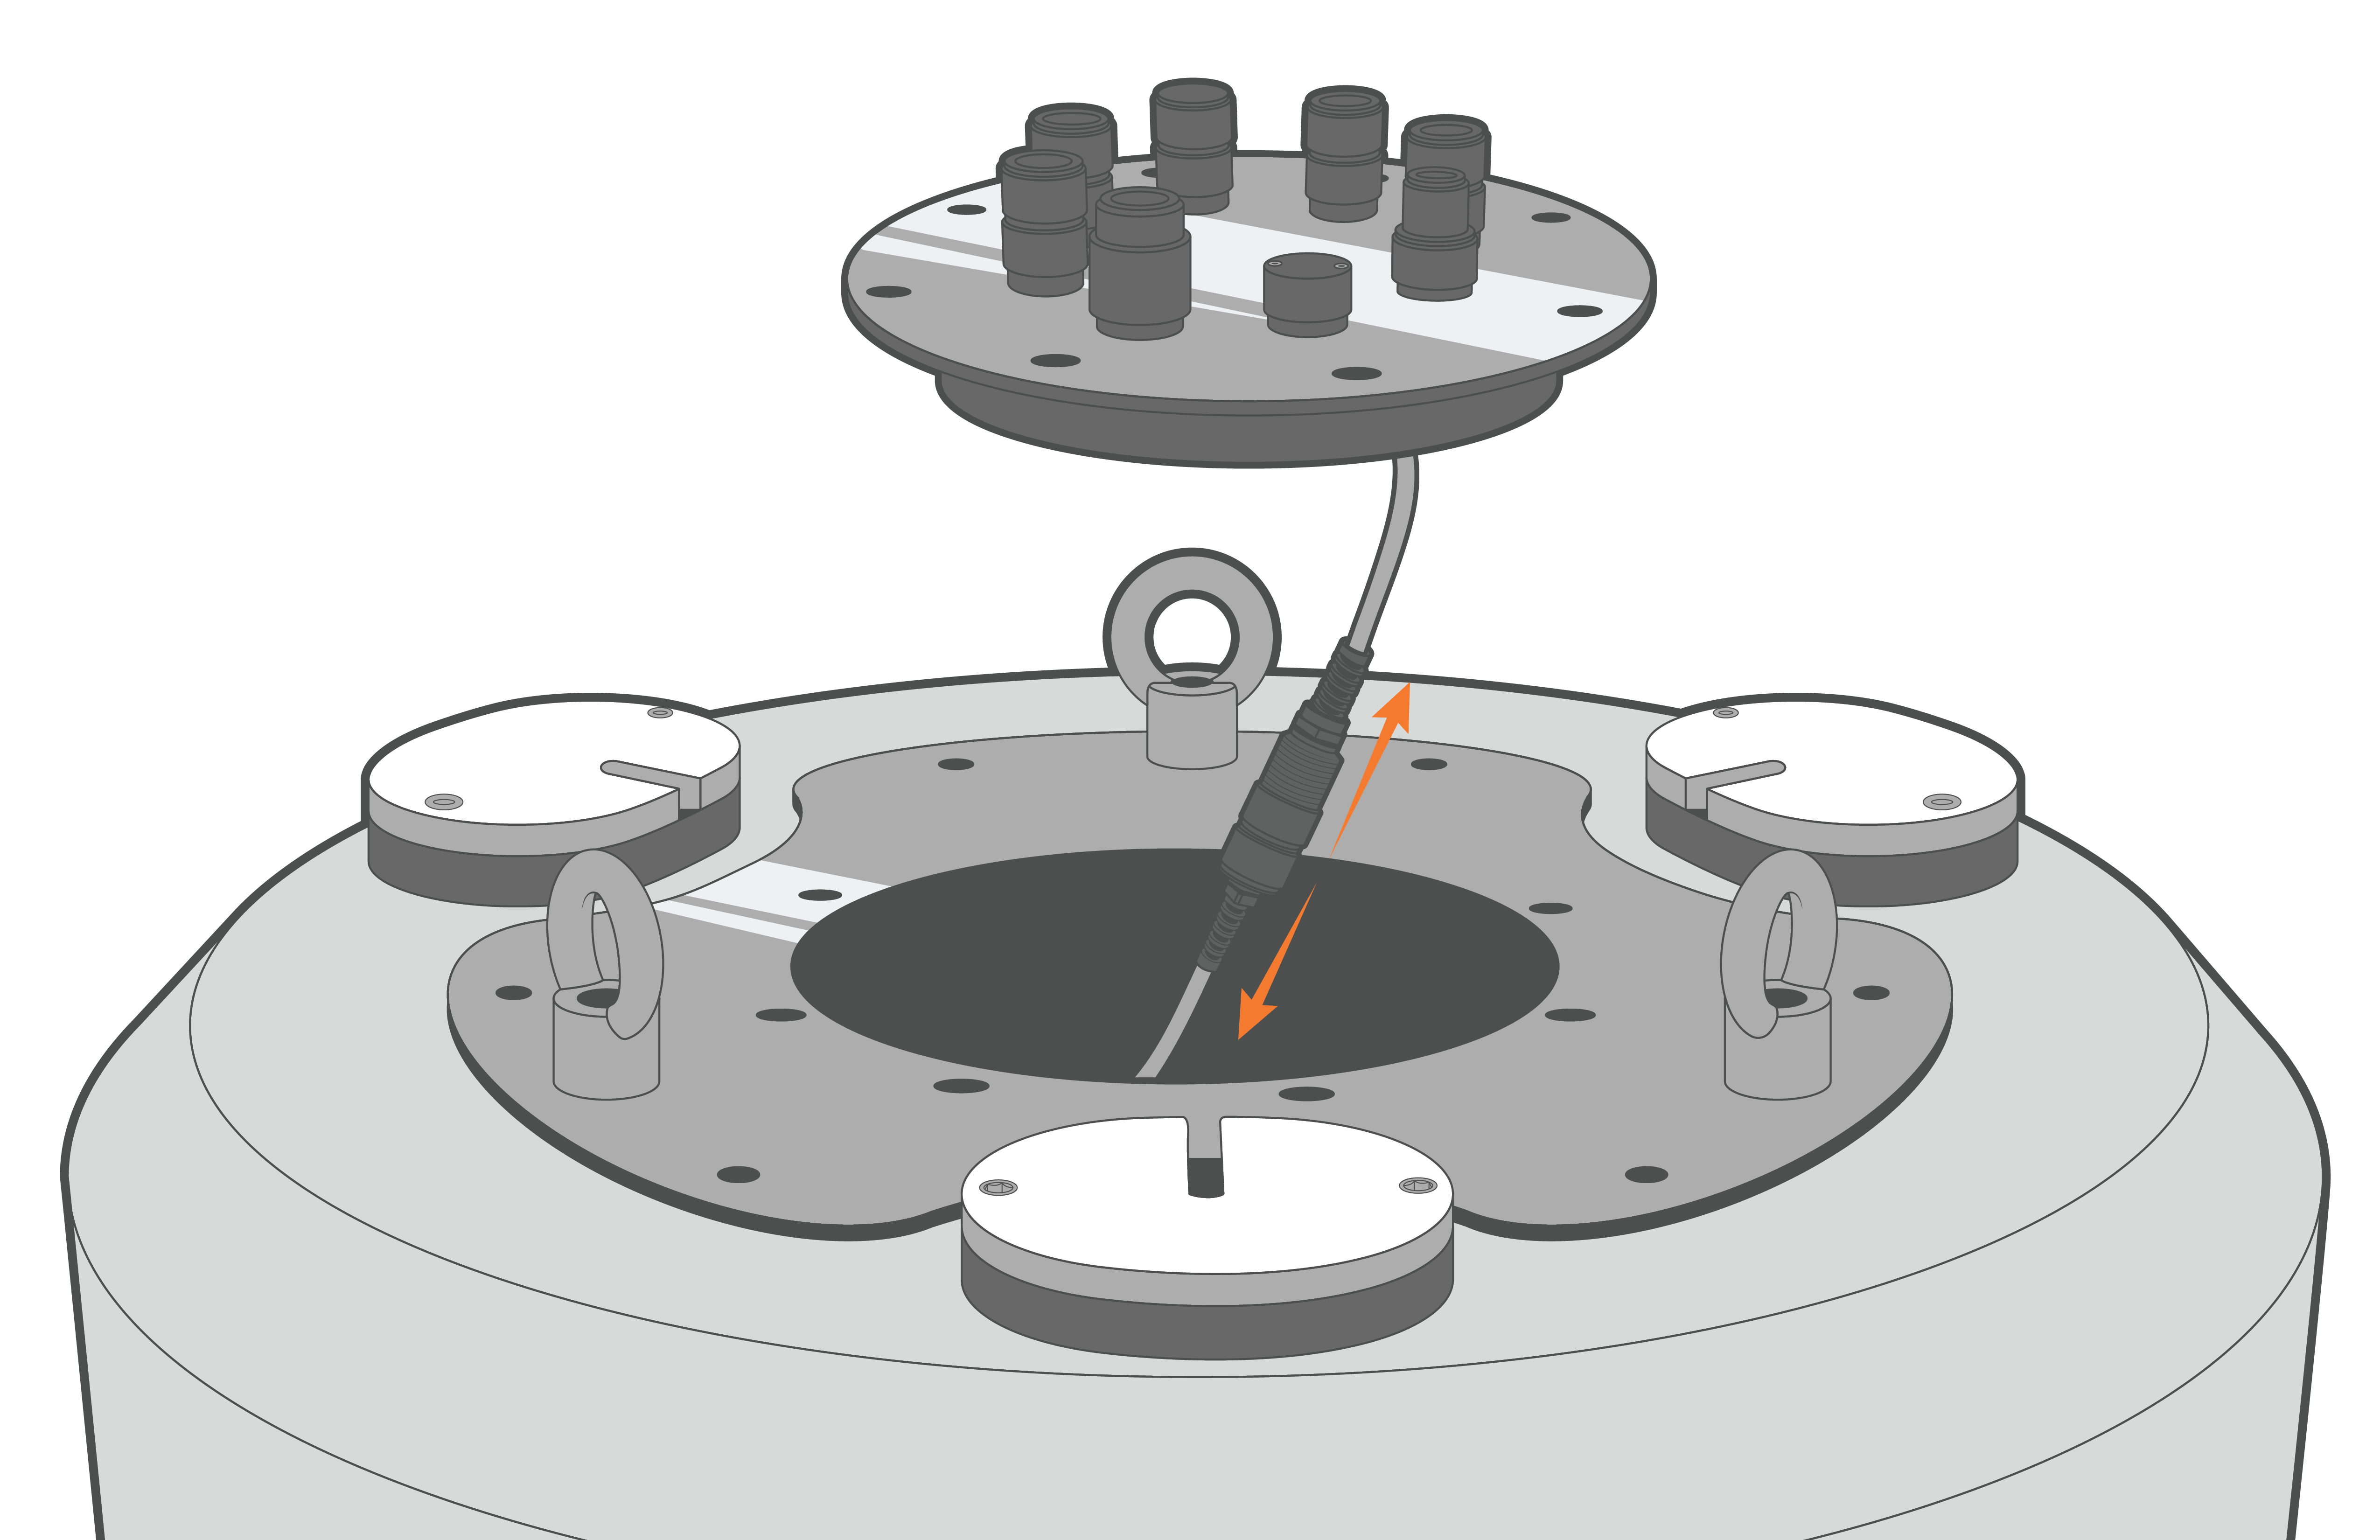
Figure 7: Unplug X2-CB in CB-150/250/450 buoys. |

Figure 8: Unplug X2-CB in CB-650/950/1250 buoys. |
- Pack with plenty of protective material and ship the X2-CB to NexSens as directed by NexSens technical support.
- For deployed systems, it is necessary to protect the data well and system batteries while the logger is under evaluation. In most cases, NexSens will provide a blank plate to maintain a water-tight seal.
- Inspect the large O-ring on top of the data well.
- Clean any debris that may have accumulated on top.
- Inspect for any tears or abrasions on the O-ring surface, replacing if damaged.
- Ensure proper lubrication of the O-ring. Use grease from the buoy maintenance kit as needed.
- It is recommended a new bag of desiccant be inserted into the data well at this time.
- Install the blank plate.
- Place the blank plate over the top of the data well and align the holes.
- Re-install the (8) bolts with lock washers from the X2-CB or data well pass-through plate using a 9/16″ socket wrench, tightening them evenly in a cross pattern to ensure an even O-ring seal.
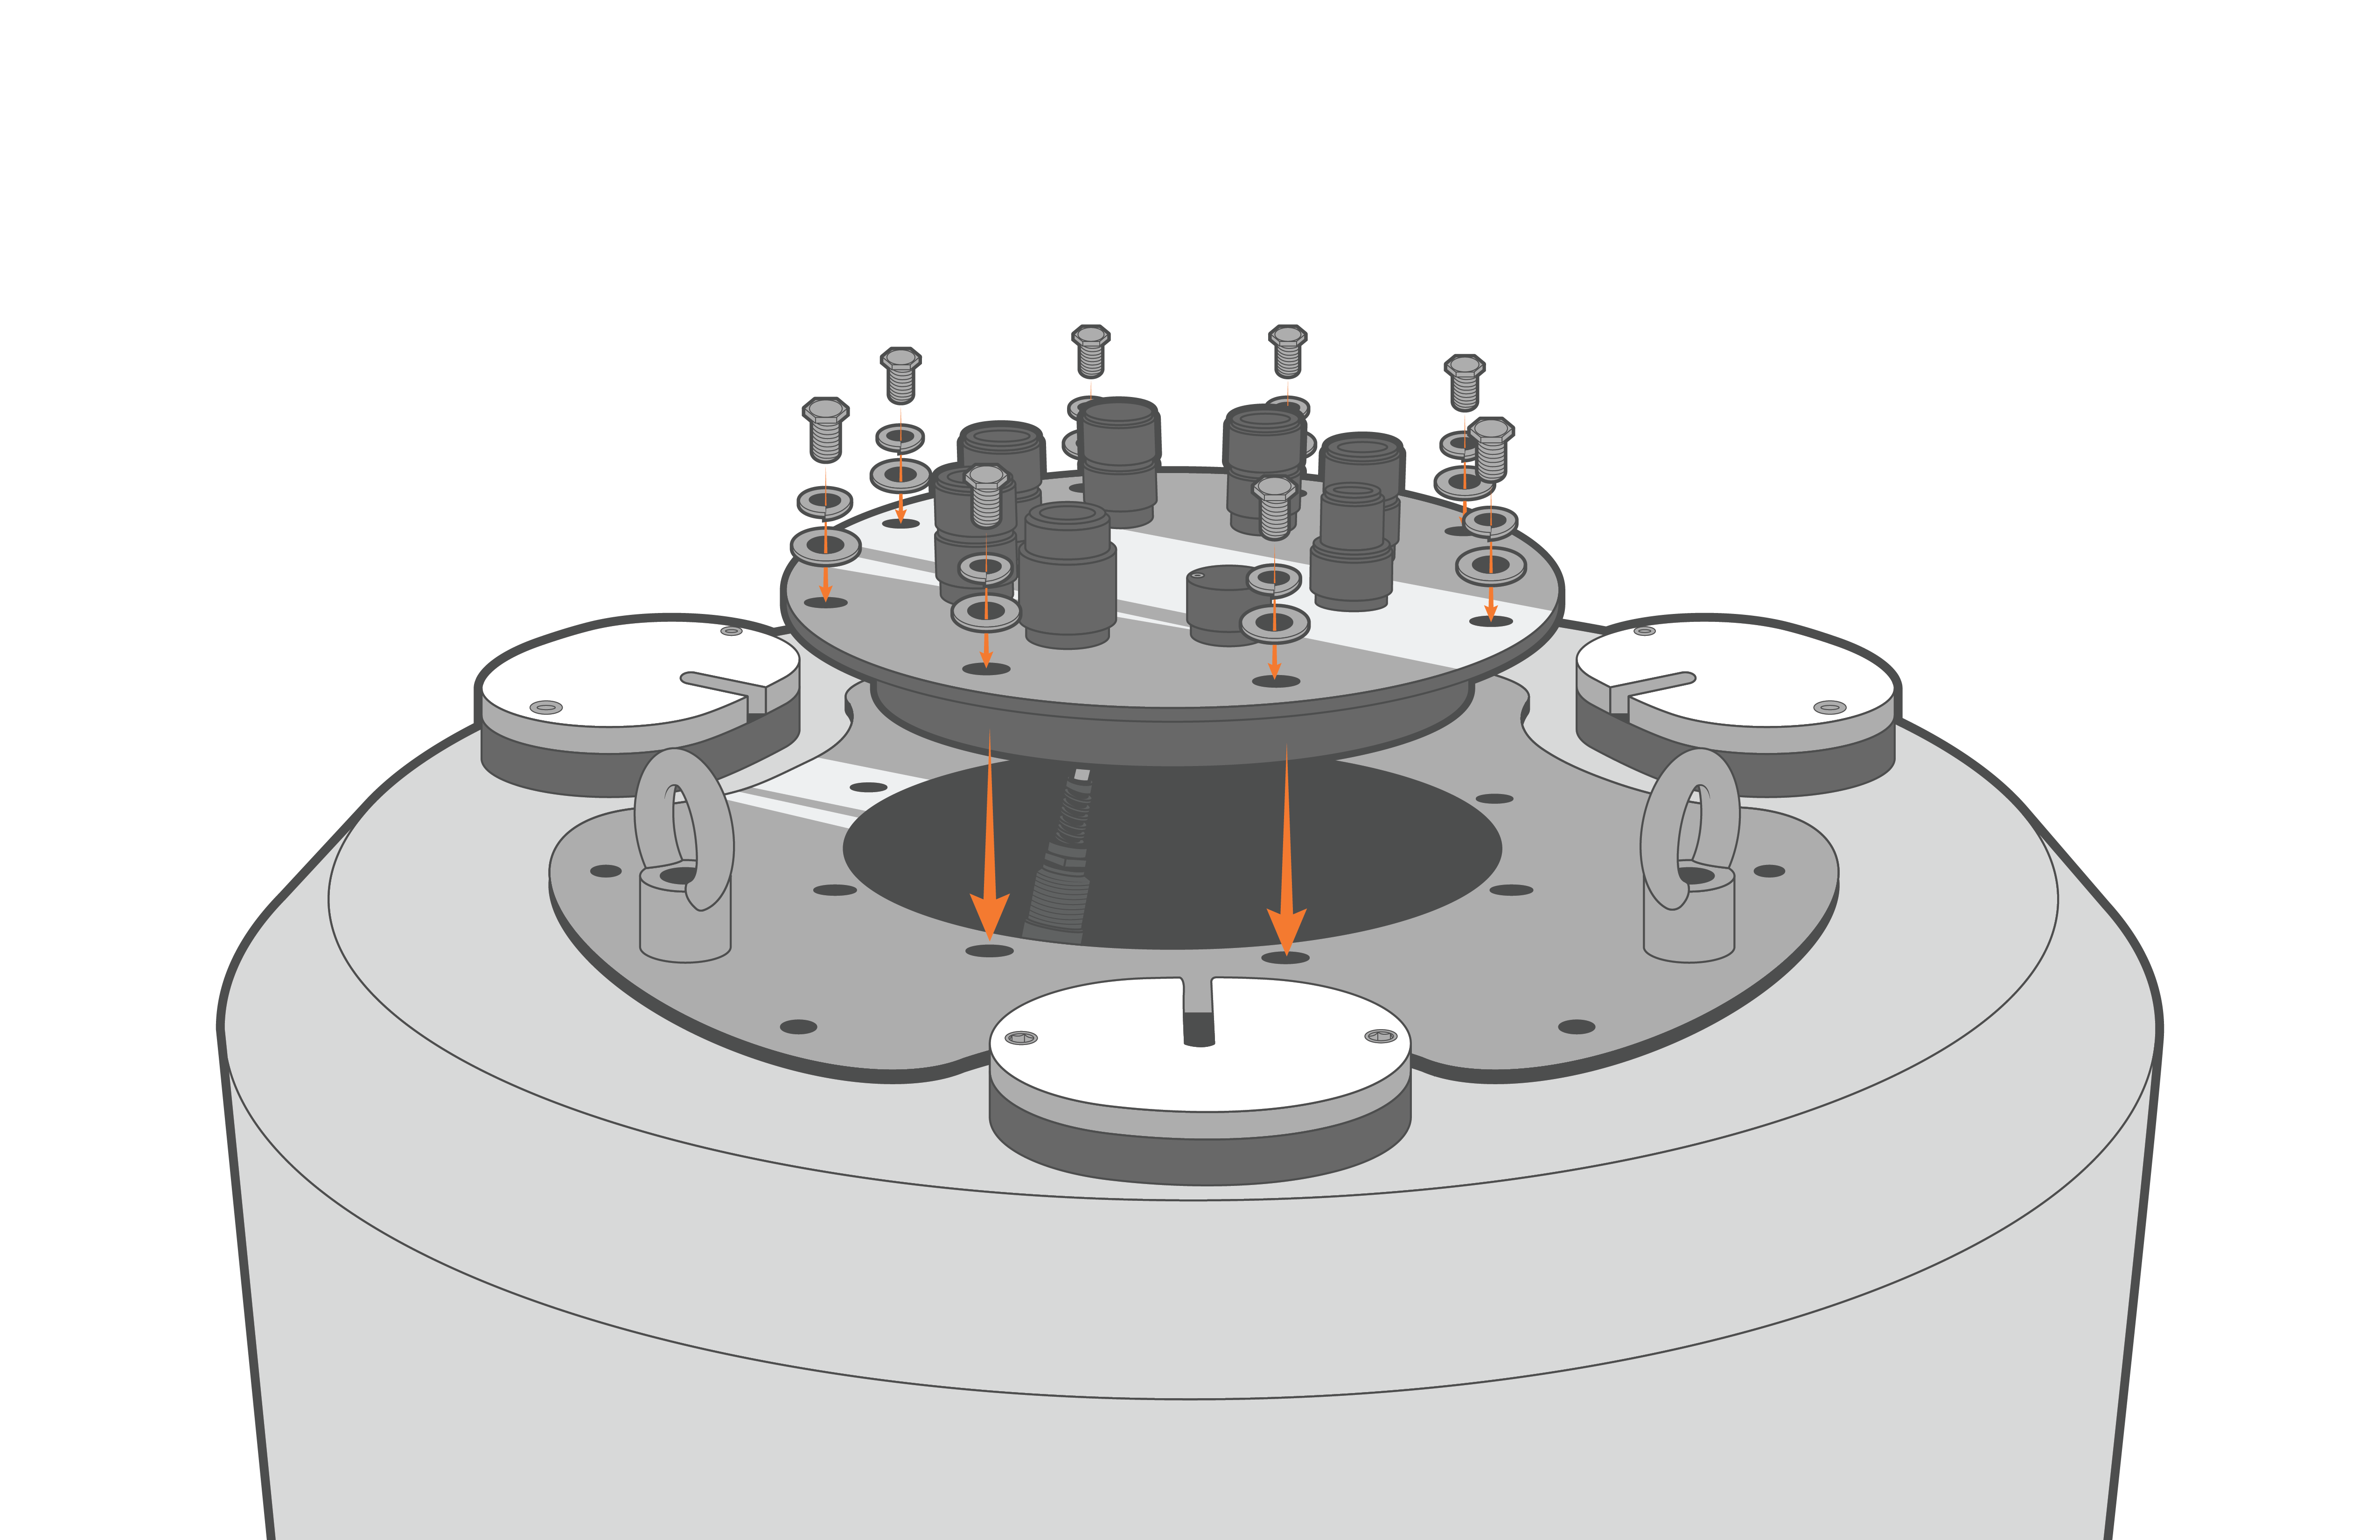
Figure 9: Bolt down the X2-CB/X2-CBMC. |
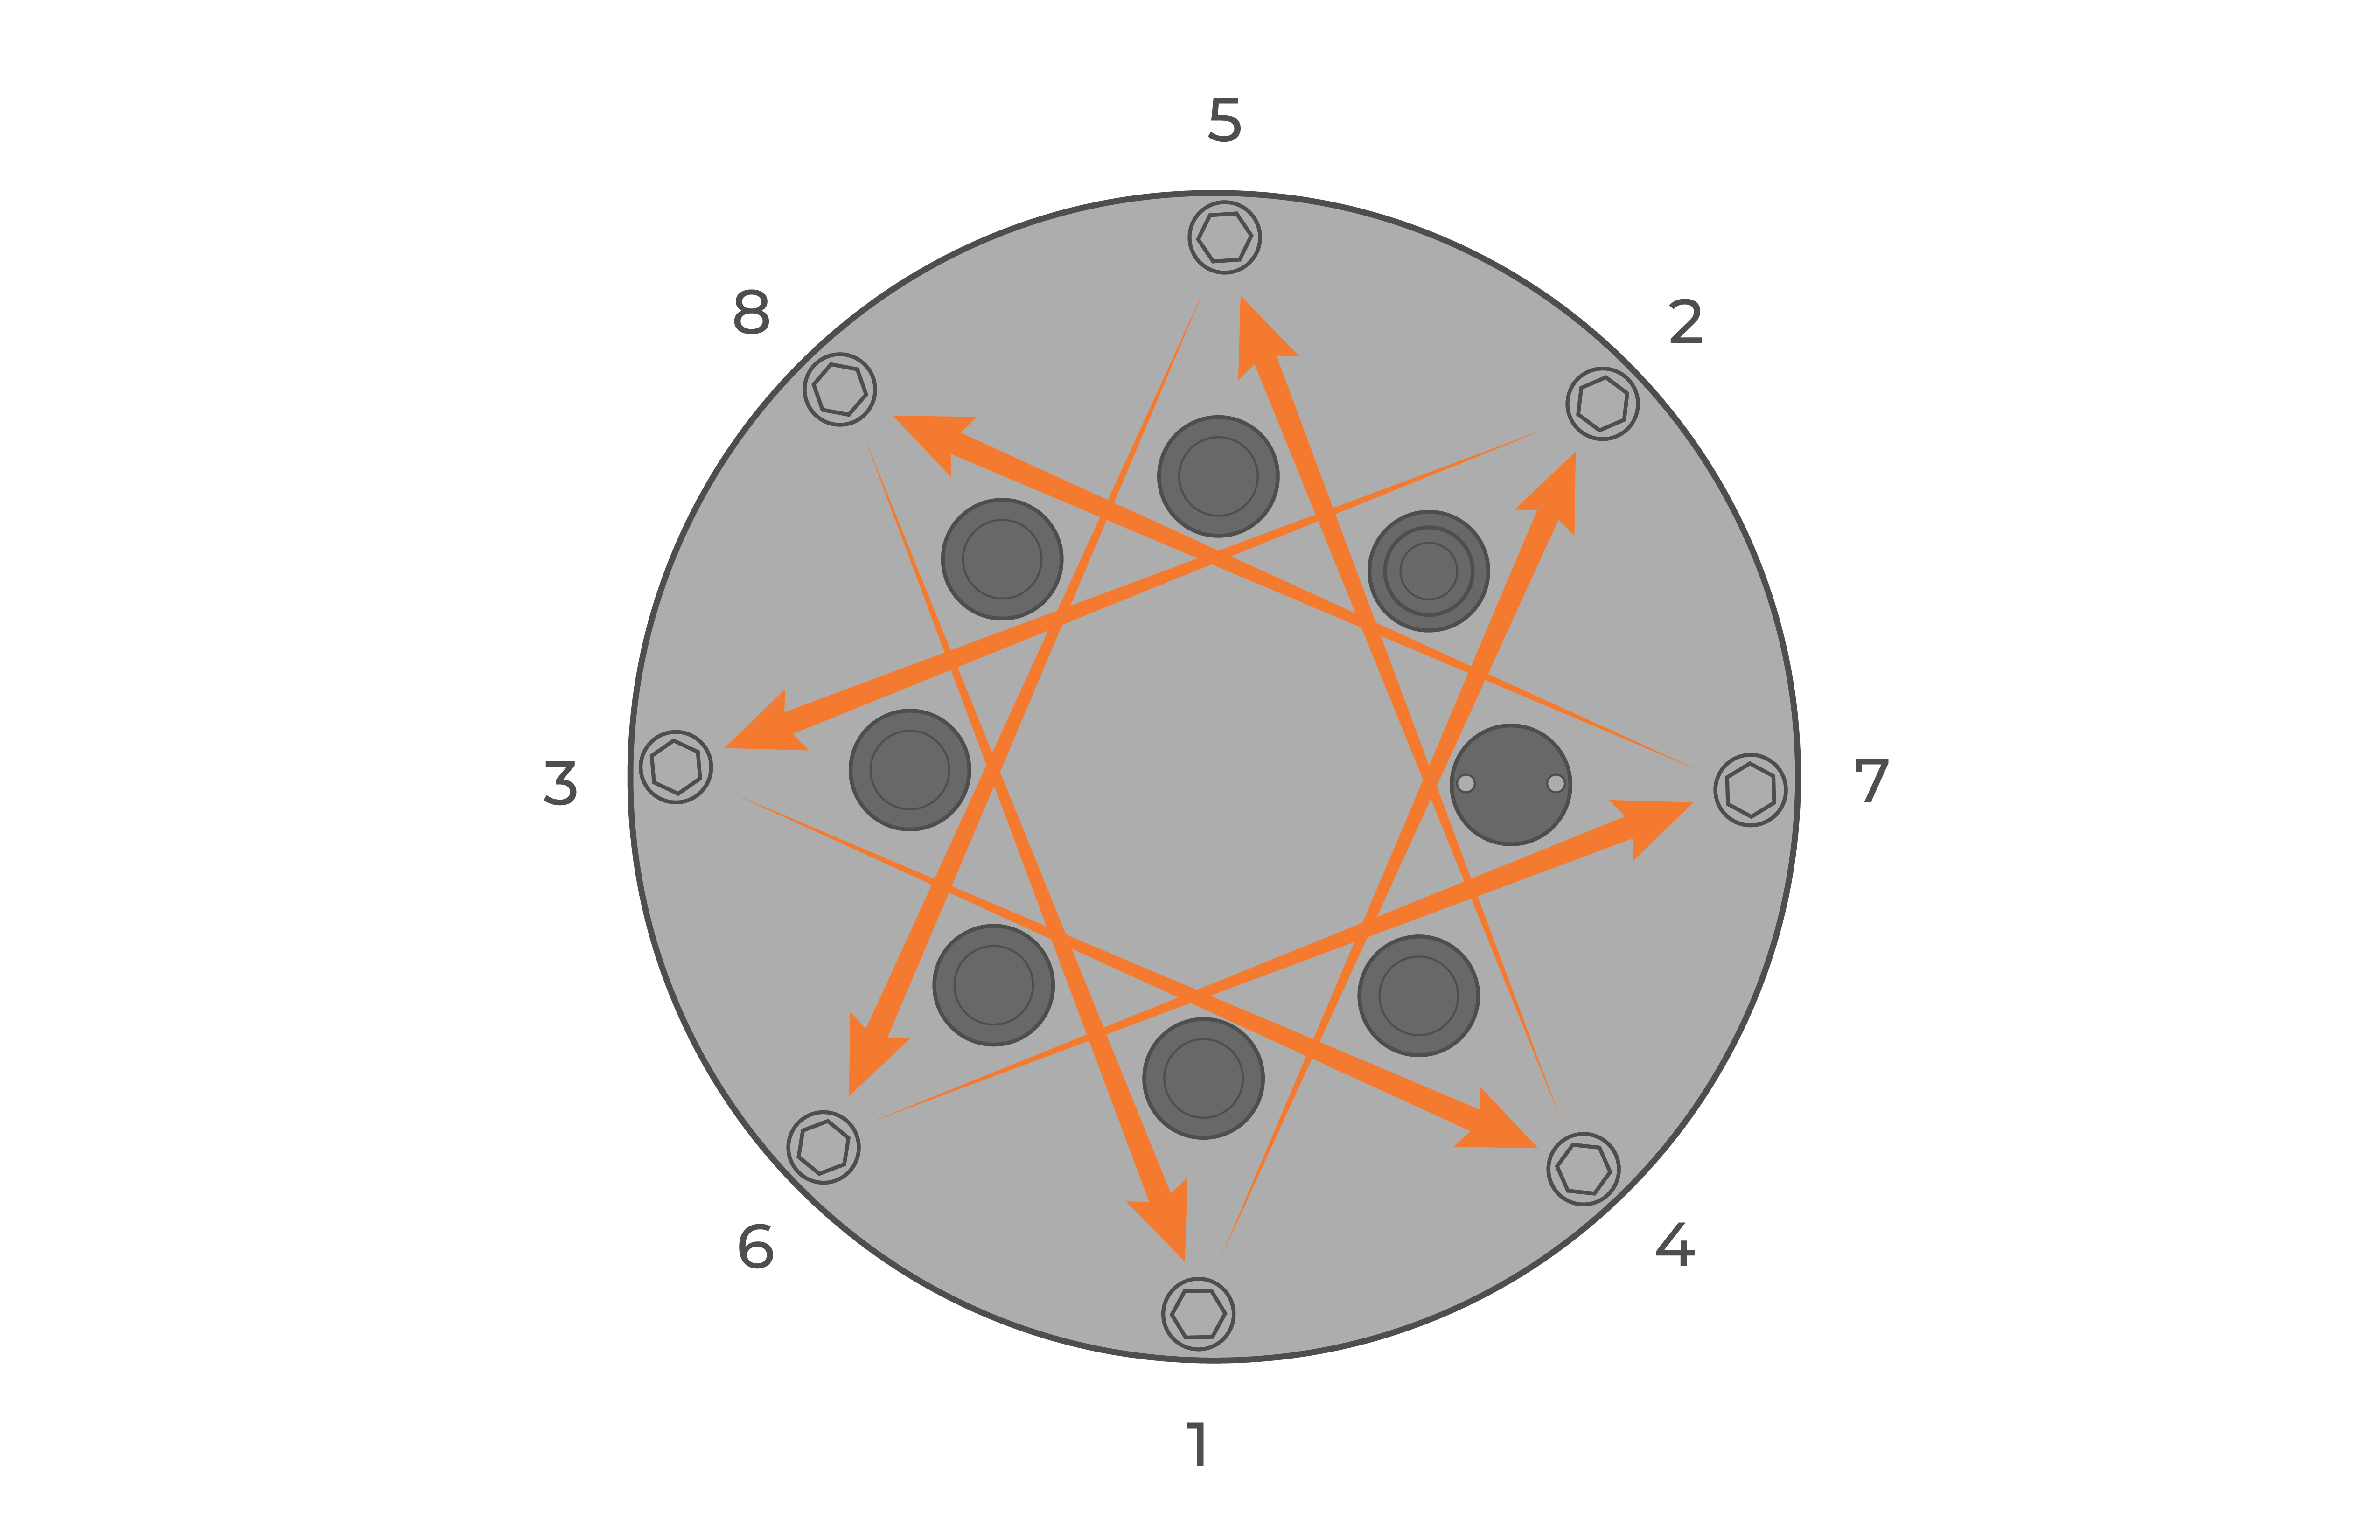
Figure 10: Bolt down the logger in a crisscross pattern. |
- Ensure that all sensor port receptacles on the blank CB plate are occupied with a hand-tightened dummy plug or a sensor cable plug from any of the deployed sensors. Additionally, verify each plug and receptacle have a clean O-ring.