
Replace G2-RAIN Siphoning Bucket
The G2-RAIN has two versions of the siphoning bucket depending on the time of purchase. For all models purchased before 2021, the G2-RAIN will have the siphoning bucket manufactured by the Rickly Hydrological Company. Newer G2-RAIN models have the siphoning bucket manufactured by Hyquest Solutions. In the instance of a bucket replacement, follow the steps below to remove the tipping apparatus connection from the Rickly bucket to install into the Hyquest Solutions siphoning bucket.

Figure 1: Rickly siphonining bucket. |
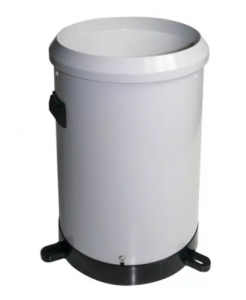
Figure 2: Hyquest Solutions siphoning bucket. |
Remove Rickly Siphoning Bucket
- Power down the G2-RAIN by using a small flat head screwdriver to turn the power switch counter-clockwise until the O-ring is visible.
- If connected to a solar panel, remove the cable connection from the G2-RAIN.
- Remove the antenna from the G2-RAIN as well.
- Using a 9/64″ hex driver, remove the (3) outside bolts connecting the bucket and the G2-RAIN-RTU/tipping apparatus assembly.

Figure 3: Remove outside bolts holding the bucket.
- Rotate the G2-RAIN-RTU/tipping apparatus clockwise to align the bolts with the vertical opening. Lift up on the G2-RAIN-RTU/tipping apparatus to separate it from the siphoning bucket.

Figure 4: Remove the G2-RAIN-RTU from the siphoning bucket.
- Loosen the connections holding the wires to the reed switch.
- It is necessary to cut off the fork terminals to fully remove the G2-RAIN-RTU from the tipping apparatus.
- Use a wire stripper to expose a ~1/4 inch section of the wires to install in the new tipping apparatus.

Figure 5: Remove the G2-RAIN-RTU wires. |

Figure 6: Cut the fork terminals from the G2-RAIN-RTU wires. |
- Use a 9/16″ wrench to remove the (3) bolts connecting the G2-RAIN-RTU and tipping apparatus.
- Gently lift the G2-RAIN-RTU to expose the wire connection with the tipping apparatus.
- Ensure not to pull too forcefully as a cable is connected to an internal flex fitting.

Figure 7: Disconnect G2-RAIN-RTU from tipping apparatus.
- Use a crescent wrench to loosen the flex fitting holding the G2-RAIN-RTU cable.
- Fully remove the entire G2-RAIN-RTU assembly.

Figure 8: Loosen the internal flex fitting and remove the G2-RAIN-RTU.
Install the Hyquest Solutions Siphoning Bucket
- Use a 4-mm hex driver to remove the new tipping apparatus from the new siphoning bucket (Hyquest Solutions).
- Remove the rubber band holding the tipper.

Figure 9: Remove the new tipping apparatus.
- Route the G2-RAIN-RTU cable through the open hole underneath the new tipping apparatus.
- Connect the wires to the terminal strip as shown below.
- For stability, attach the cable to the included clamp within the new tipping apparatus and tighten down using the available screw.

Figure 10: Install G2-RAIN-RTU in new tipping apparatus. |

Figure 11: Wire in the G2-RAIN-RTU cable. |
- Re-install the new siphoning bucket using the (3) outside bolts and a 4mm hex driver.
- The G2-RAIN is now fully installed with the new Hyquest Solutions tipping apparatus and siphoning bucket.
Testing on WQData LIVE
- Apply power to the G2-RAIN.
- Fill a beaker with ~300 mL of water.
- Pour water into the siphoning bucket and count the number of tips heard within the unit.
- At the next transmit interval, review the data on WQData LIVE and ensure the number of tips heard matches the tip counter and rain parameters on the web.
- It is recommended to perform this process three times to ensure accuracy.
- Once confirmed, the G2-RAIN can be re-installed back out into the field.