
Replace Solar Regulator in SP-Series Solar Power Pack
Solar regulator replacements do not follow a regular maintenance schedule. Regulator failures are rare and normally only necessary when a system demonstrates improper charging behavior:
- Weak or no charging response on unloaded battery with clean panel in direct sunlight.
- Excessively high charging voltages on the battery (significantly greater than 15V).
Remove the Old Solar Regulator
Should a regulator require replacement, contact NexSens to source a SA3018 solar regulator and then proceed.
- Remove the solar pack from its mounting location, then place it on a flat work surface.
- Typically, the easiest means of removing the solar pack is to remove both socket head cap screws from the angle adjustment bracket using a 3/16″ hex driver.
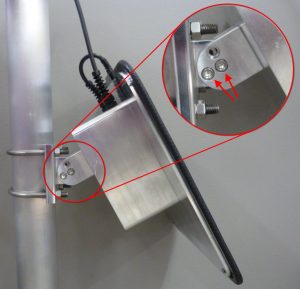
Figure 1: The angle adjustment screws are connected to the pole mount bracket.
- Loosen the four screws securing the battery housing to the panel mount using the same 3/16″ hex driver.

Figure 2: Loosen enclosure screws using 3/16″ hex driver.
- Carefully lift up on the enclosure and set the housing to the side. Avoid placing tension on the connected solar panel cable when moving the enclosure.
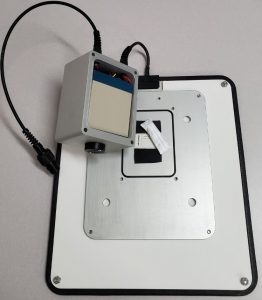
Figure 3: Carefully invert enclosure to access battery and solar regulator assembly.
- Remove the battery from the enclosure and disconnect the negative and positive cable leads.

Figure 4: Remove old battery.
- Locate the two Molex connectors linking the regulator to the solar panel and the UW-6 pigtail, respectively, and disconnect both.
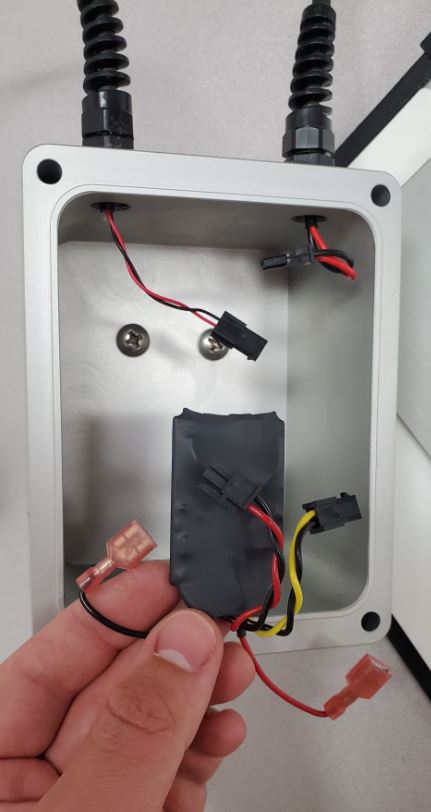
Figure 5: Disconnect the old solar regulator Molex connectors.
Install the New Solar Regulator
- Connect the new regulator such that:
- The yellow & black regulator cable pair connects to the solar panel lead.
- The red & black regulator cable pair connects to the UW-6 plug lead.
- The black wires from both pairs of connectors align.
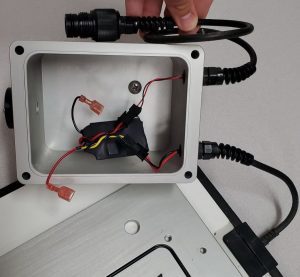
Figure 6: Regulator assembly connection.
- Re-connect the leads to the battery and carefully place it back inside the housing. Ensure none of the cabling is pinched.
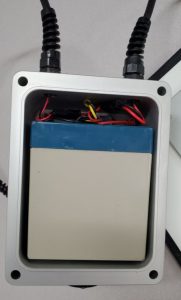
Figure 7: Install new battery, avoiding pinching cables between the battery and housing.
- Replace the small bag of desiccant in the enclosure.
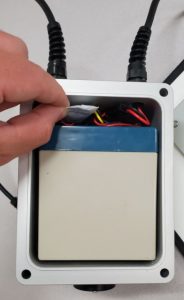
Figure 8: Replace desiccant bag.
- Verify the panel bracket’s O-ring is free from debris and damage and is seated properly in its groove.
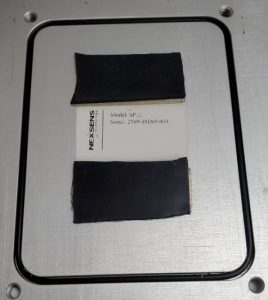
Figure 9: Verify panel bracket O-ring alignment before closing.
- Re-align the battery enclosure with the solar panel mount, then tighten down the four screws evenly using a 3/16″ hex driver.
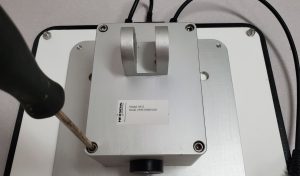
Figure 10: Tighten enclosure screws using 3/16″ hex driver.
- Check the pack voltage to verify proper connection of the battery.
- Place the pack outdoors exposed to sunlight for a couple of hours. Compare the starting and ending voltages afterwards to confirm the system is charging properly.