Sea-Bird Scientific MicroCAT X-Series Integration Guide
The Sea-Bird Scientific MicroCAT measures conductivity and temperature. It easily integrates with NexSens X-Series data loggers using the SDI-12 sensor interface.
Sensor Setup
Before the sensor can be deployed, it must first be set up through Sea-Bird Scientific UCI software. Follow the manufacturer’s guidelines for sensor setup and set the operating mode to SDI-12.
Note: Be sure to note the parameter order, as this will be needed to align with selected parameters in the logger.
Connecting with X-Series Loggers
Next, the MicroCAT will need to be set up for the X-Series logger using CONNECT software. If you have not yet done so, set up the project in WQData LIVE.
- Connect the sensor using the supplied cable to one of the open sensor ports on the logger and note the port number.
- Plug the X3 into the USB port of the computer and power it on with the AC power cable.
- Open CONNECT and select the SENSOR tab.
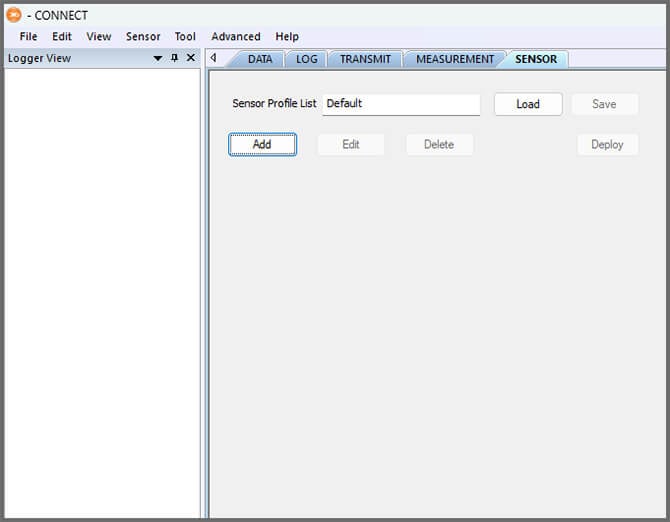
- Click Add and select Sea-Bird from the Manufacturer drop-down. Then select the appropriate model.
- Adjust the SDI-12 address if needed and select the port number.
- Select either Continuous or Switch in the Power drop-down.
- Add or remove sensor parameters as desired. Note that the selected parameters must match the parameter order set in the sensor software.
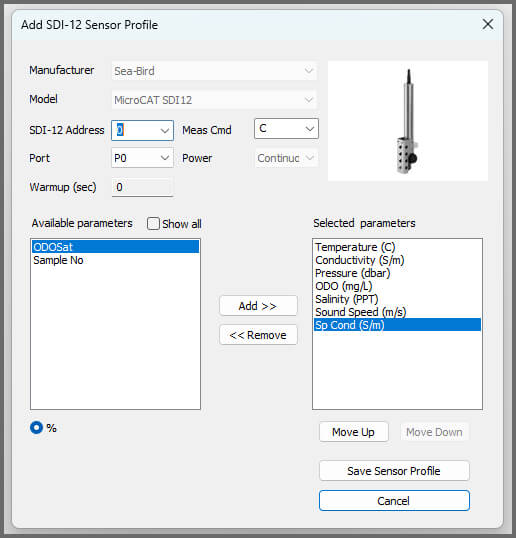
- Select Save Sensor Profile.
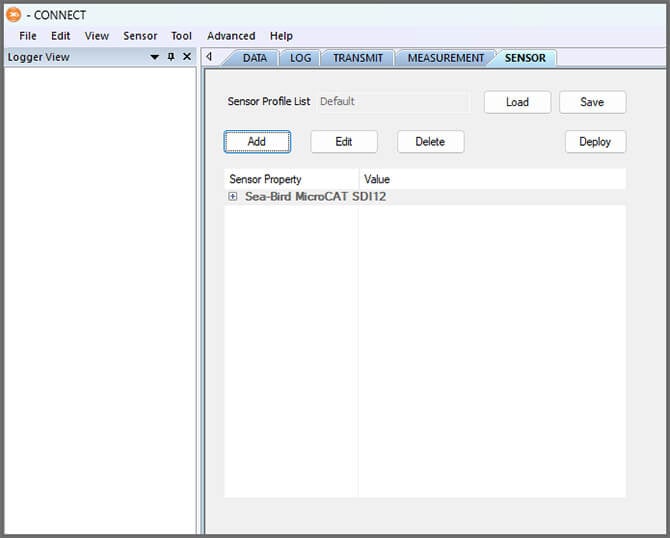
- Complete the setup for all other sensors, and then click Save.
- Name the Sensor Profile List and select Ok.

- Complete system setup by clicking Deploy.
- Confirm that data is being transferred to WQData LIVE.
Mounting
Deployment setups will vary based on the platform, application, and site location. For general buoy and near-shore structure mounting, see below.
Buoy-Based Deployments
First, follow the appropriate User Guide in the Knowledge Base for buoy assembly. Then, use the NexSens HydroCAT CTD Instrument Cage Mount to attach the sensor to the buoy cage by following the steps below.
Some instruments will arrive with a mount already attached to the sensor—in this case, follow the instructions below.
- Attach the mounting plate to the outside of the instrument cage using the included hardware.

- Secure the sensor on the inside of the cage with the metal guard facing the surface of the water.
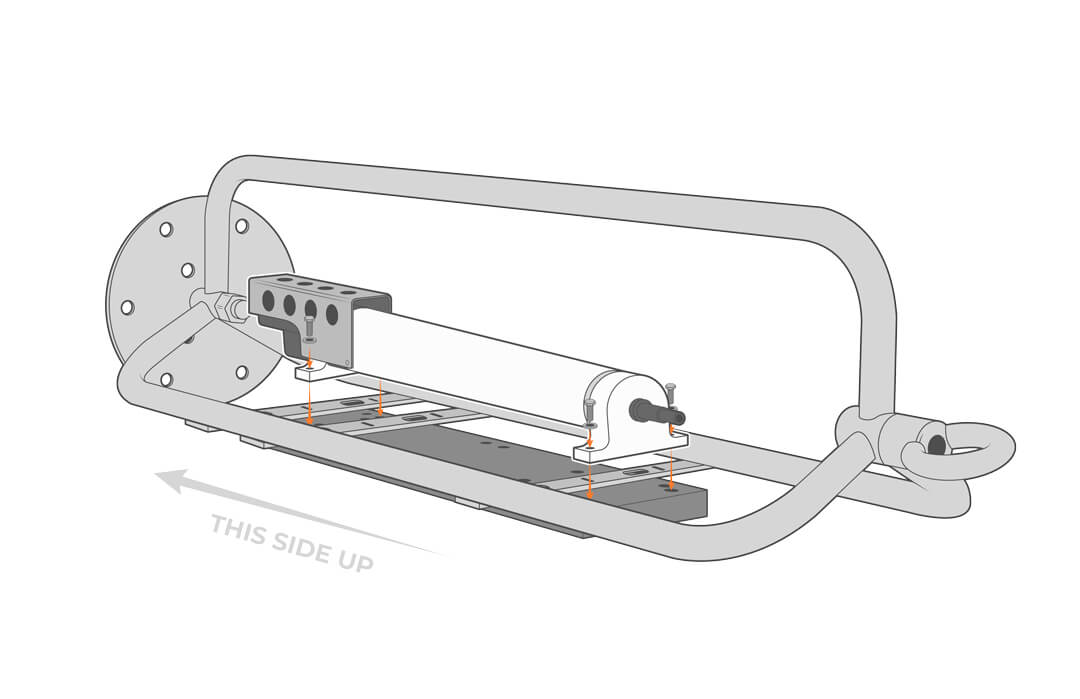
If the instrument does not arrive with mounting hardware already attached, follow the steps below.
- Attach the mounting plate to the outside of the instrument cage using the included hardware.
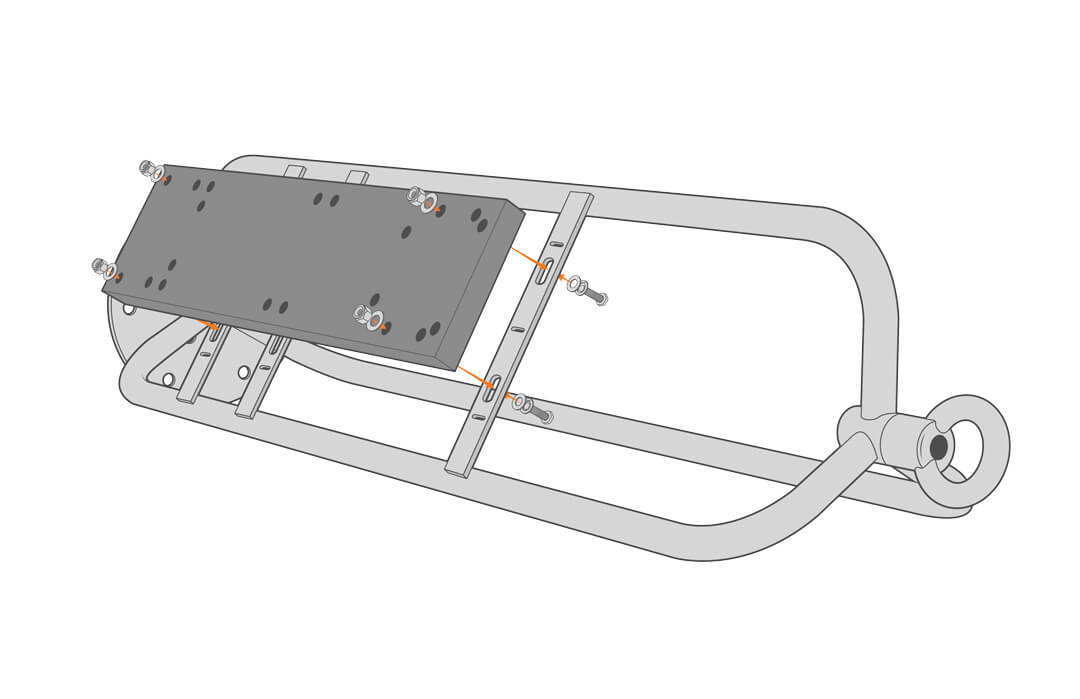
- Secure the included clamps at the desired points on the inside of the cage. If needed, new holes can be drilled in the mount to accommodate different models. Ideal placement for the clamps is just above the metal guard and above the cable.
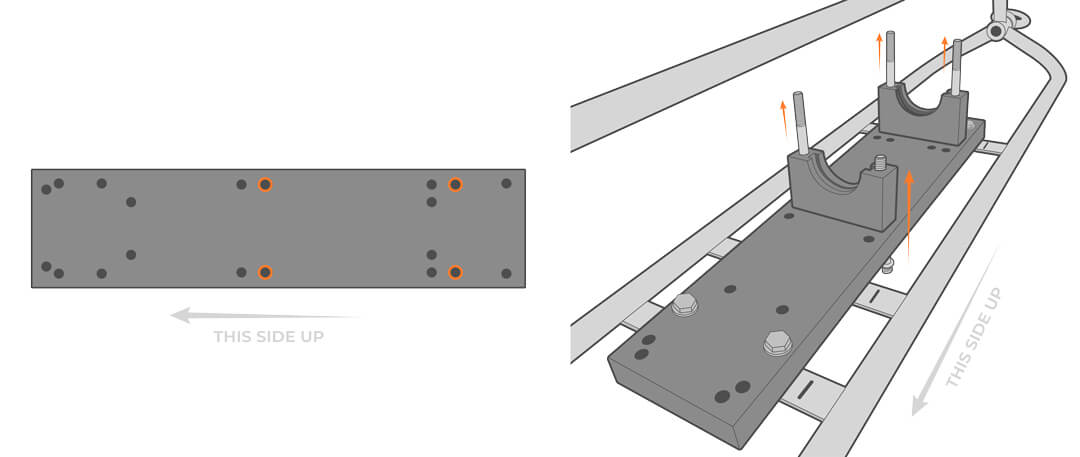
- Slide the silicon O-rings onto the MicroCAT sensor and adjust as needed to align with the support brackets.


- Secure the sensor in place by screwing in the top brackets.

- Secure the sensor cable on the buoy cage, taking care to minimize strain.

Near-Shore Deployments
The MicroCAT can be mounted to pilings, bridge piers or other shoreside structures. It’s best to design a sliding or removable mounting bracket to provide service access to the sensor above water.
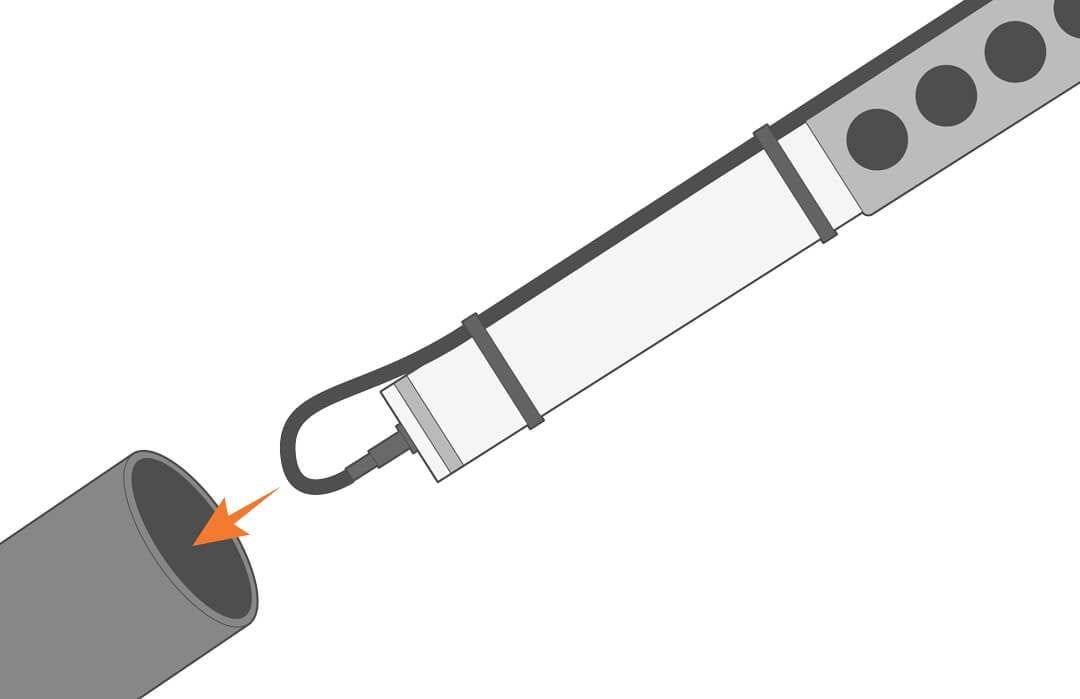
The unit can be deployed inside a perforated pipe to protect it from debris, but it will need to be a tight fit or secured to avoid impact caused by waves and rough seas. Regular inspection and maintenance are required to remove fouling and ensure adequate water flow.
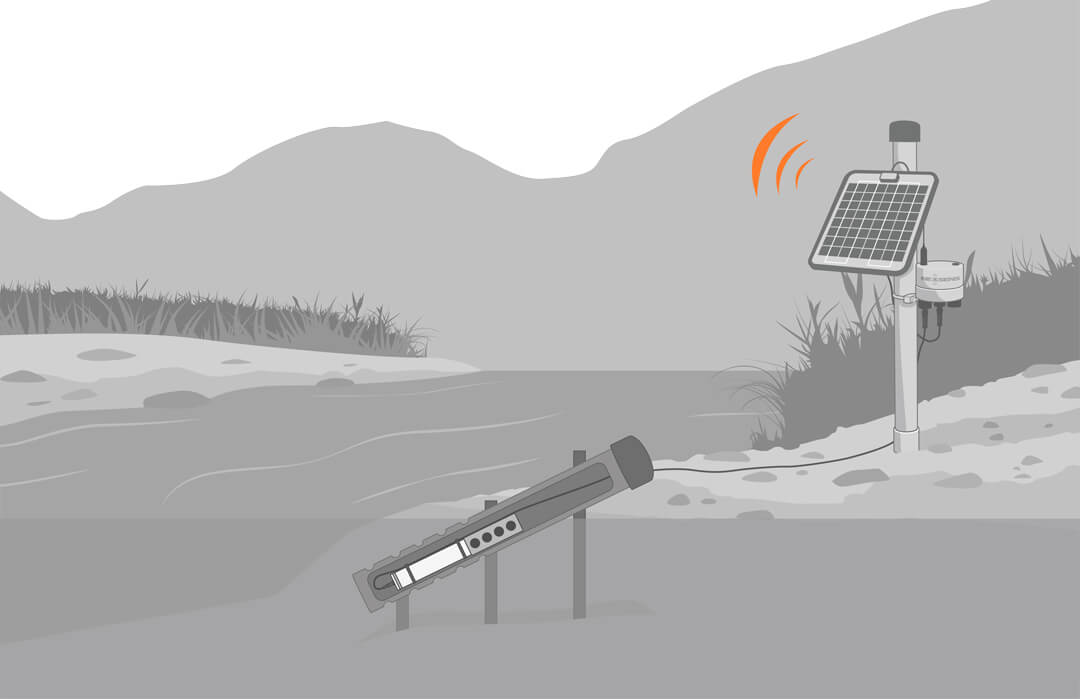
- Mount the bracket or pipe.
- Using the instrument cable, connect the sensor to the data logger while taking care to minimize cable strain.