
NexSens EWC Environmental Web Camera User Guide
The NexSens EWC Environmental Web Camera offers time-video-clip modes with real-time cellular communication.
1. Install software and set up the computer
- Download and install NexSens CONNECT software on a field or lab computer.
- Plug the UW6-USB-485P-DC cable adapter into the computer.
- Ensure the computer has access to the internet so the USB VCP drivers install automatically.
- Open Windows Device Manager and note the COM port for the USB Serial Port.
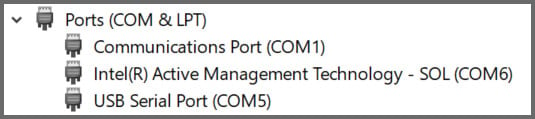
- If the device does not install properly, contact your IT administrator to manually install drivers from the VCP Driver download.
2. Power the sensor and prepare for deployment
- Plug the UW6-USB-485P-DC cable adapter into the EWC.
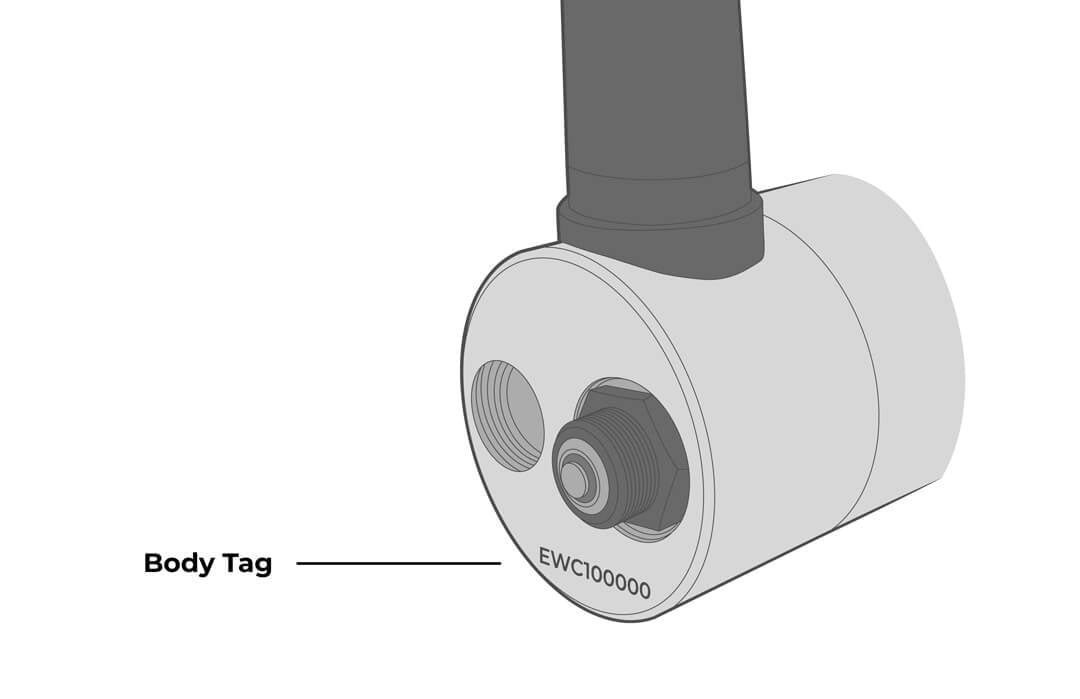
- Wait for the second beep and then connect to the EWC’s Wi-Fi network.
- Network Name: NexSens_EWC_xxxxxx, with xxxxxx being the EWC body tag.
- The password can be found in the included shipping documents.
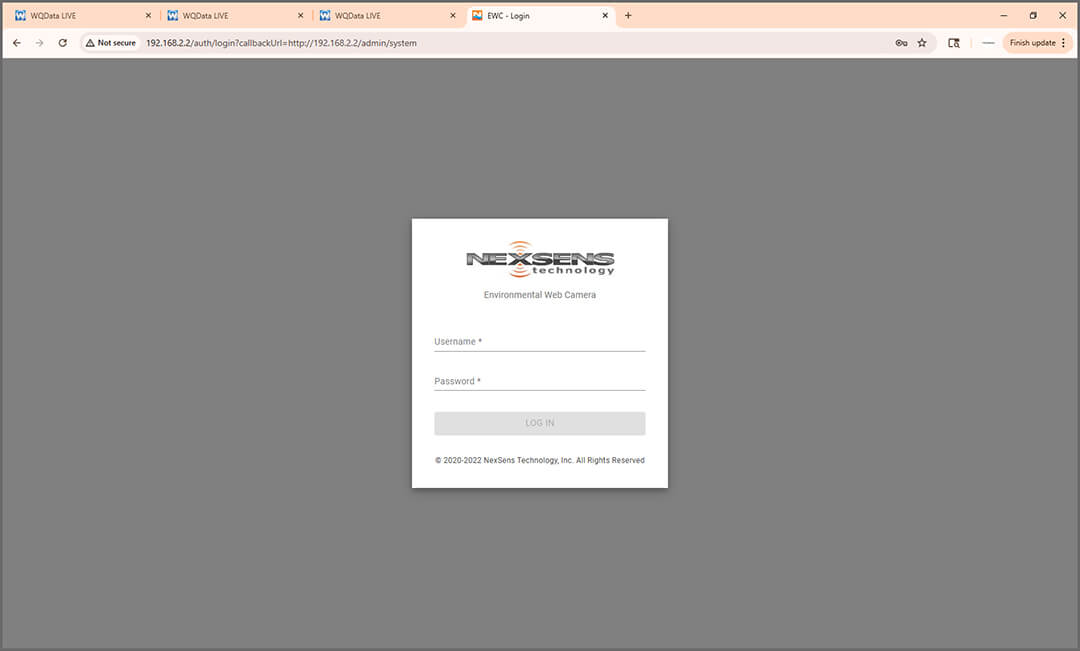
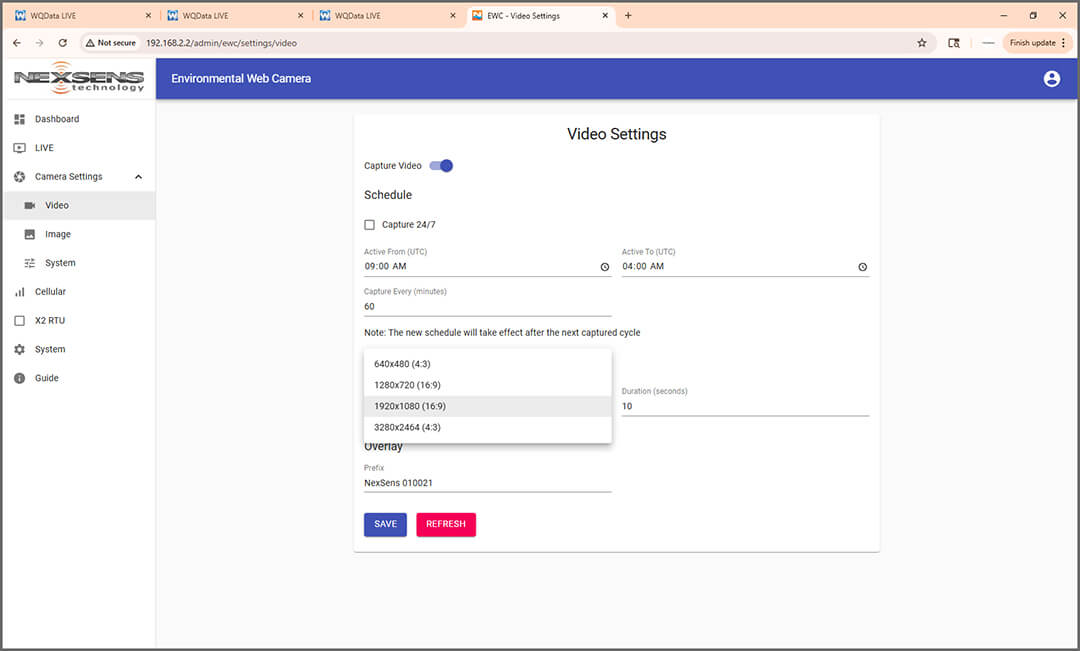
- Open a web browser and enter the following web address: 192.168.2.2
- Log in using the following credentials:
- Username: admin
- The password can be found in the included shipping documents.
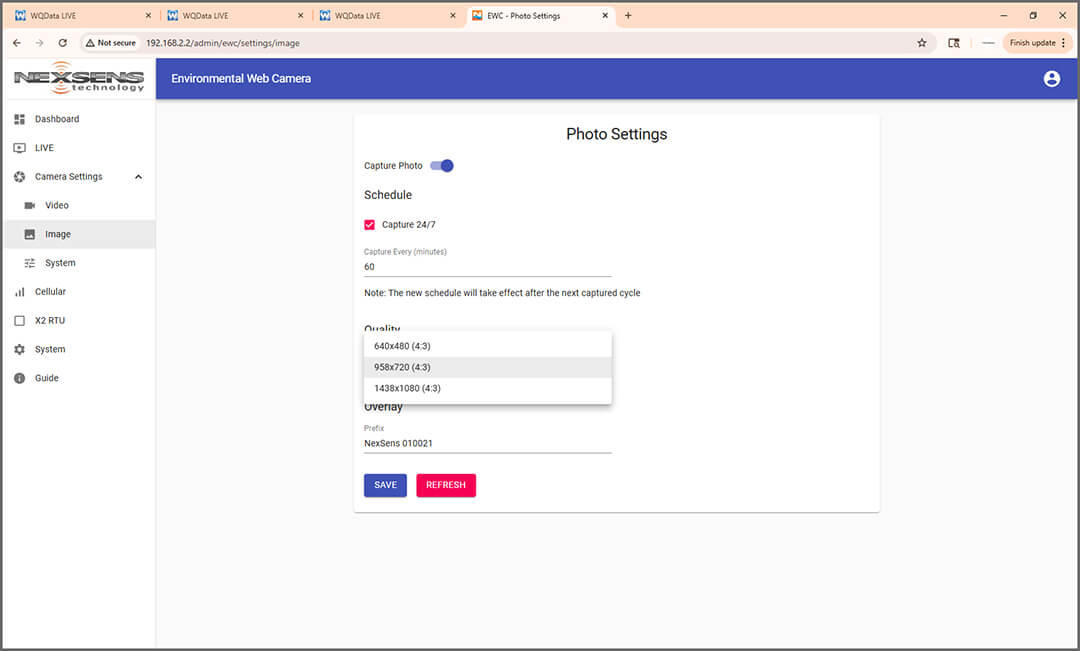
- In the Camera Settings dropdown, adjust photo/video quality.
- If using a different cellular provider, users will need to complete additional steps during setup. Jump to the Changing the SIM Card step.
- If using FTP, click Protocol from the menu and select FTP (Standard) from the Protocol dropdown.
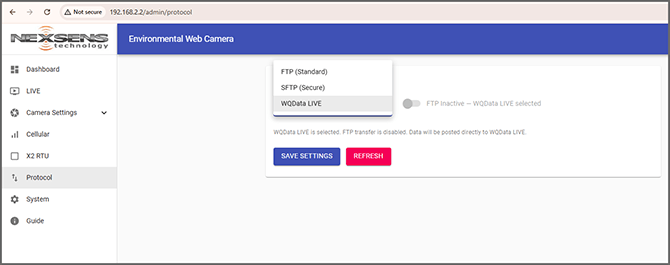
- Enter the FTP server information and click Save Settings.
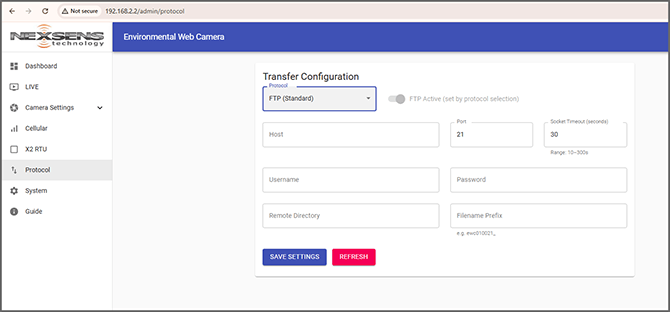
- Enter the FTP server information and click Save Settings.
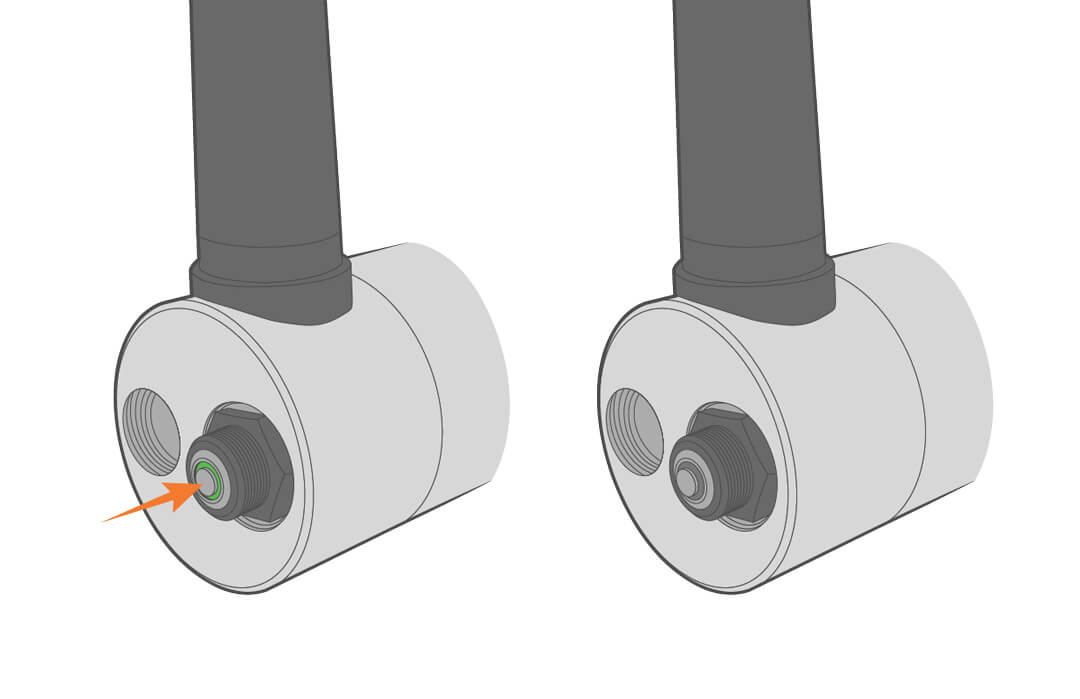
- When configuration is complete, remove power and press and hold the green LED button on the EWC until the light fully fades away.
3. Data Logger Connection
The NexSens EWC interfaces with data loggers via RS-485.
Connecting to NexSens X3-Series Data Loggers
If you have not yet done so, set up the project in WQData LIVE.
Note: The Professional or Enterprise tier is needed.
- Connect the sensor using the supplied cable to either P1 or P2 on the logger and note the port number.
- Plug the X3 into the USB port of the computer and power it on with the AC power cable.
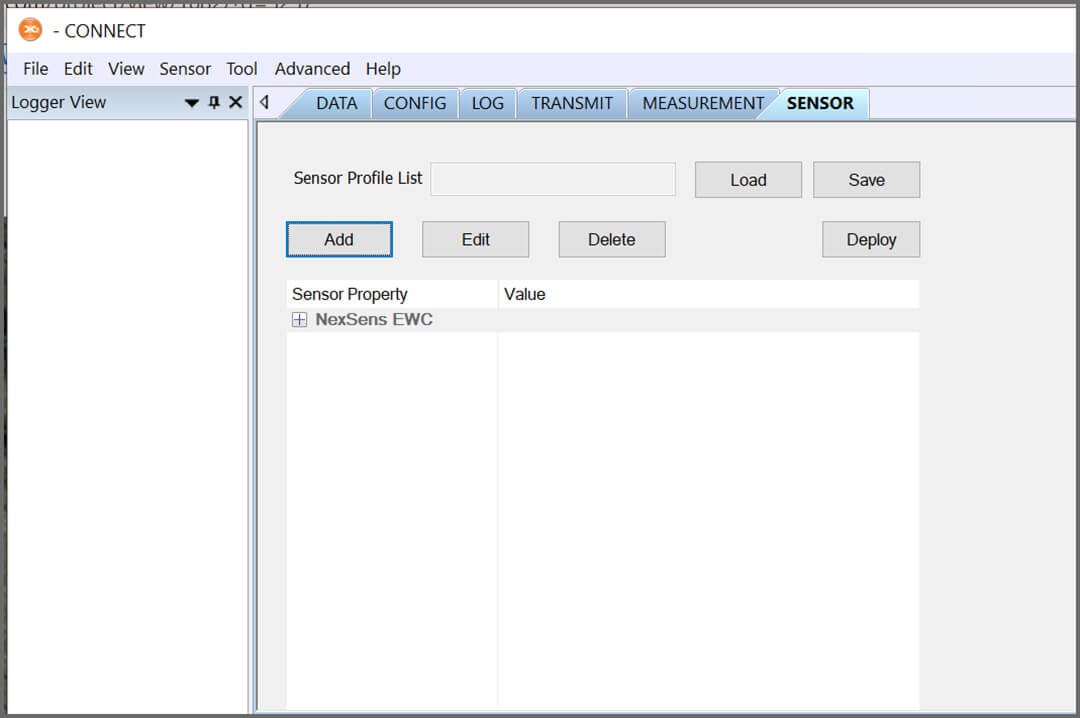
- Open CONNECT and select the SENSOR tab.
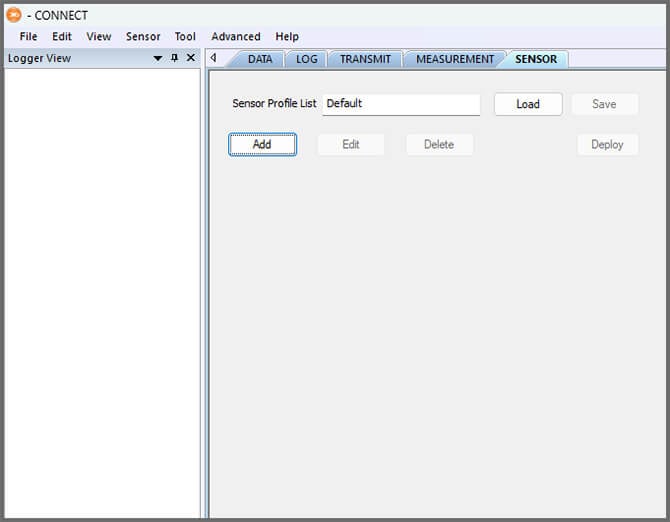
- Click Add and select NexSens from the Manufacturer drop-down. Then select EWC.
- Select the Port Number and set the Active Window if desired–this is the period where the EWC is active.
- Enter the starting time in the Active From box and set the end time.
- Choose the Capture Type.
- For Video: Set the Video Length between 5 and 30 seconds.
- For Photo: Set the photo size.
- 1 = Small (958 x 720),
- 2 = Large (1437 x 1080)
- Adjust the Transfer Time if needed to extend the timeout in poor cellular signal areas.
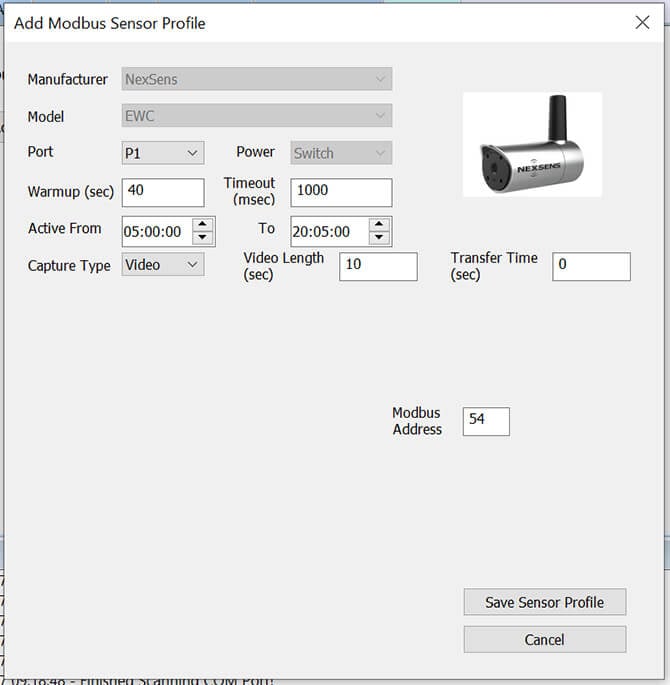

- Note: The Modbus address for new EWC sensors will be preset to 54.
- Select Save Sensor Profile.
- Complete the setup for all other sensors, and then click Deploy.

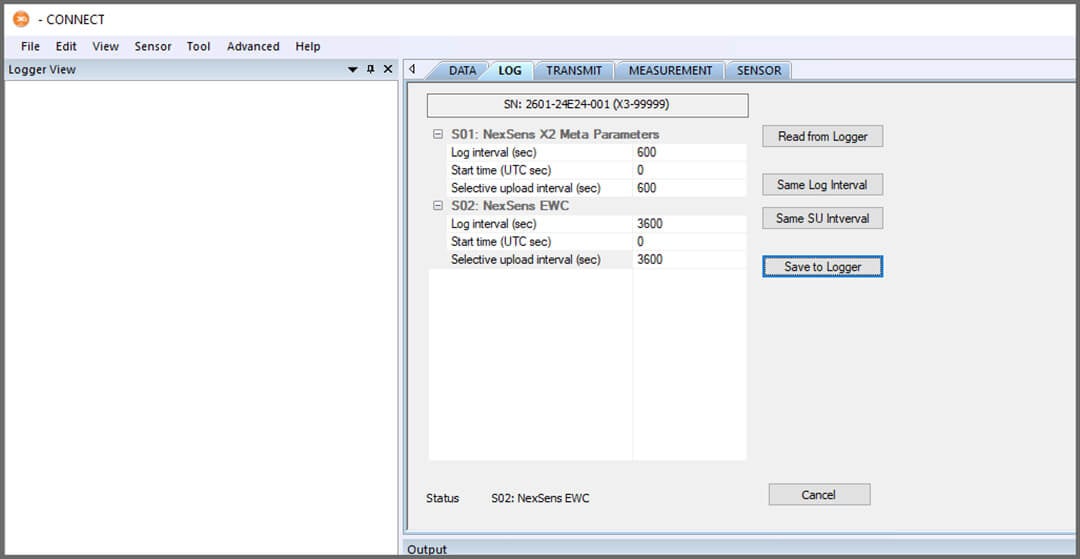
- The minimum log interval is 30 minutes, but 1 hour or greater is recommended. To set the log interval, follow the steps below:
- Open the Log tab and click Read from logger.
- Select the EWC from the list on the left and set the Log interval to 1800 (30 minutes) or longer if needed.
- Click Same SU Interval and then Save to Logger.

- Confirm that data is being transferred to WQData LIVE at the next interval.
4. Mounting
Deployment setups will vary based on the platform, application, and site location.
Large Buoy Platforms
First, follow the appropriate User Guide in the Knowledge Base for buoy assembly. Then, use the NexSens EWC Webcam Buoy Mount to attach the EWC to the buoy solar tower by following the steps below.
- Attach the mount to the camera base.
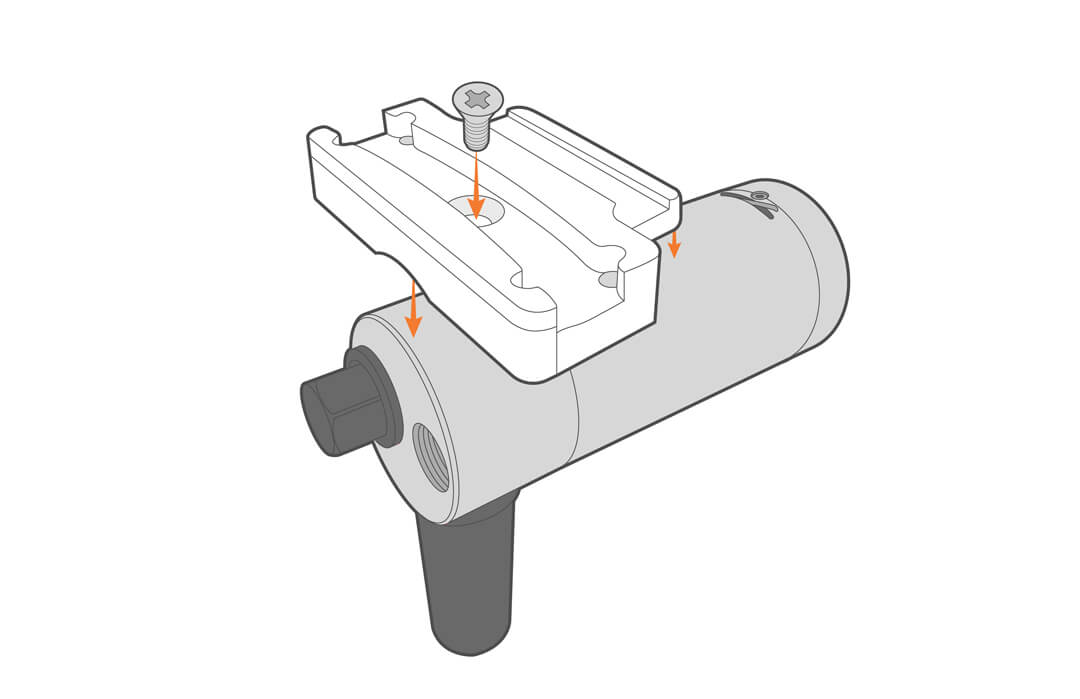

- Secure the camera to the mount using the included strap.
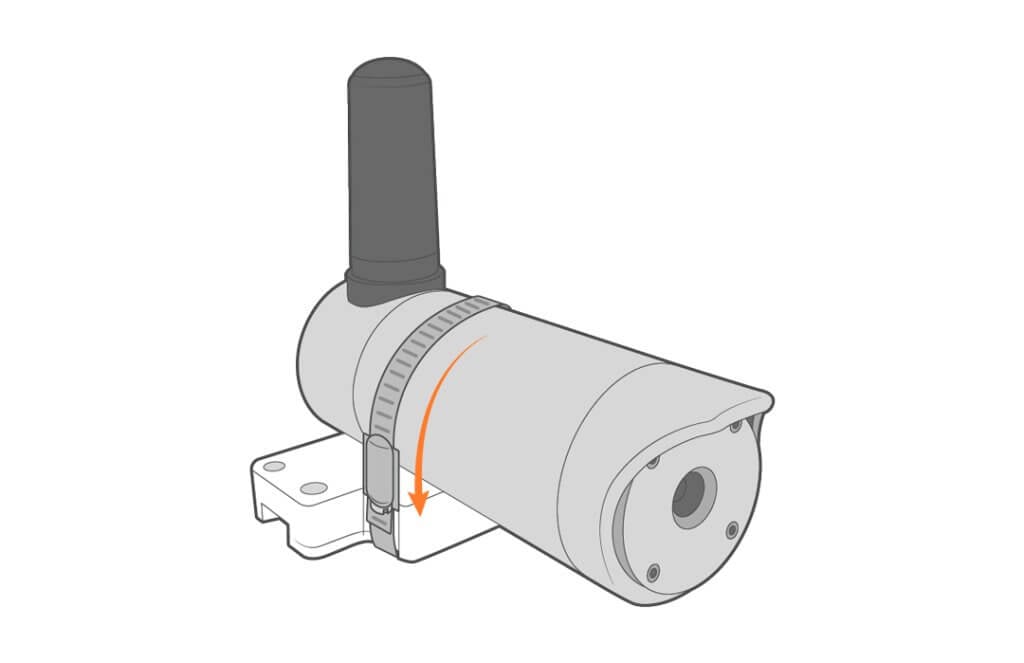
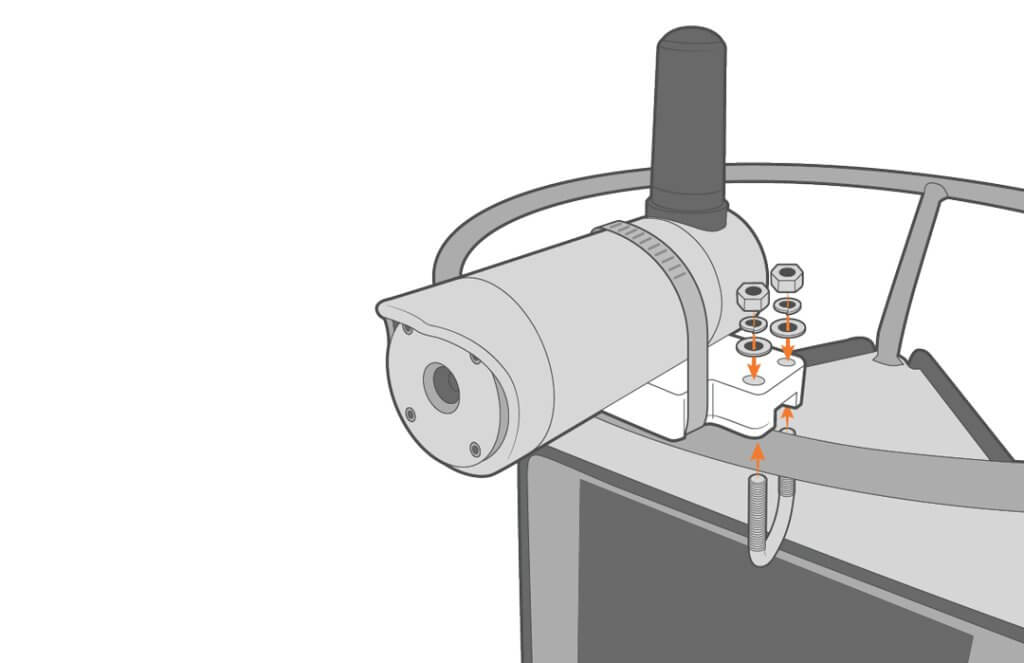
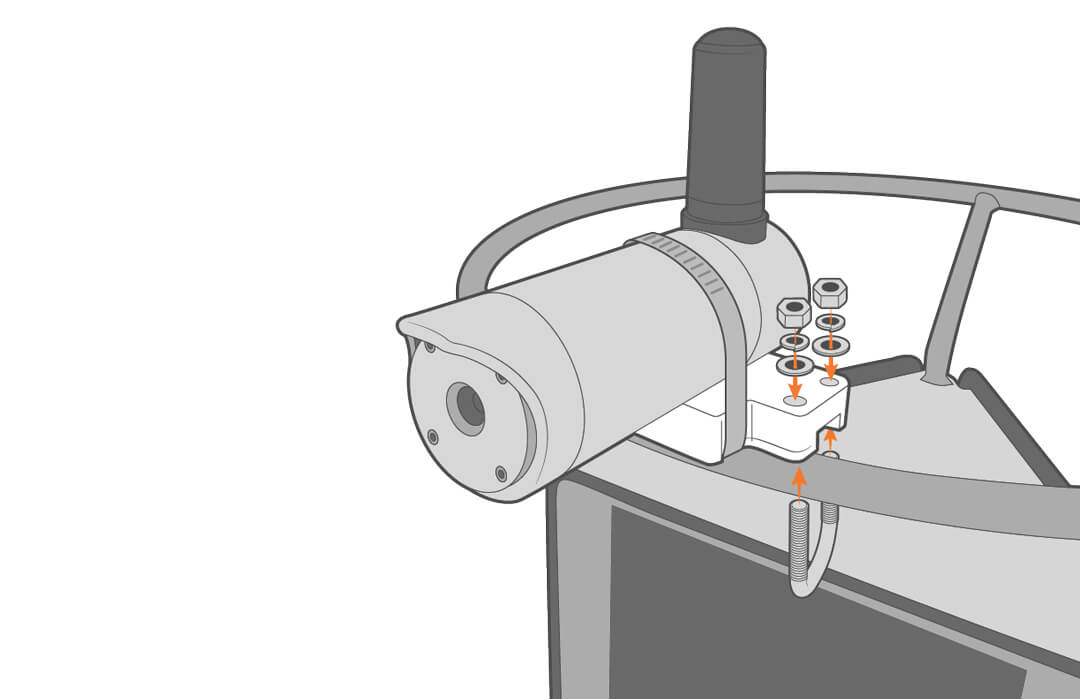
- Secure the mounted sensor to the solar tower ring using the included hardware.

Compact Data Buoys
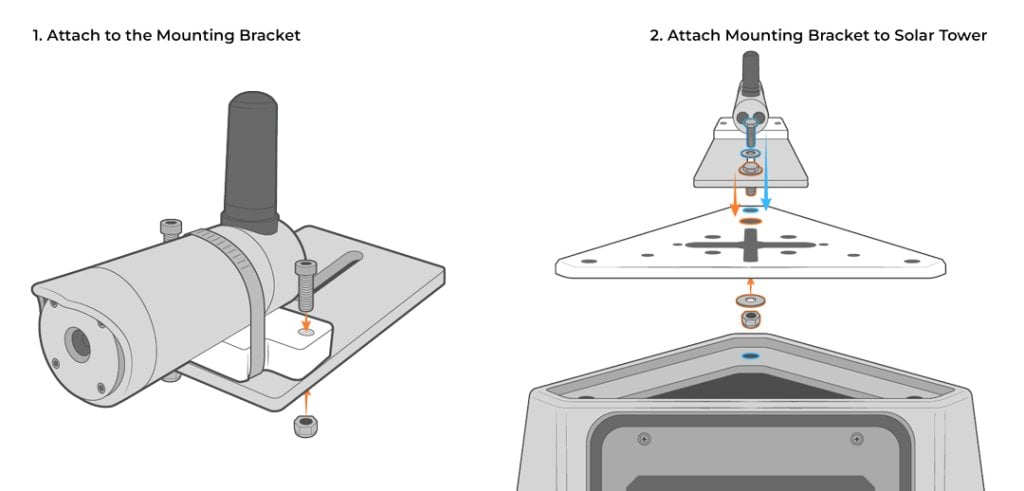
For mounting on the XB-200 or CB-450 data buoys, complete the appropriate user guide in the Knowledge Base for buoy assembly and then use the NexSens XB-EWC-M Buoy Mount to attach the camera by following the steps below.
- Attach the mount to the camera base.

- Secure the assembly using the included strap.

- Attach the unit to the mounting bracket and solar tower.


5. Inspection and Maintenance
If images are no longer being received or image quality deteriorates, users may need to travel to the site to clean the camera and check connections.
Cleaning
- Ensure back ports are plugged when cleaning and deployed.
- Clean the lens with a soft cloth and water if necessary.
- Rinse off and dry when not in use.
Storage
Before storing the EWC, users should disconnect from the power and cover the lens to prevent scratches.
Changing the SIM Card
If using a different cellular provider, users will need to change the internal SIM card prior to deployment.
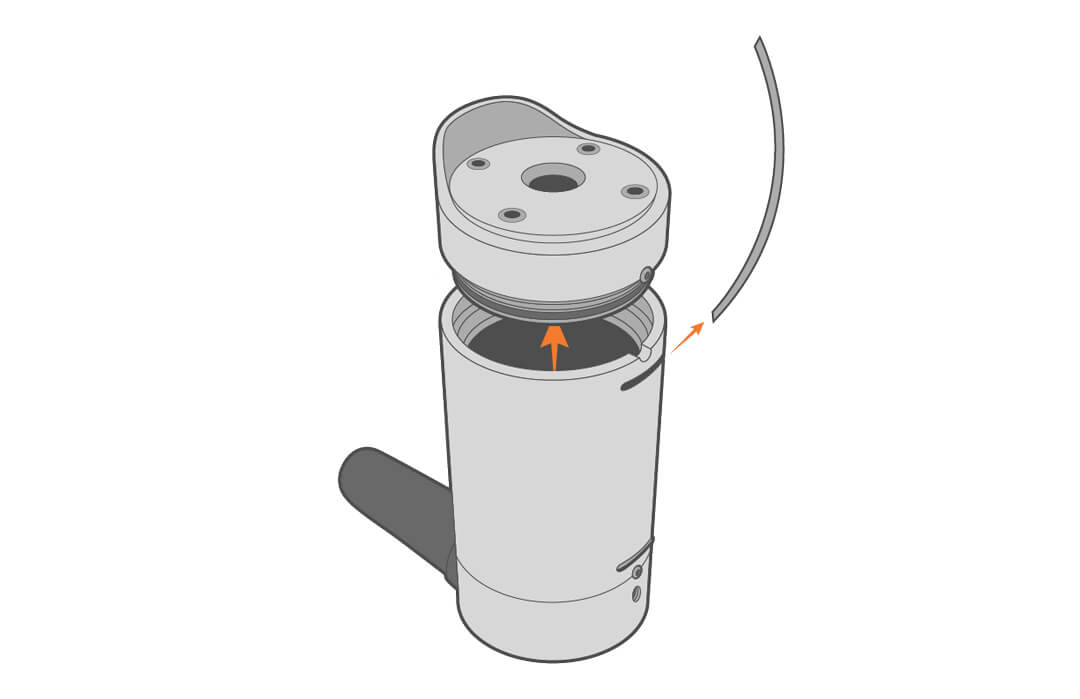
- Unplug the power cable and press and hold the green LED button on the EWC until the light fully fades away.

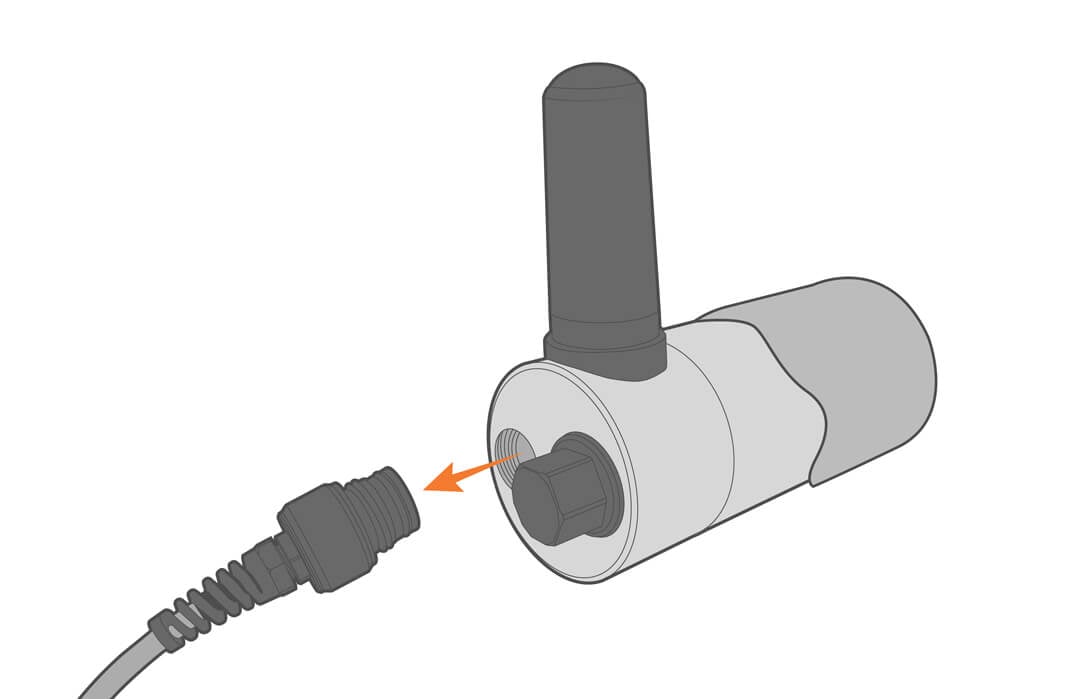
- Remove the plastic line and remove the front component, taking care not to stress the connector.

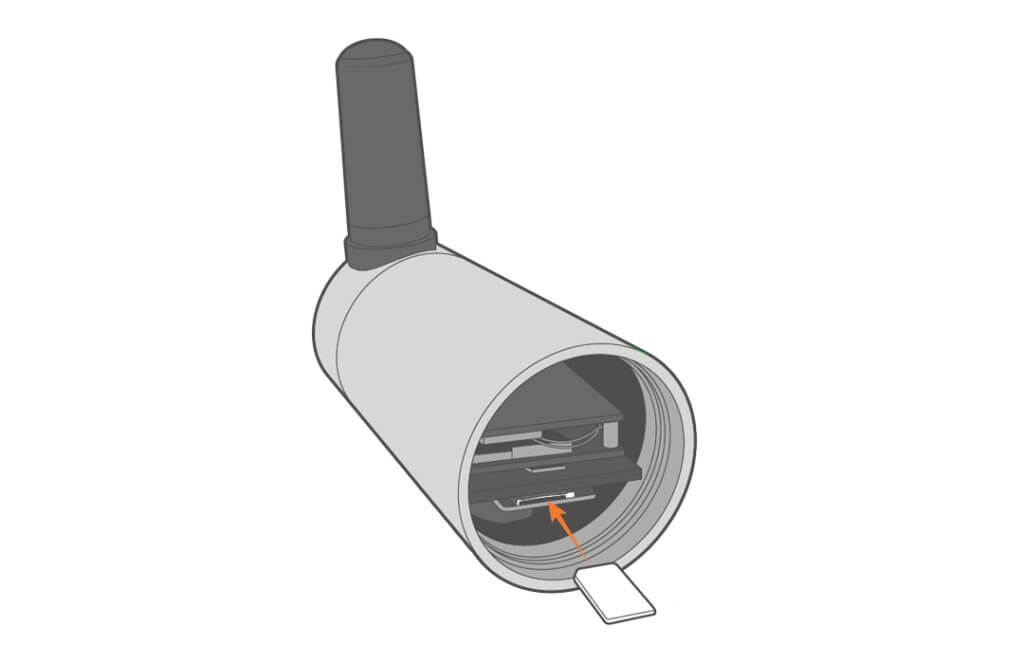
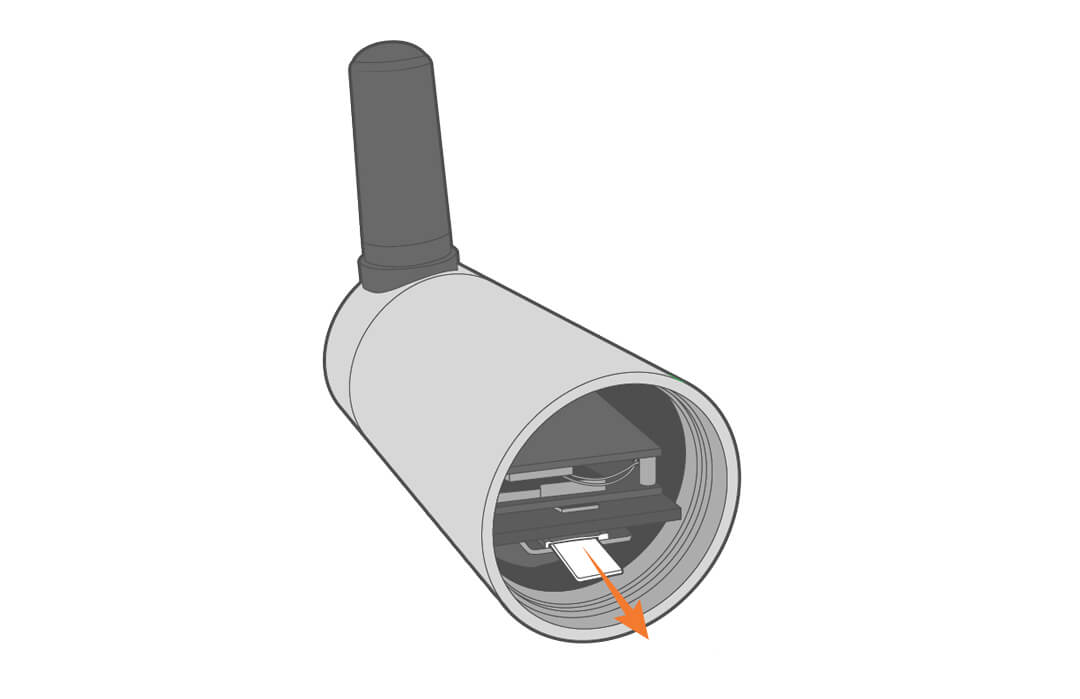
- Gently push on the SIM card to release it and replace it with the new card. Push the new card until it clicks in place.


- Re-attach the front of the camera and the plastic line, taking care not to pinch the cable.
- Power on the EWC, connect to the network, and go to the web interface.
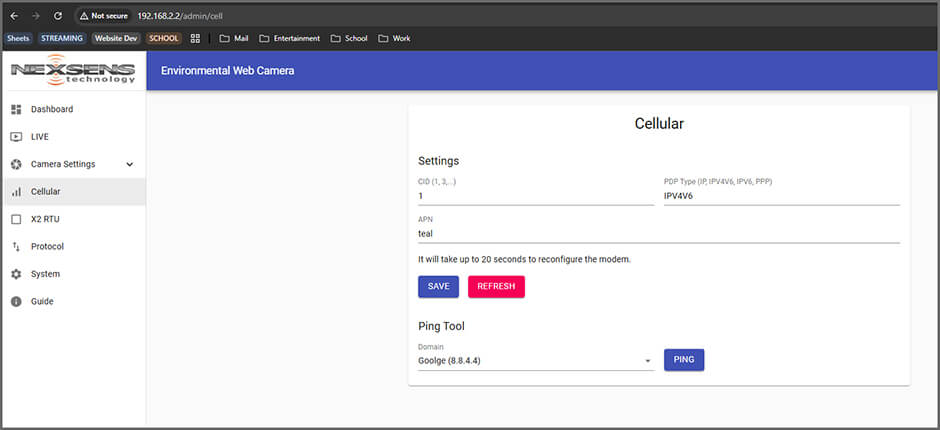
- In the Cellular tab, set the PDP Type and APN for the new SIM card and click Save.
- After a few seconds, a message will appear indicating if the configuration was successful.

- After a few seconds, a message will appear indicating if the configuration was successful.
- After waiting at least 20 seconds, click Ping to test.

6. Troubleshooting
| Problem | Potential Causes | Solutions |
|---|---|---|
| Video not uploading | Poor signal strength | Check signal strength in the area and move to an area with better signal strength. |
| Physical damage | Check the physical setup and condition of the EWC. | |
| No power | Use a DVM to verify the input power is registering 5-17VDC |
7. NexSens Warranty
View the NexSens Warranty.
8. NexSens Service Request
To return equipment for evaluation and repair, visit this page for more information.