In-Situ AquaTroll X-Series Integration Guide
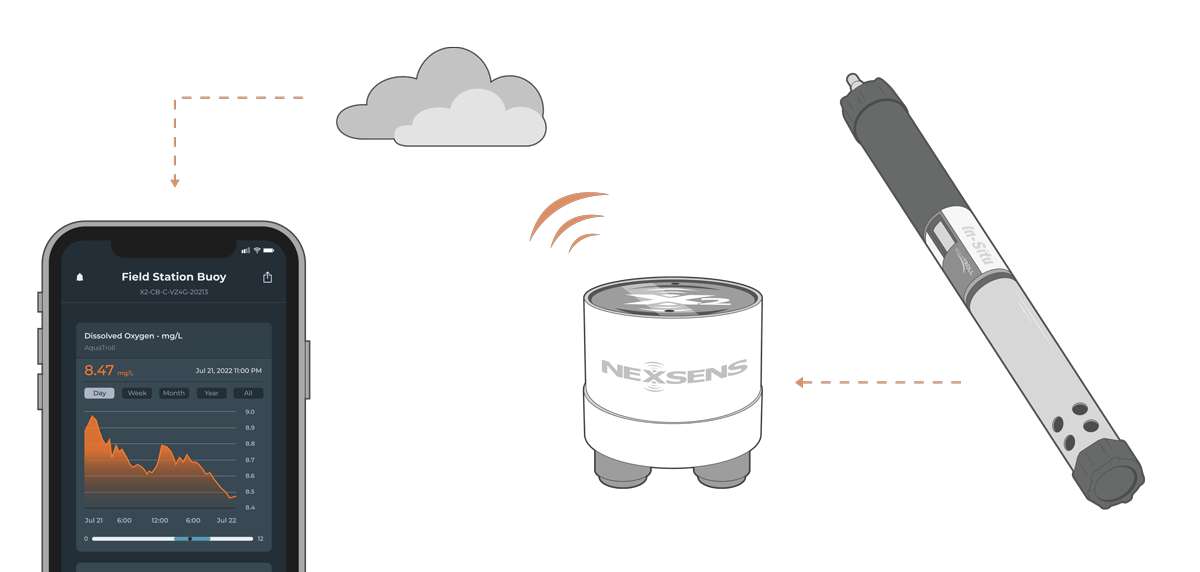
The In-Situ Series of Multi-Parameter Water Quality Sondes are compatible with NexSens X-Series data loggers using SDI-12.
Sensor Setup
Before the sensor can be deployed, complete sensor setup by following the manufacturer’s guidelines.
Note: Be sure to note the parameter order in the software, as this must align with selected parameters in the logger.
Connecting with X-Series Loggers
Next, the sensor will need to be connected to the X-Series logger through CONNECT software. If you have not yet done so, set up the project in WQData LIVE.
- Connect the sensor using the supplied cable to one of the open sensor ports on the logger and note the port number.
- Plug the X3 into the USB port of the computer and power it on with the AC power cable.
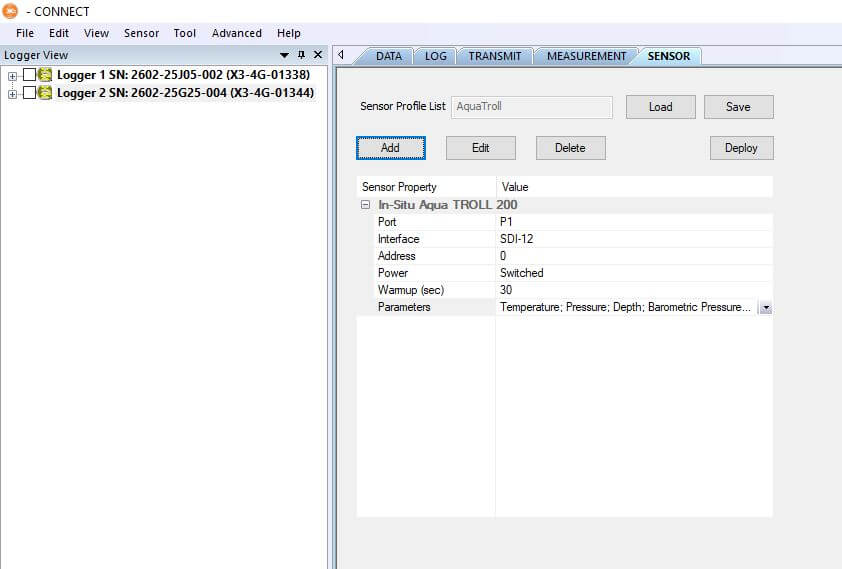
- Open CONNECT and select the SENSOR tab.
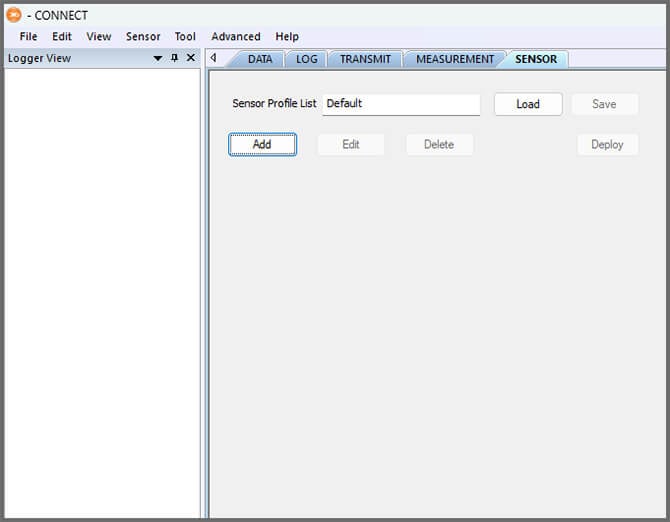
- Click Add and select In-Situ from the Manufacturer drop-down. Then select the appropriate model.
- Adjust the SDI-12 address if needed and select the port number.
- If using multiple SDI-12 sensors, ensure each has a unique address.
- Select either Continuous or Switch in the Power drop-down.
- Switch is recommended for the sensor.
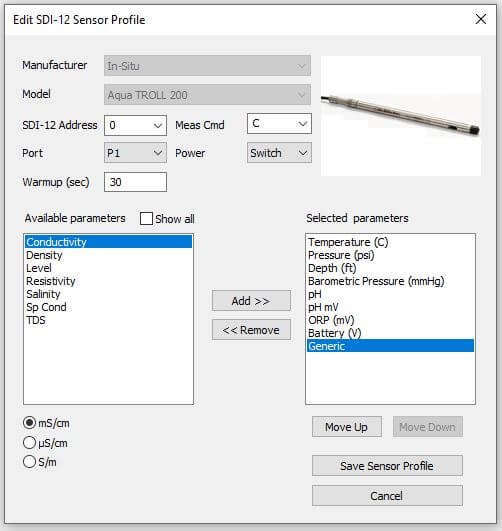
- Select Save Sensor Profile.
- Complete the setup for all other sensors, and then click Save.
- Name the Sensor Profile List and select Ok.

- Complete system setup by clicking Deploy.
- Confirm that data is being transferred to WQData LIVE at the next interval (default is 10 minutes).
Buoy-Based Deployments
First, follow the appropriate User Guide in the Knowledge Base for buoy assembly. There are two options for near-surface measurements and a third option for water column measurements:
1. Cage Mount
Use the NexSens Small Instrument Cage Mount to attach the sensor to the buoy cage.
- Strap the sensor to the cage leg with the mount and cable ties (as shown). The mount is supplied with a rubber adhesive liner to prevent the sensor from sliding.
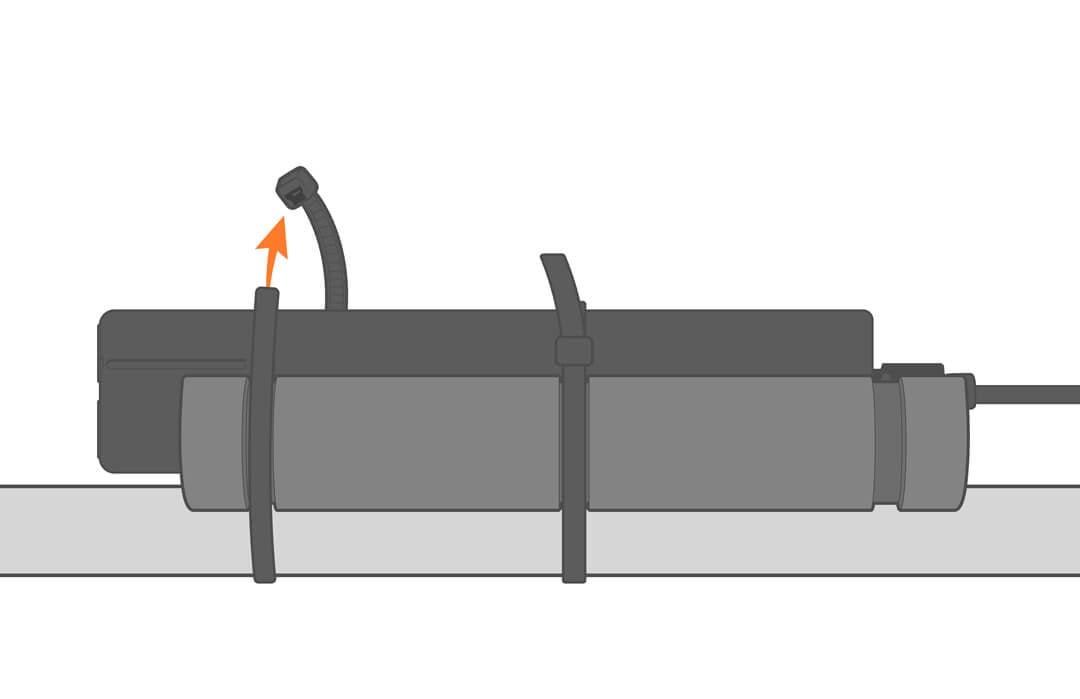
- Further secure the assembly by adding a few additional ties to the cable.
2. Buoy Deployment Pipe
Optional perforated deployment pipes can be fitted to most NexSens CB– and XB-series buoys. Deploying the sensor inside the pipe provides easy access for maintenance and recalibration.

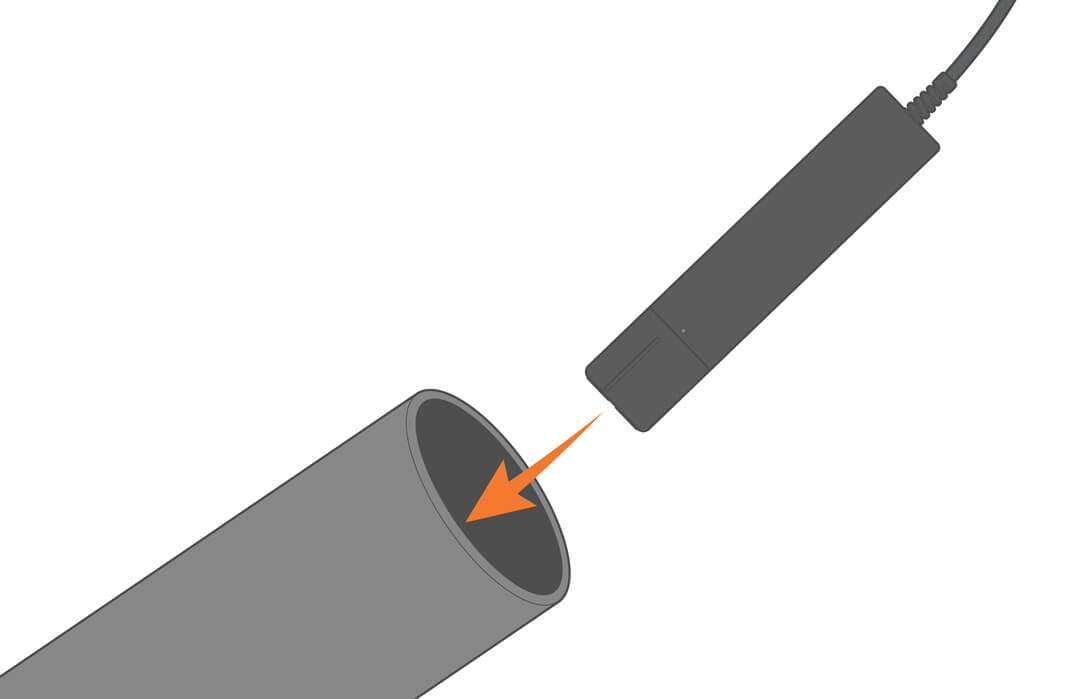
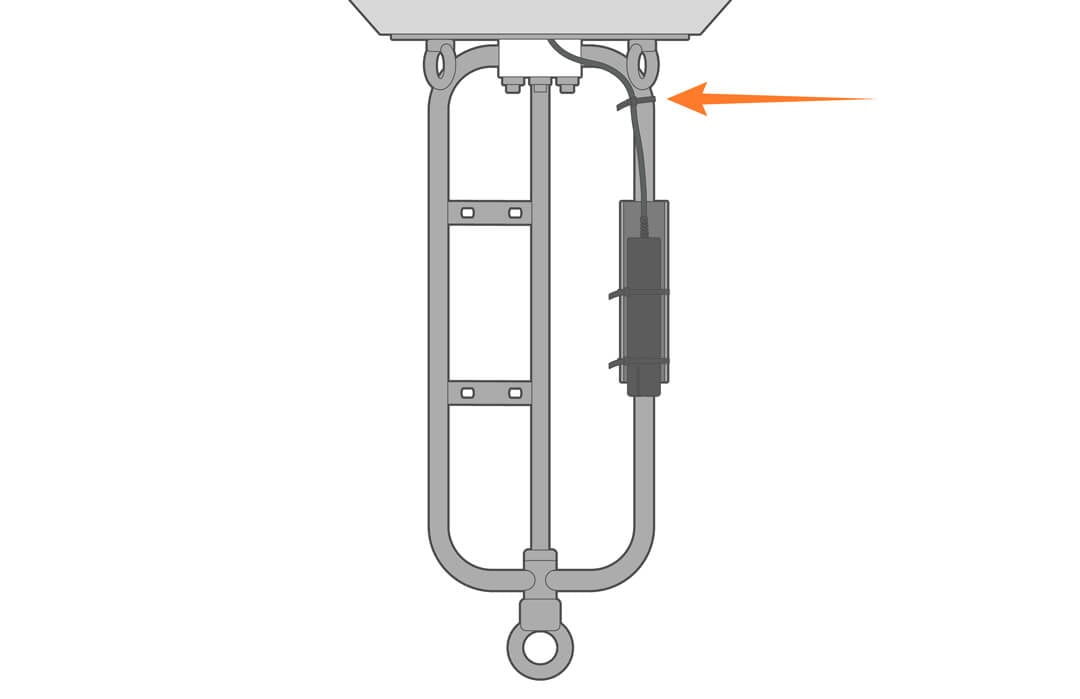
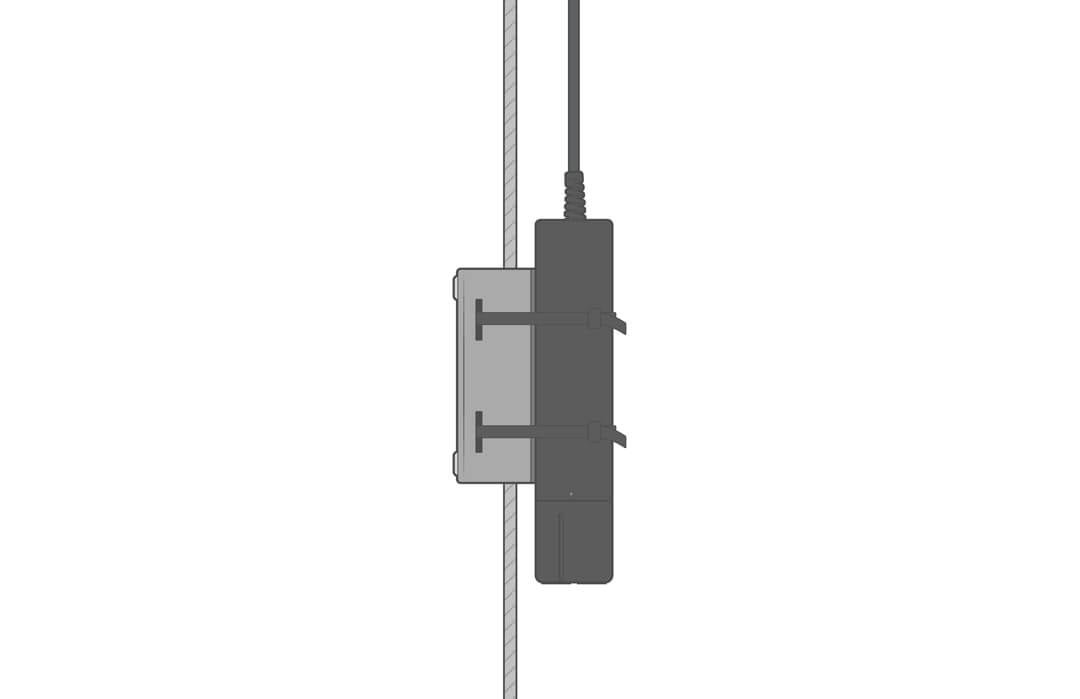
3. Water Column
Use the NexSens Instrument Mooring Clamp to securely attach the sensor to a sensor mooring line at the desired depth in the water column.
Shore-Based Deployments
For dock, pier, or bank deployments, it’s best to secure the sensor in a perforated PVC pipe. Extend the pipe into the water and deploy the sensor.