SP32 Solar Power Pack Repair Manual
If a NexSens SP32 solar power pack becomes damaged or is no longer performing as intended, repair or replacement may be necessary. Many repairs are preventable with proper maintenance and regular upkeep. However, equipment can still be damaged by environmental conditions, deployment issues, or normal wear and tear, in which case repair or replacement will be required.
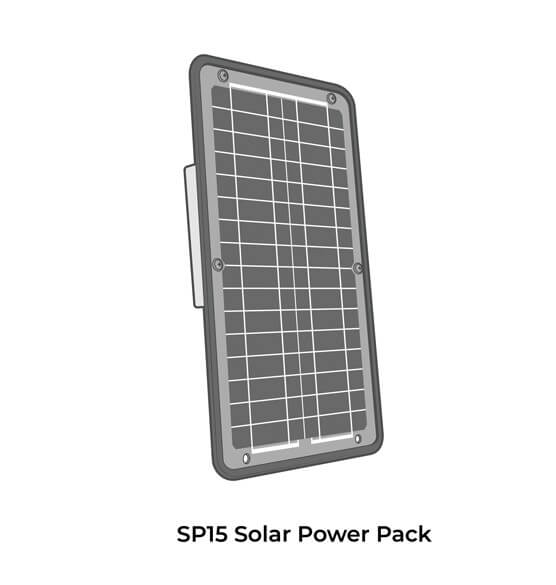
Replacement Parts
- A04 Battery
- Solar Regulator for SP32 (N10108)
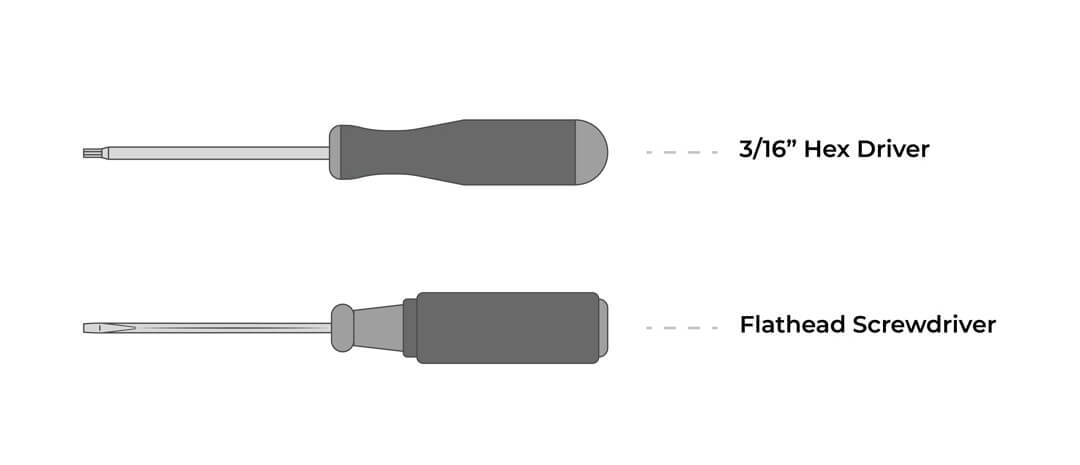
Tools and Supplies
Check Voltage on an SP32 Solar Power Pack
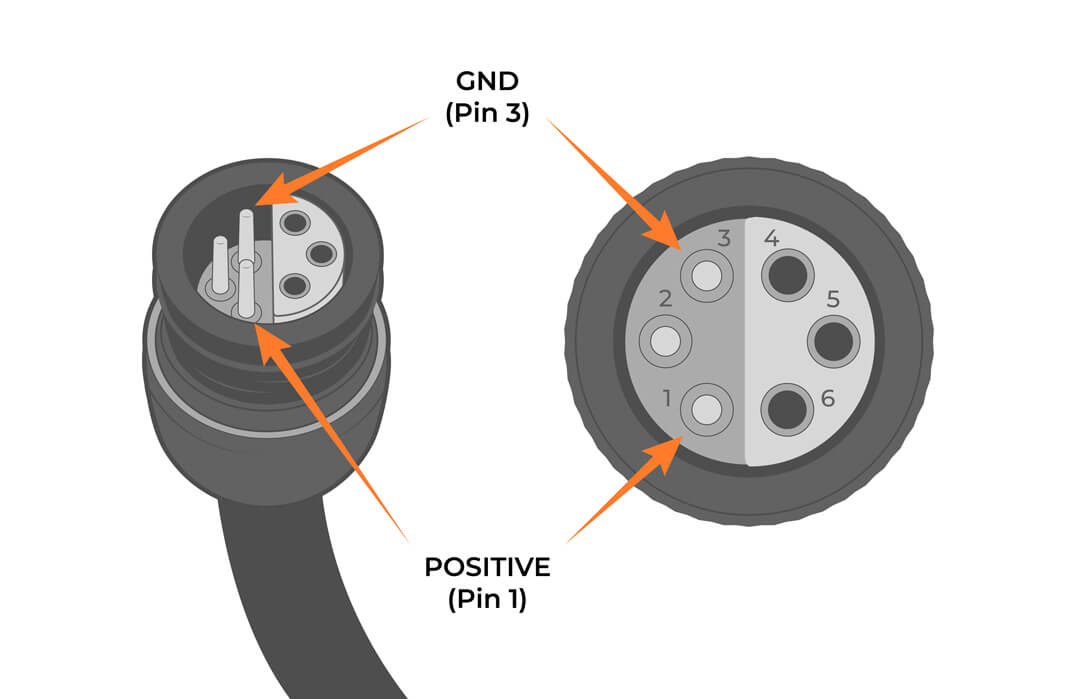
Use a DC Multimeter and measure the potential between Pins 4 and 6 of the Battery Pack’s PWR OUT port. Healthy operational pack voltages range from 12V to approximately 14.9V, depending on the amount of direct sunlight and the age/health of the installed battery. Significantly lower observed voltages may warrant a battery replacement (every 3-5 years standard) or solar regulator replacement (only in the event of failure).
Replace a Battery in an SP32 Solar Power Pack
The SP32 uses two NexSens A01 batteries connected in parallel. Replacement batteries can be purchased from NexSens Technology, or comparably-sized 12V SLA AGM-type batteries can be sourced locally and substituted in their place.
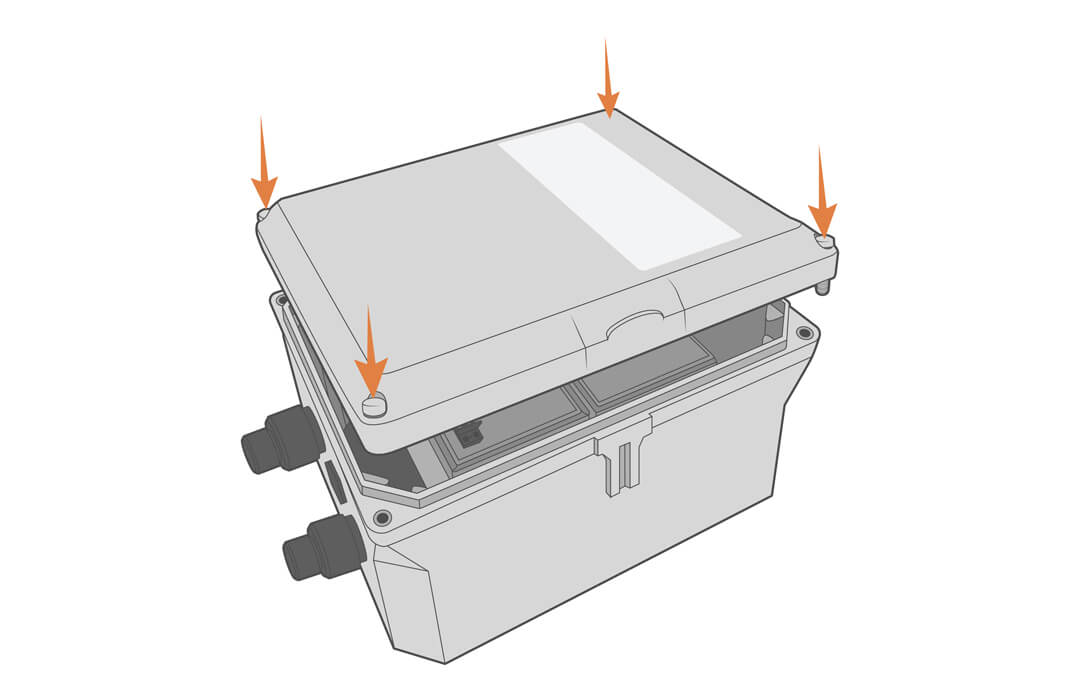
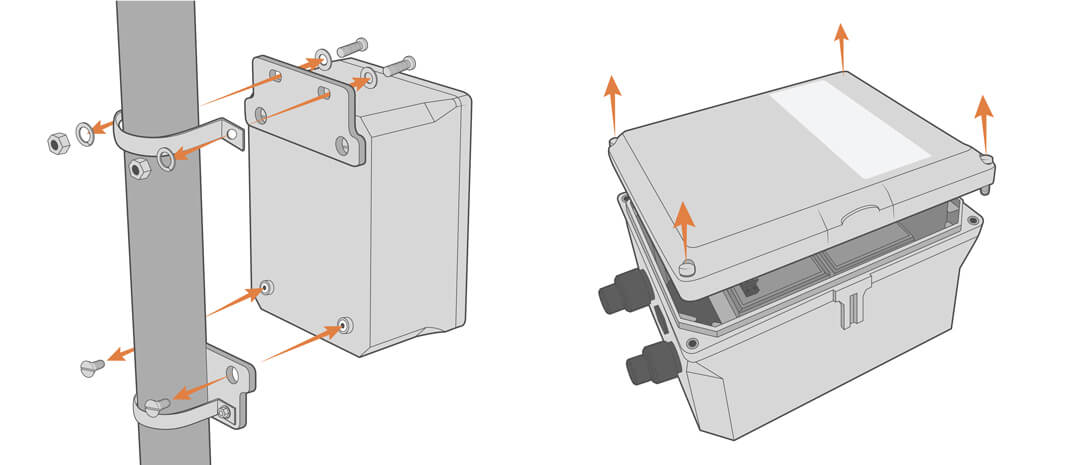
- Open the battery box enclosure lid.

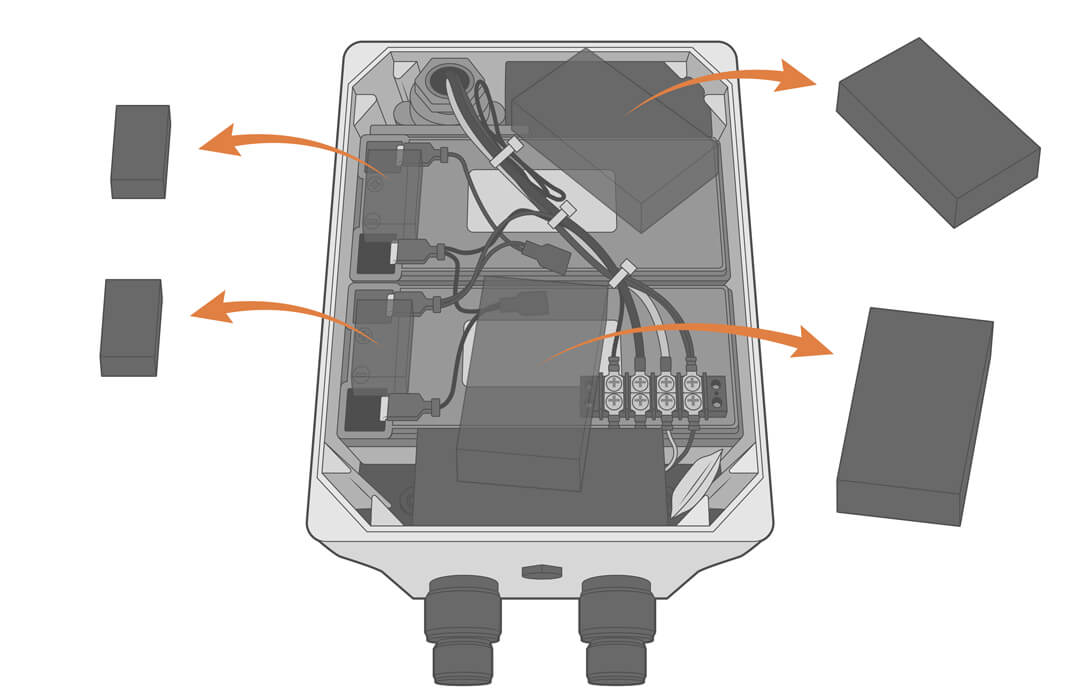
- Remove the foam spacer pieces positioned between the lid and batteries.

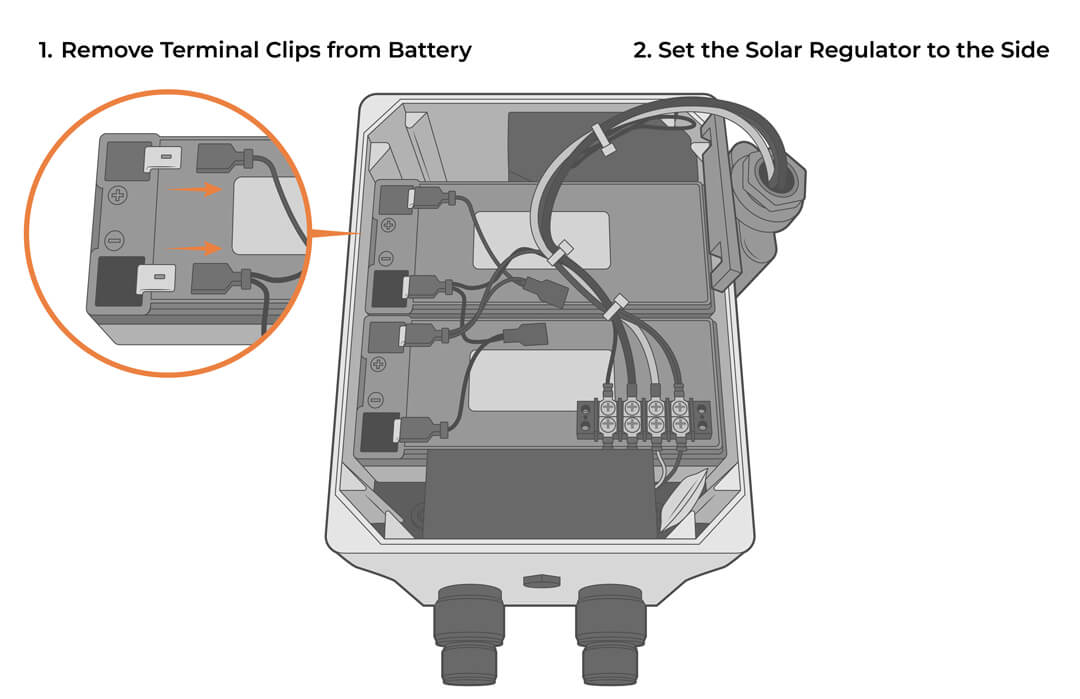
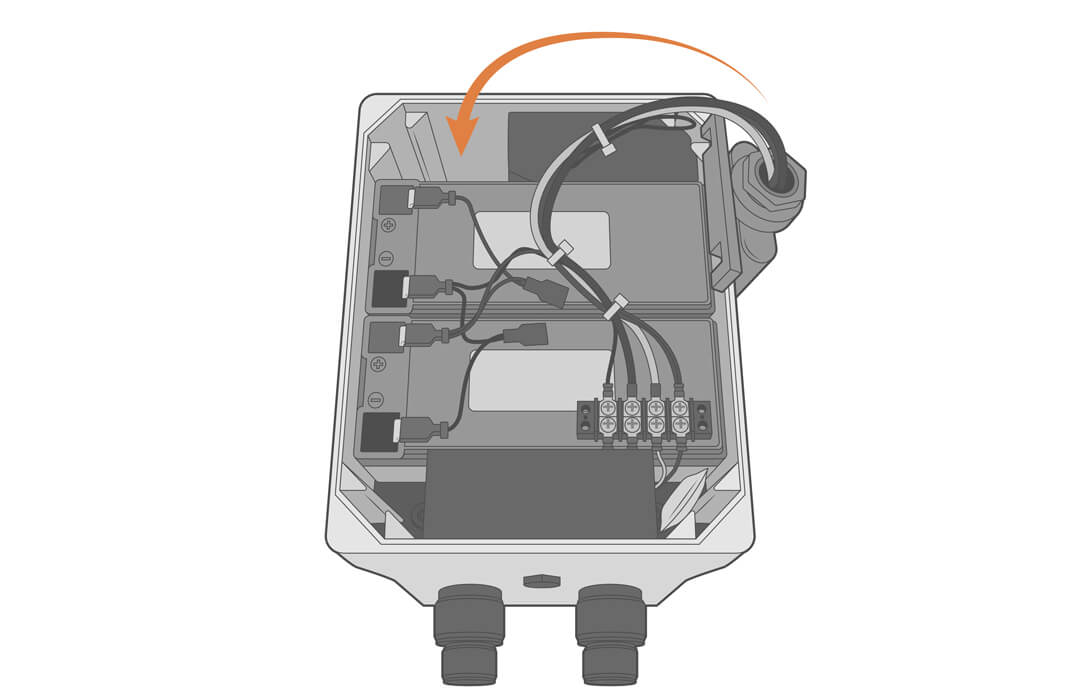
- Remove the terminal clips from the old battery, lift the solar regulator out of the box, and set it to the side.
- Remove the top piece of dense battery spacing foam. Note that the spacing is tight and removal will require significant force.
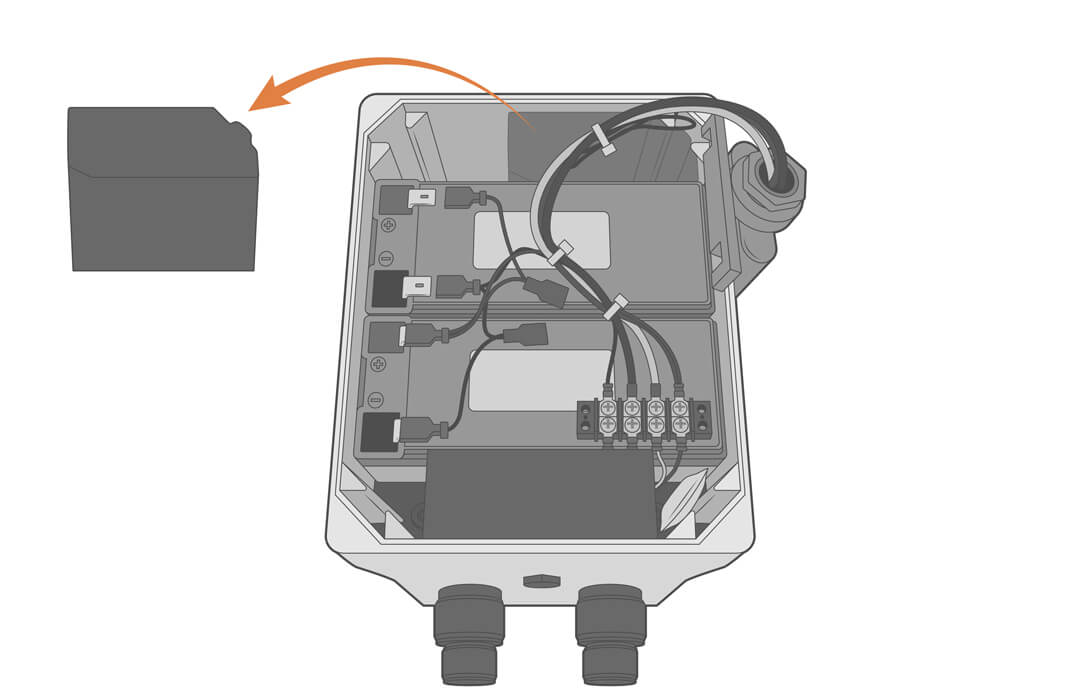
- Remove the old battery from the box.
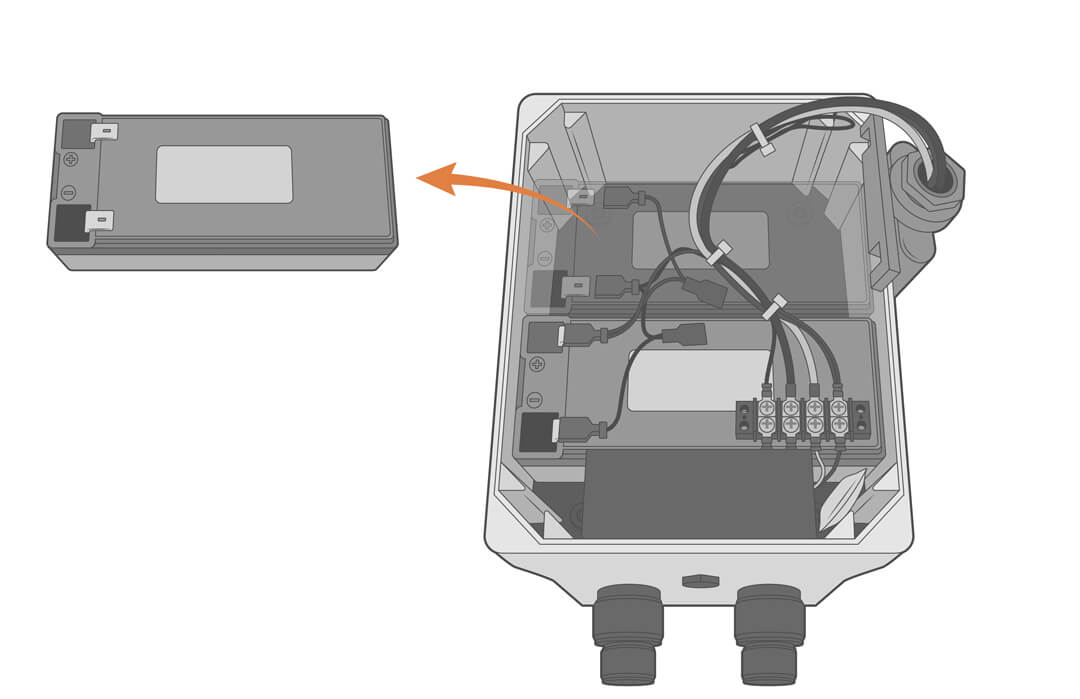
- Install the replacement battery.
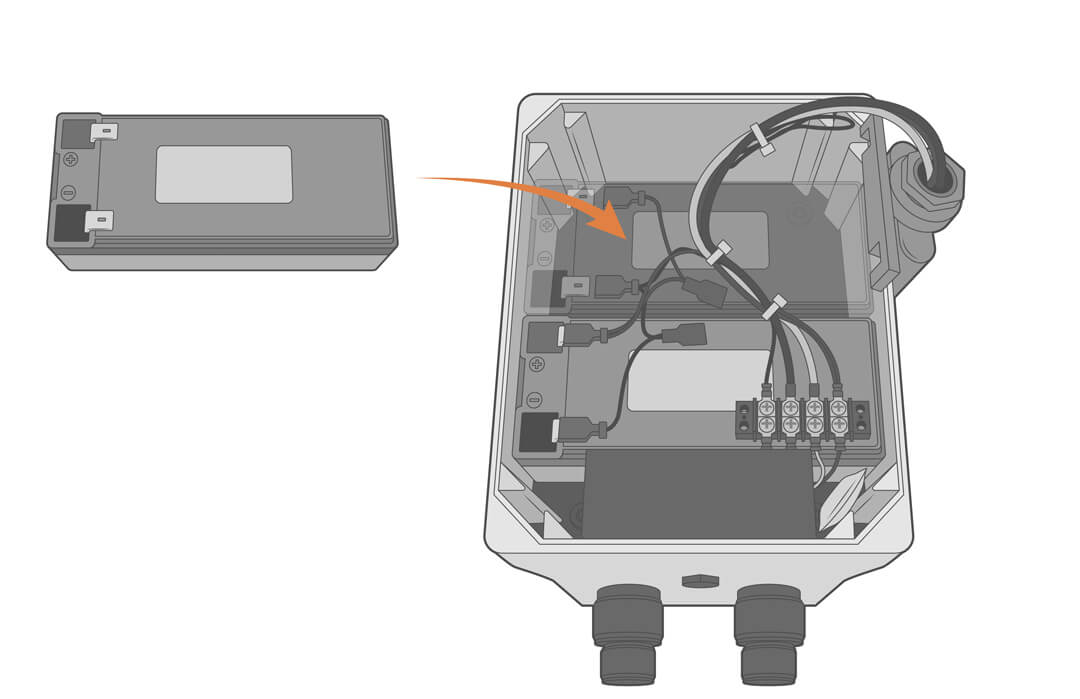
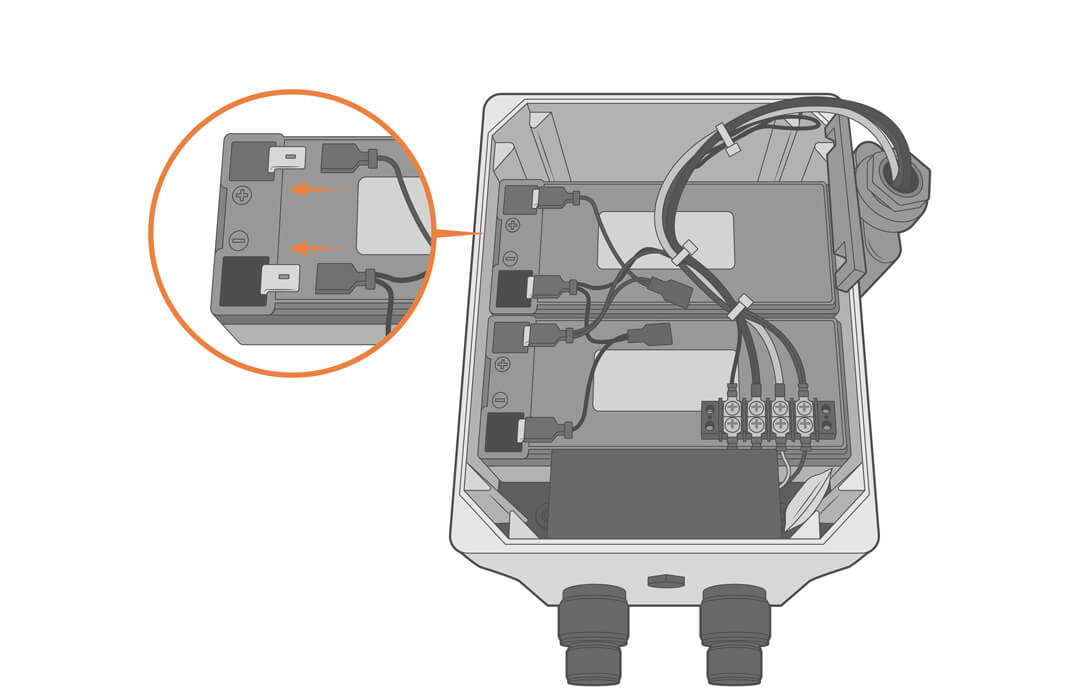
- Connect the battery terminal leads.
- Replace the dense battery spacing foam piece in the enclosure. Note that the spacing is intended to be tight, so it will take significant pressure to push it back in place.
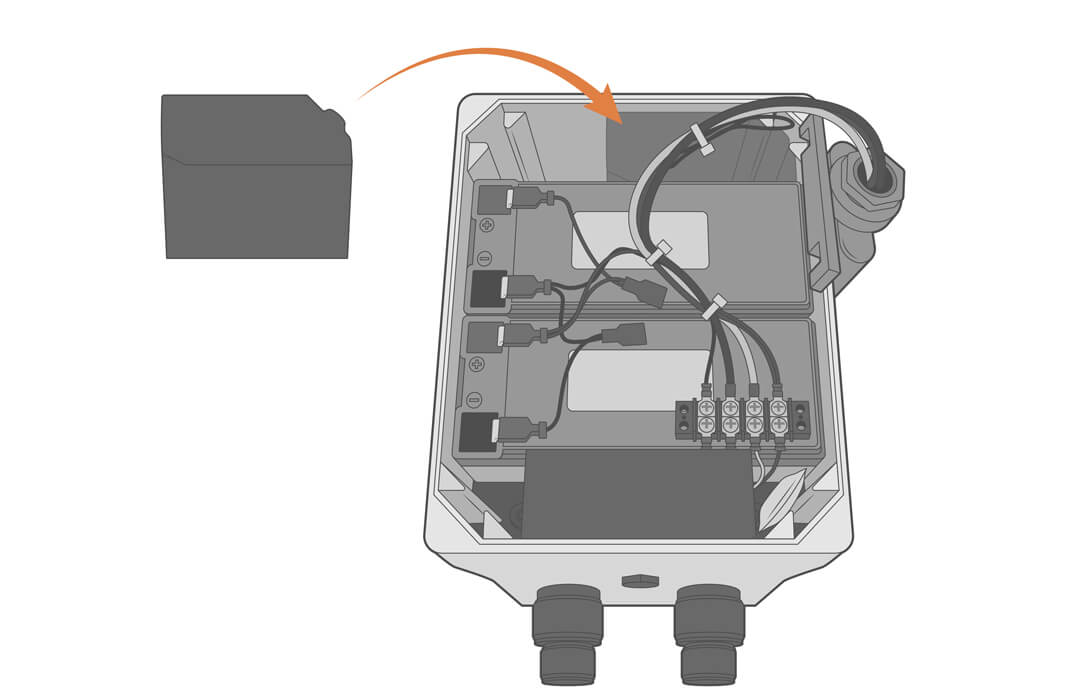
- Set the solar regulator back into the vacant space next to the battery foam.
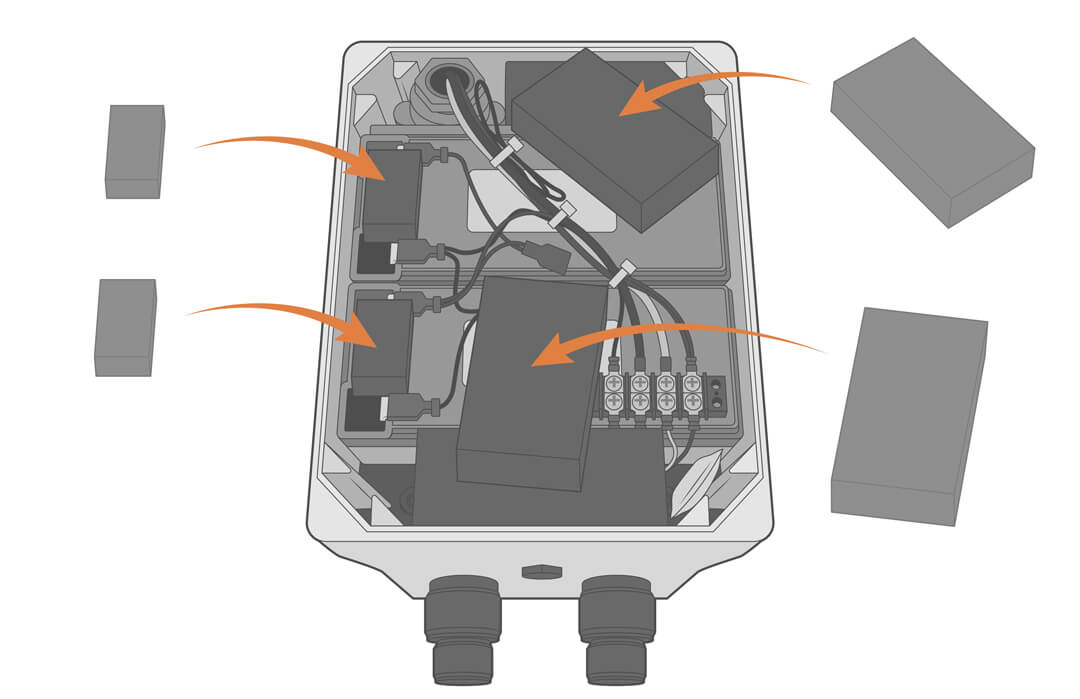
- Place the lid spacing foam pieces back on top of the battery.
- It is recommended that the bag of desiccant (typically positioned in the lower left or right corners of the battery box) be replaced at this time, especially if any condensation is observed internally.
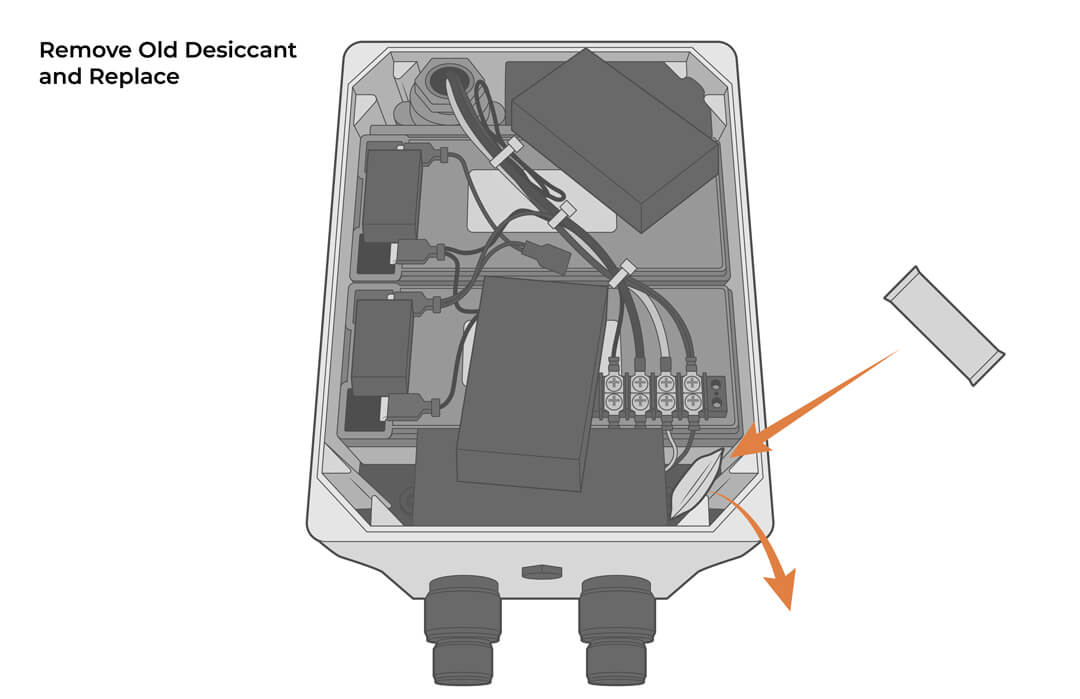
- It is recommended that the bag of desiccant (typically positioned in the lower left or right corners of the battery box) be replaced at this time, especially if any condensation is observed internally.
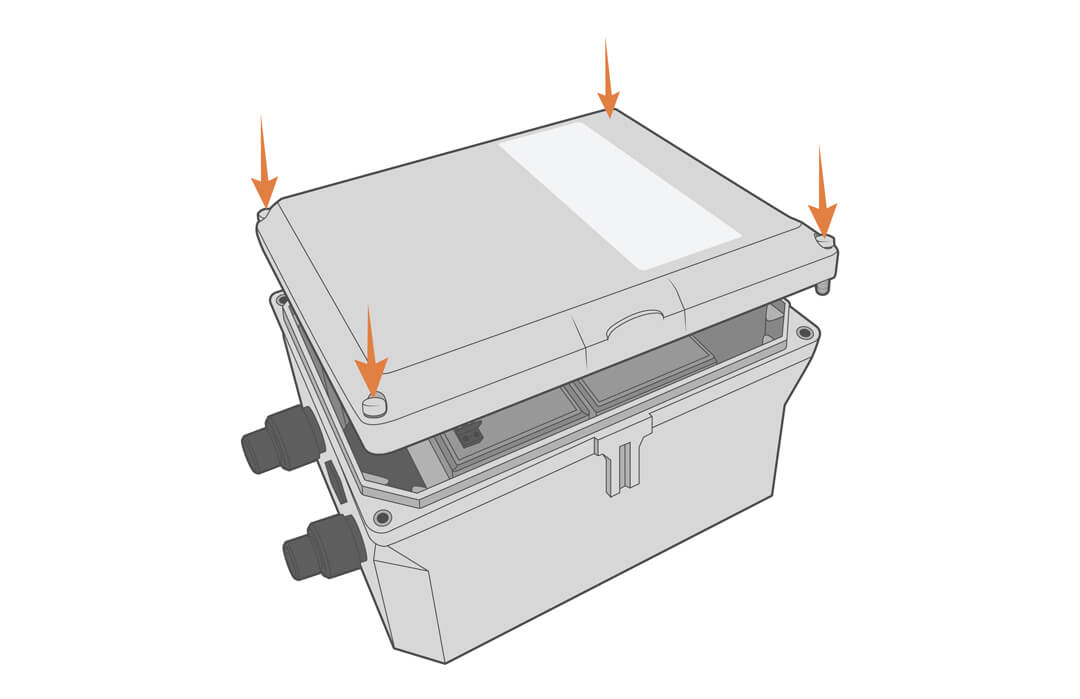
- Reinstall the enclosure lid and evenly tighten all four screws in a cross pattern. Take care that no wires or pieces of foam are pinched between the lid and housing.
Replace a Solar Regulator in SP32
The 6A solar regulator inside the SP32 battery box does not require regular maintenance. Regulator failure, generally indicated by a flashing or solid green LED, is rare but can occur.
- Open the battery box enclosure lid.
- Remove the foam spacer pieces positioned between the lid and batteries.
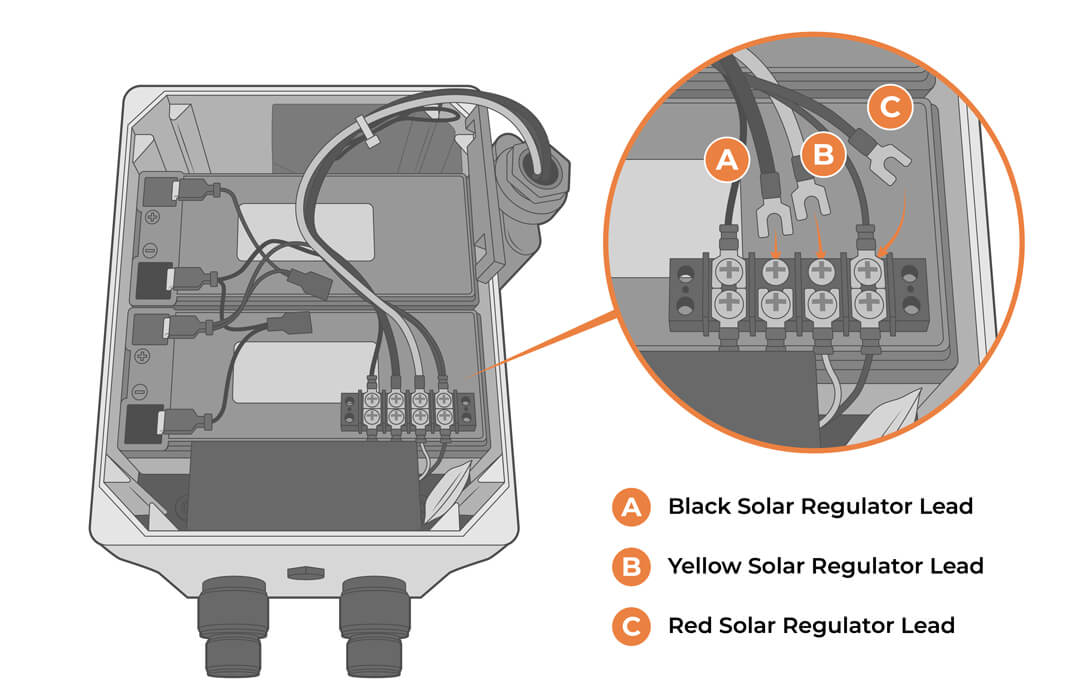
- Loosen the terminal screw associated with the red solar regulator (bottom) and battery terminal (top) connectors.
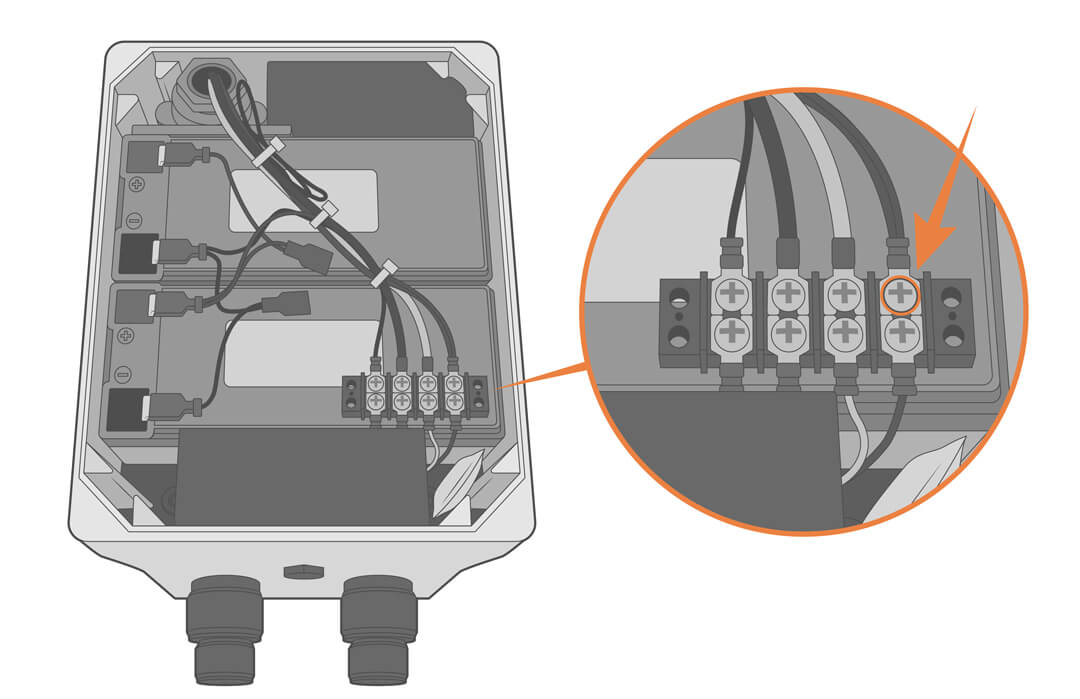
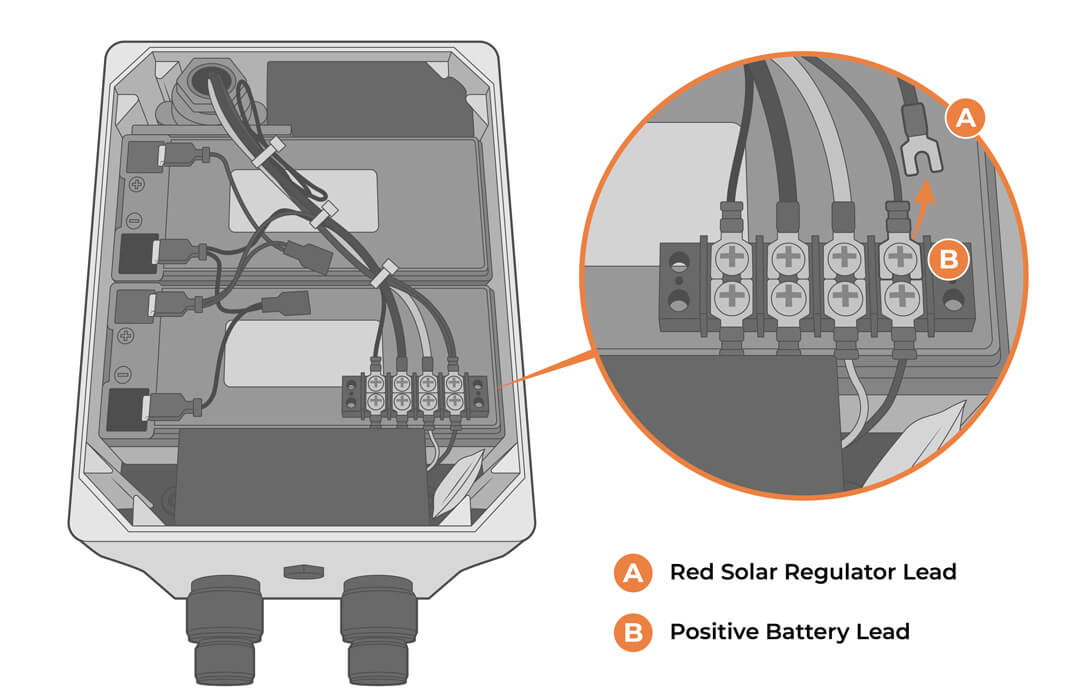
- Disconnect the red solar regulator lead and reconnect the red battery lead (to prevent accidental shorting to ground).
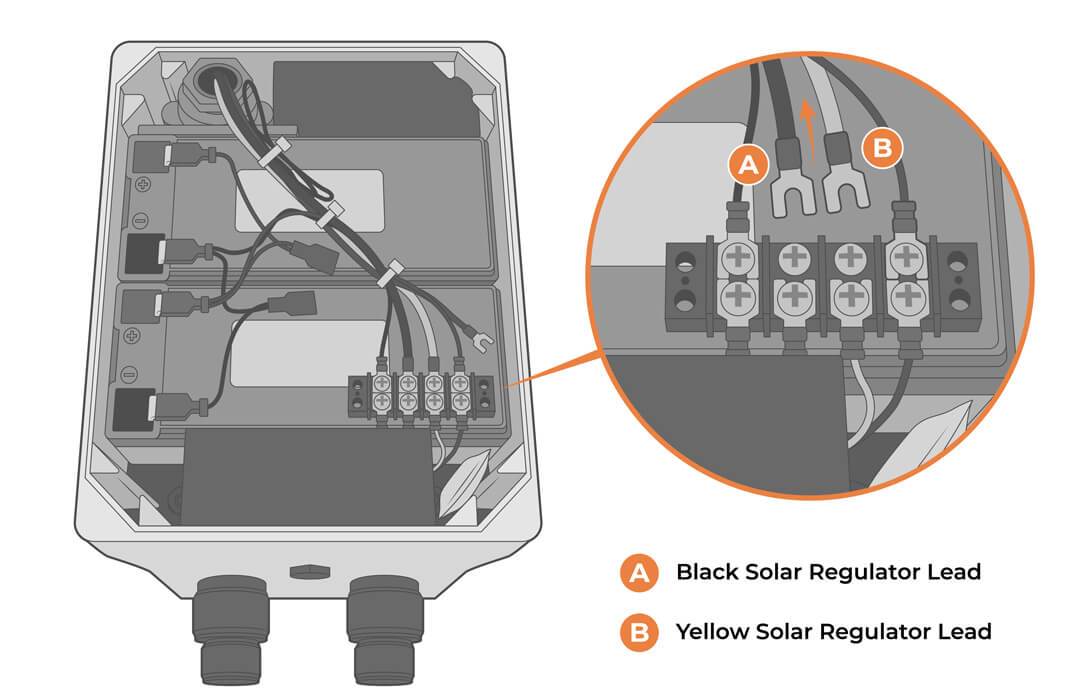
- Remove the yellow and black solar regulator leads from the terminal strip.
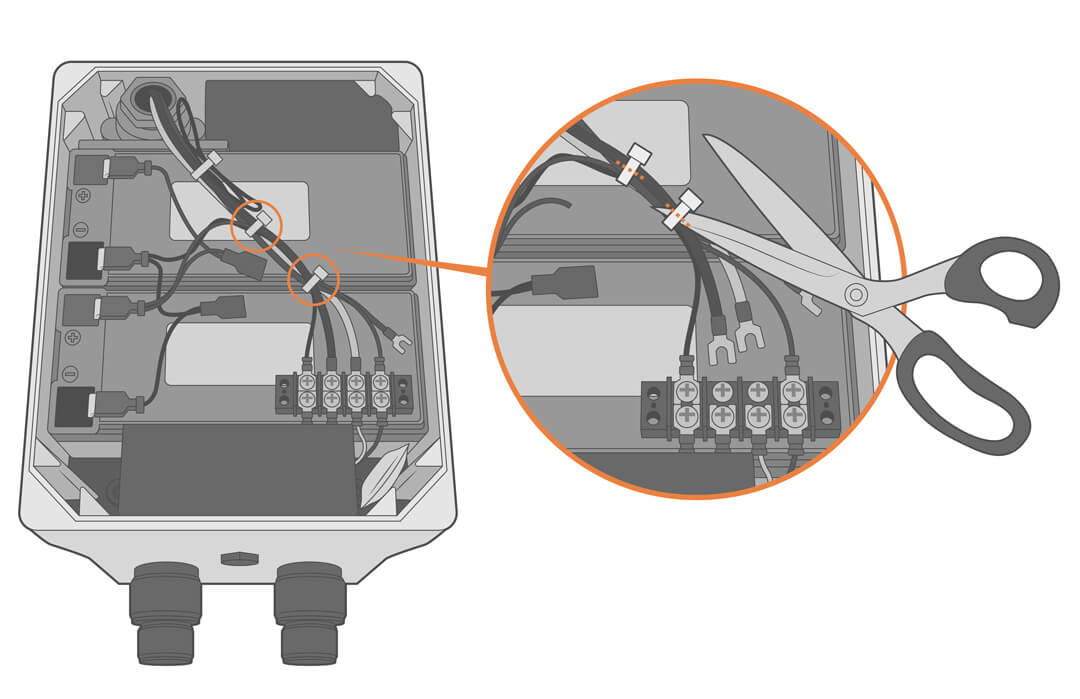
- Cut the two cable ties tethering the old regulator wires to the battery cables. Take care not to nick any of the wires in the process.
- Remove the old solar regulator.
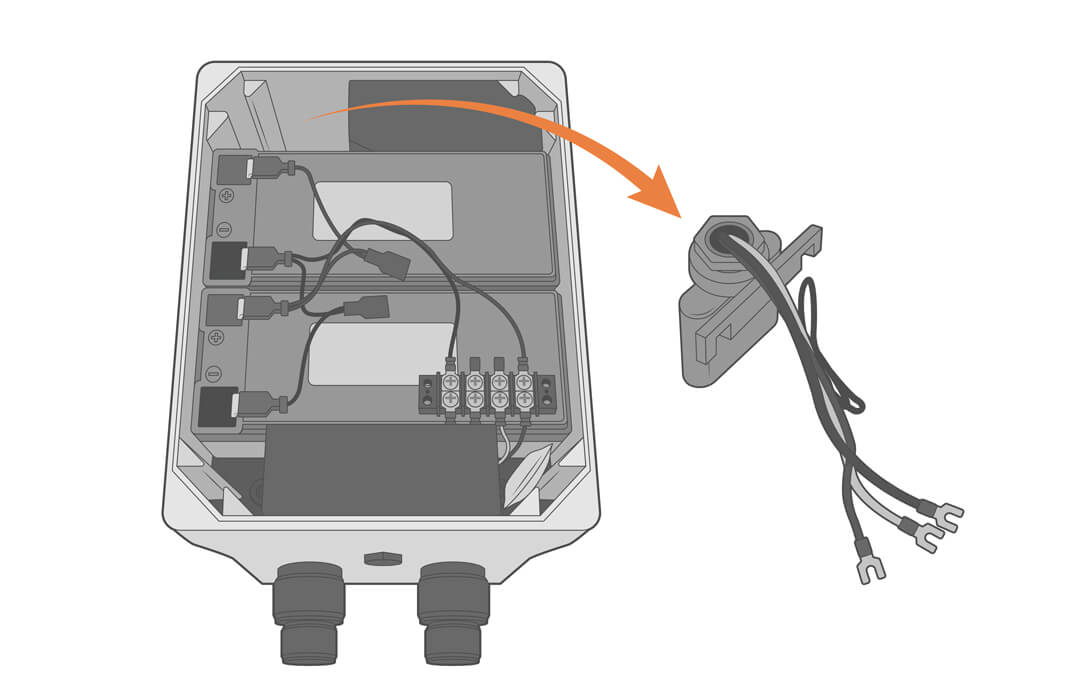
- Establish the original connections to the new solar regulator and tighten down the terminal screws firmly. Gently pull on the connections to confirm they do not come loose.
- Re-seat the regulator and replace the cable ties.
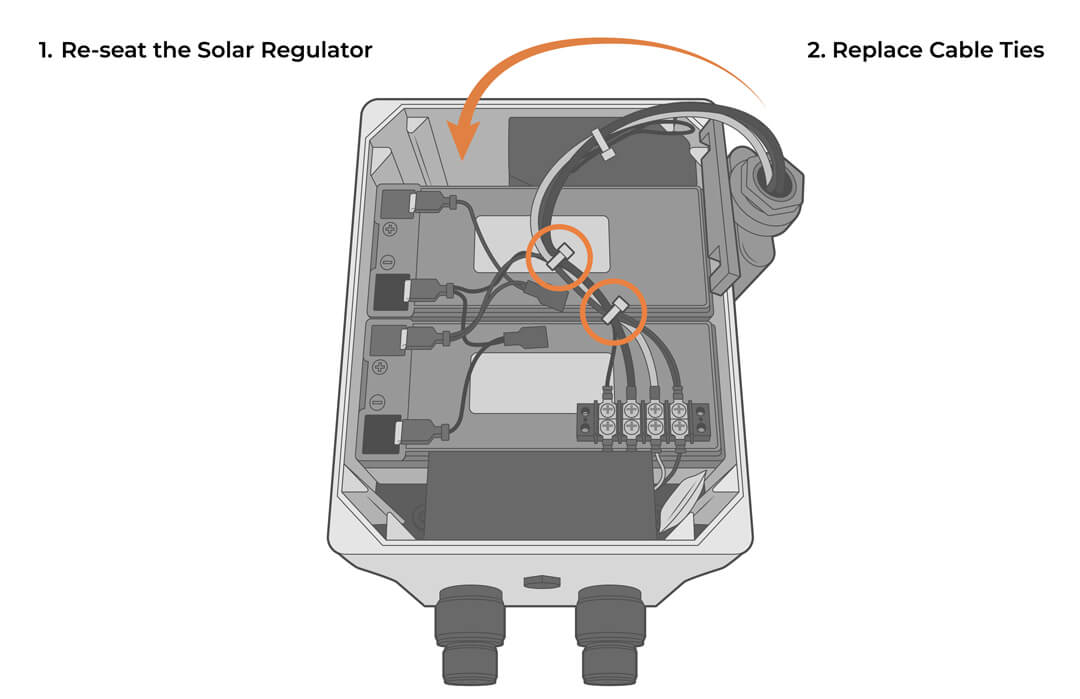
- Replace the lid spacing foam pieces back on top of the battery in the approximate positions shown.
- It is recommended that the bag of desiccant (typically positioned in the lower left or right corners of the battery box) be replaced at this time, especially if any condensation is observed internally.
- It is recommended that the bag of desiccant (typically positioned in the lower left or right corners of the battery box) be replaced at this time, especially if any condensation is observed internally.
- Replace the enclosure lid and evenly tighten all four screws in a cross pattern. Take care that no wires or pieces of foam are pinched between the lid and housing.