For stand-alone applications where a few months of data is uploaded at a single point in time, it can be beneficial to increase the speed at which the iSIC communicates via RS-232 to limit the amount of time a download takes.
This article walks through steps to:
- Update iChart software and iSIC data logger firmware to the latest versions
- Change iChart settings for quicker upload
- Change the iSIC data logger baud rate
- Update the baud rate used for interrogation
Checking current baud rate:
When setting and using baud rates other than the default 9600 baud, there exists three places the baud rate has to be changed:
- In the iSIC data logger
- In any Advanced terminal dialog boxes
- In the iChart project file
To upload data from an iSIC data logger, the iChart project file must match the baud rate to which the iSIC data logger is currently set. Similarly, to run any Advanced menu options, the baud rate selected must match the baud rate to which the iSIC data logger is currently set.
The easiest way to check the current baud rate of an iSIC data logger:
Run iChart and connect an RS-232 cable between the iSIC data logger COM port and the PC COM port.
Select Advanced | Terminal in iChart. The Device Connection window will appear.
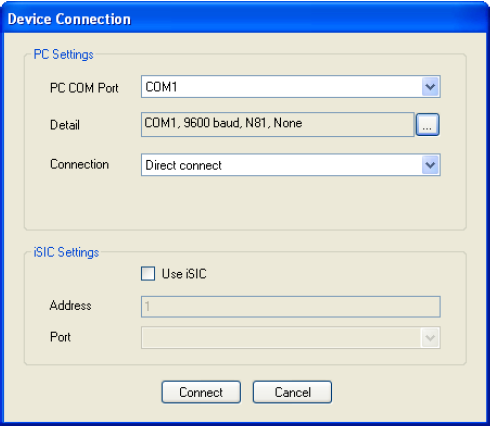
Figure 1: Device Connection Window
Make sure the COM port selected matches the COM port used on the system. To verify, check the Ports section of the Device Manager by clicking Start | Right-click Computer | Manage. Unplug the connecting cable, then reconnect it to see which port disconnects and reconnects).
Click on the ‘…’ next to the COM settings and change the baud rate to 9600. Click Connect. A white screen should appear.
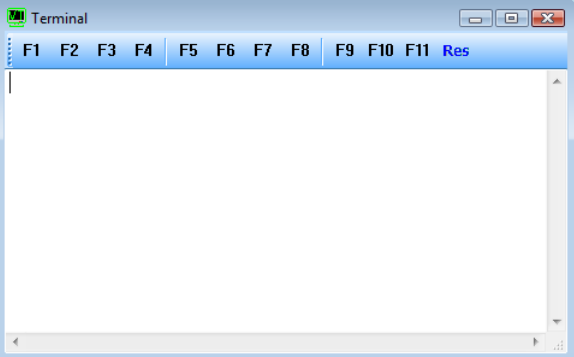
Figure 2: Terminal Window
Cycle power to the iSIC data logger by removing the two fuses and then plugging them back in. Look for a green LED flash for the first few seconds after plugging the fuses in.
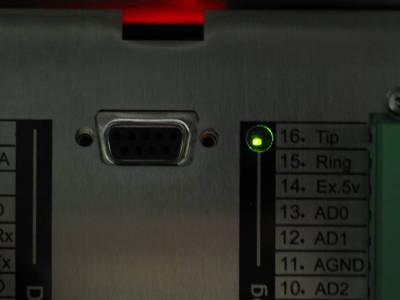
Figure 3: Green Blinking LED
Inside of the white window (the Terminal) look for a message similar to the following:
!00RunApp
#POR
NexSens
%232
%232

Figure 4: Message in Terminal Window
If the text does not display or is unreadable, close the terminal, and select Advanced | Terminal again. This time, select a different baud rate and click Connect. Remove and re-apply power and check for the flashing LED light until the correct baud rate is found.
If no baud rate displays in the Device Connection settings window, make sure the correct COM port is selected and the RS-232 cable is securely connected.
Figure 5: Device Connection Window
Update iChart software and iSIC data logger firmware to the latest versions
Note that an iSIC data logger’s baud rate must be set to 9600 baud in order for programming or a code update to be possible. Refer to the section below on changing the baud rate if necessary.
If an iSIC data logger is not set to 9600 baud (found using the above section), skip to the section below and set the iSIC back to 9600 baud, then perform the code update. After completing the code update, set the data logger back to the previously selected baud rate.
To perform a Code Update, follow these steps: http://www.nexsens.com/knowledge-base/software/ichart/isicsdl500-code-updates-in-ichart.htm.
When iChart is finished updating the iSIC firmware, simply click Done and continue with normal operation.
Change iChart settings for quicker upload
Go to Edit | Preferences and click on the Advanced tab. Remove the check mark in Send timestamp with each upload cmd. This will greatly increase the speed of the upload. Be sure the firmware of all data loggers in the project file is updated before unchecking this box. Click OK.
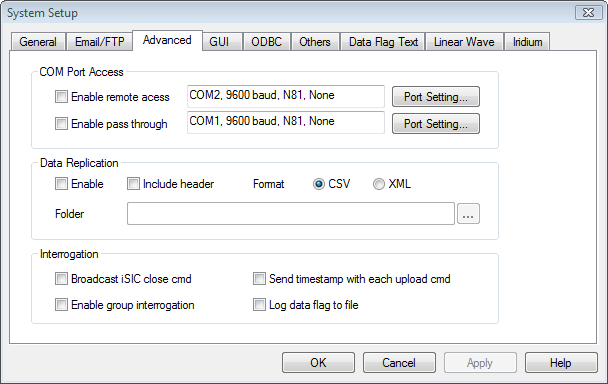
Figure 6: Advanced Preferences Menu
Change iSIC data logger baud rate
Make sure the data logger is already set up in iChart6 at 9600 baud. In iChart, click Advanced | iSIC | iSIC. The iSIC Setup menu will appear.

Figure 7: iSIC Setup Menu
Select the COM Port the data logger is connected to. Check the PC Device Manager to verify if necessary. Then click Connect. The button should change to Disconnect.
Click the General tab. In the Status area of this tab, there should be information on current firmware, hardware, battery voltage, etc.
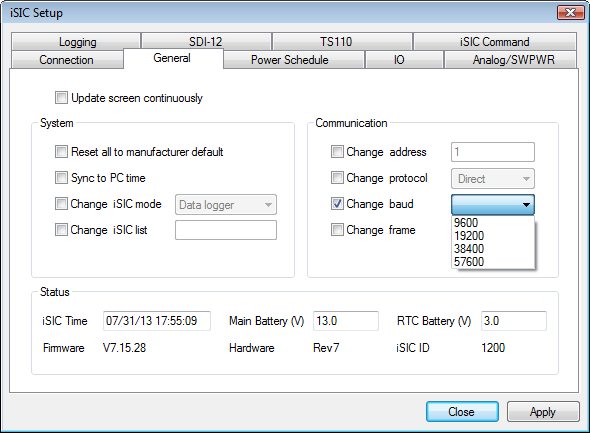
Figure 8: General iSIC Setup Menu
Place a check box in Change baud and select the desired baud rate from the drop-down menu. Click Apply. Note that the command may come back as failed, because the baud rate is now set differently than what was selected on the Connection tab.
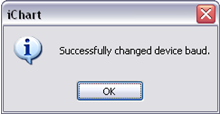
Figure 9: Successful Baud Rate Change
Note: After changing the baud rate, it is recommended that the new baud rate be written on the inside enclosure of the iSIC data logger so that it will be easier to determine which baud rate the data logger is currently set to.
Go back to the Connection tab, click Disconnect and then close the iSIC Setup window.
Updating the baud rate used for interrogation
To change the baud rate that iChart uses in the interrogation process, open the .icr (iChart project) file used to upload data. Right-click the data logger from the Navigation Panel and select Property.
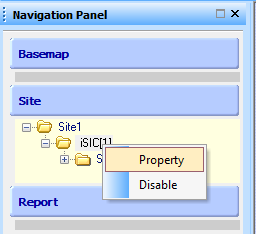
Figure 10: iChart Navigation Panel
The iSIC Data Logger Communication Properties window will appear. Click the “…” button for the communication settings and change the baud rate to match that of the iSIC data logger.
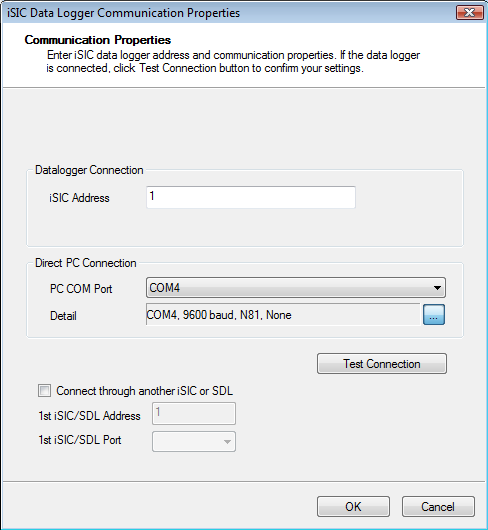
Figure 11: iSIC Data Logger Communication Properties
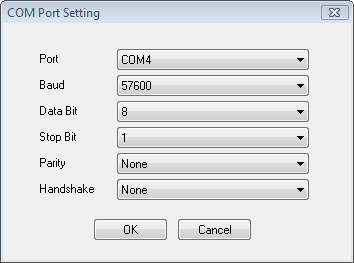
Figure 12: Baud Rate Settings
Examples of data download speed:
Running at 57600 baud, with the “send timestamp” unchecked, iChart can upload (2000) WXT510 data sets per minute. At a four minute log interval, this means it should be possible to upload (5) days worth of data per minute.
Running at 9600 baud, with the “send timestamp” unchecked, iChart can upload (950) WXT510 data sets per minute. At a four minute log interval, this means it should be possible to upload (2 ½) days worth of data per minute.
REV: 14A23